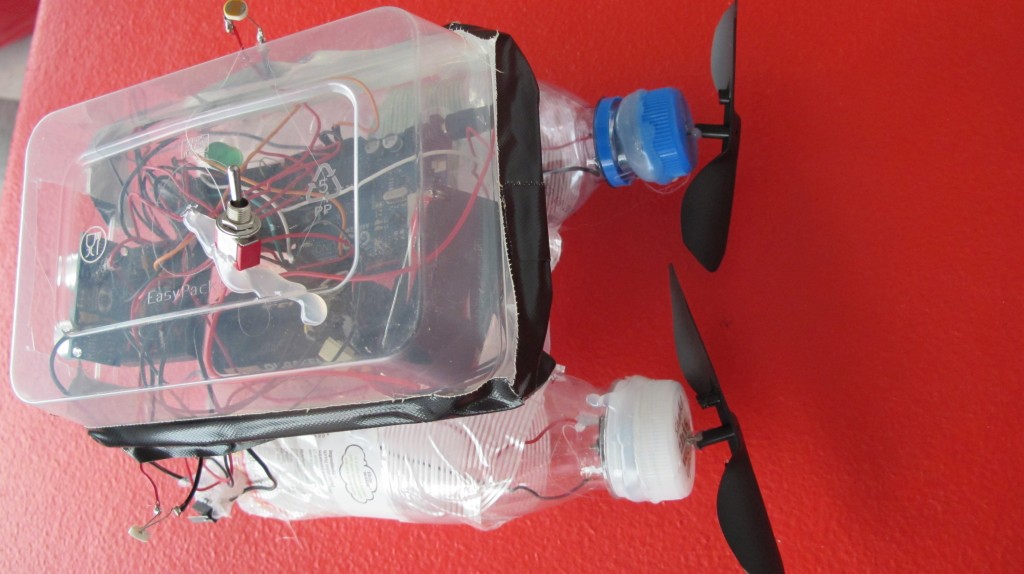
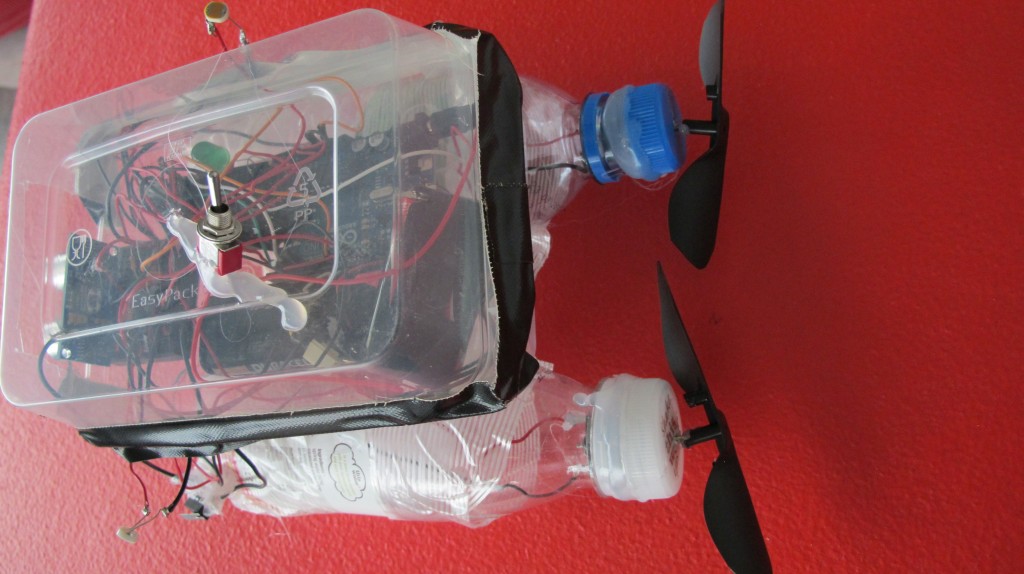
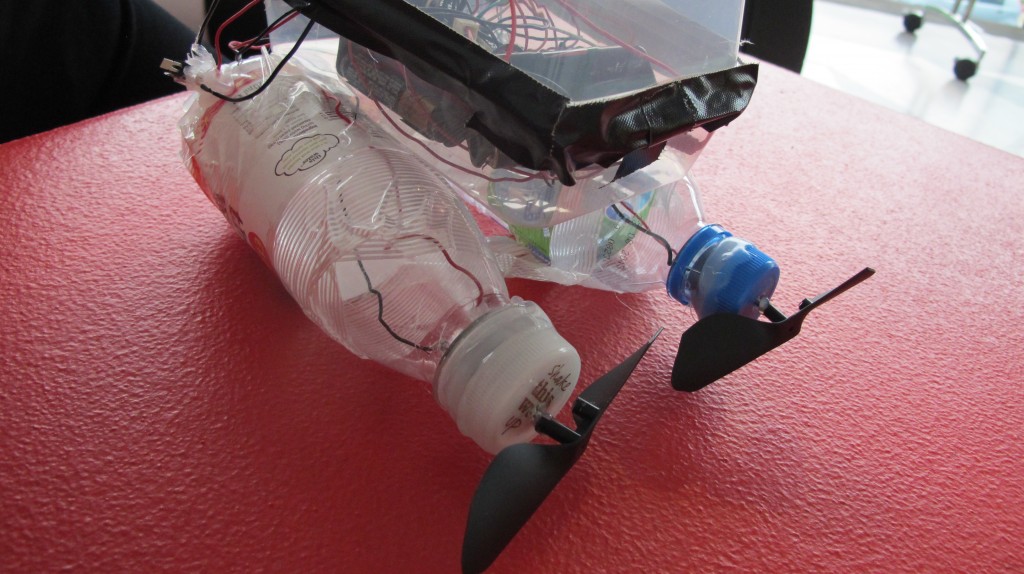
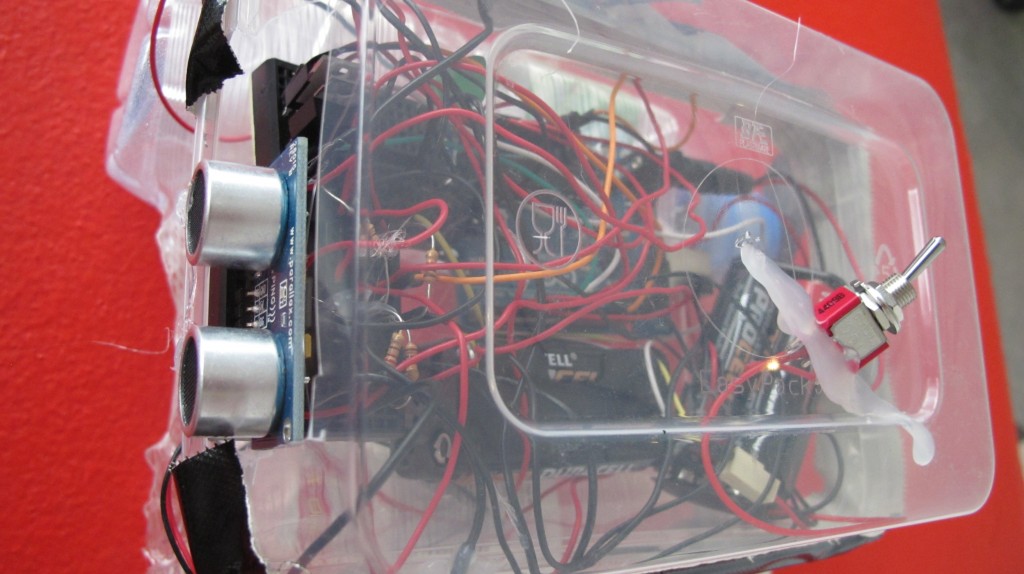
ITP
robot boat with many sensing capabilities


STEP BY STEP HOW TO:
http://levinegabriella.com/teaching/Boat.pdf TUTORIAL and CODE
github.com/gabriella/boat-
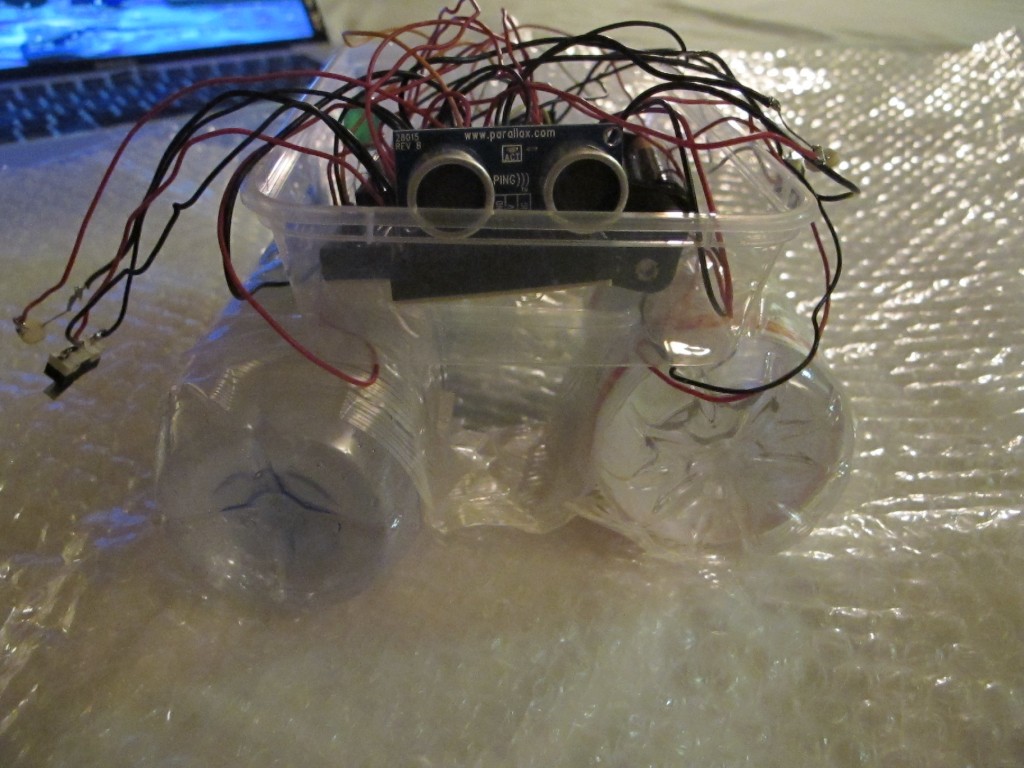
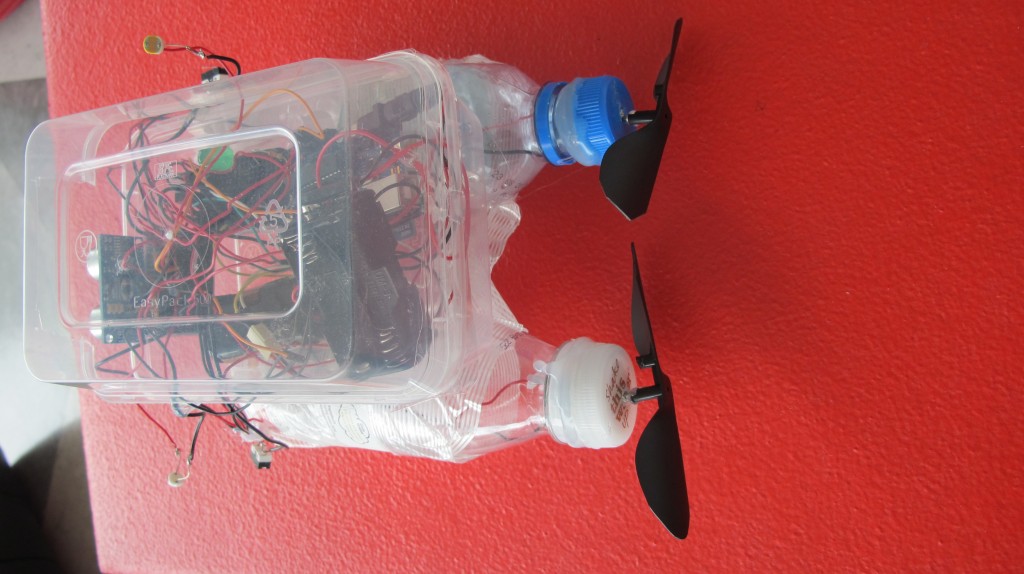
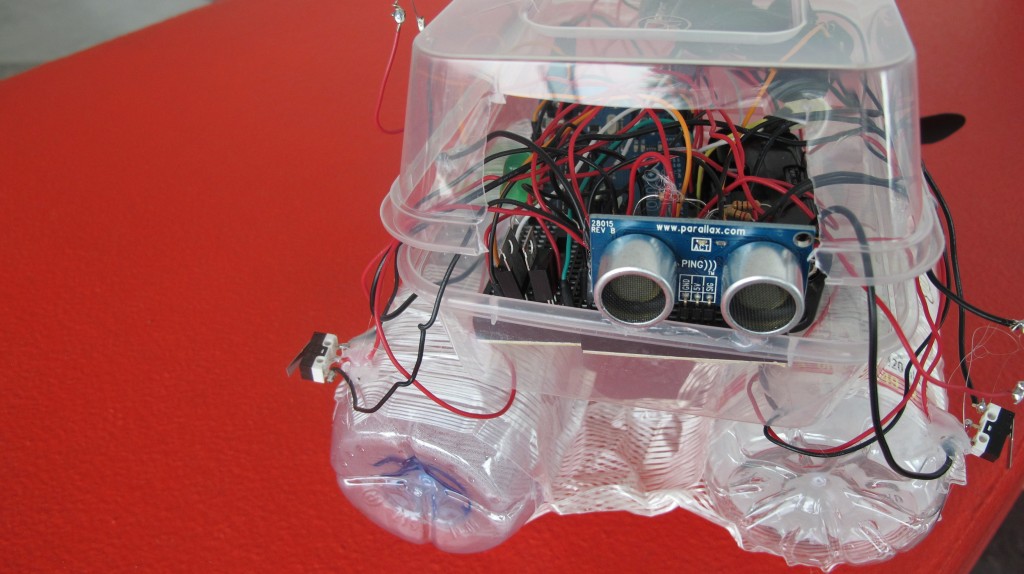
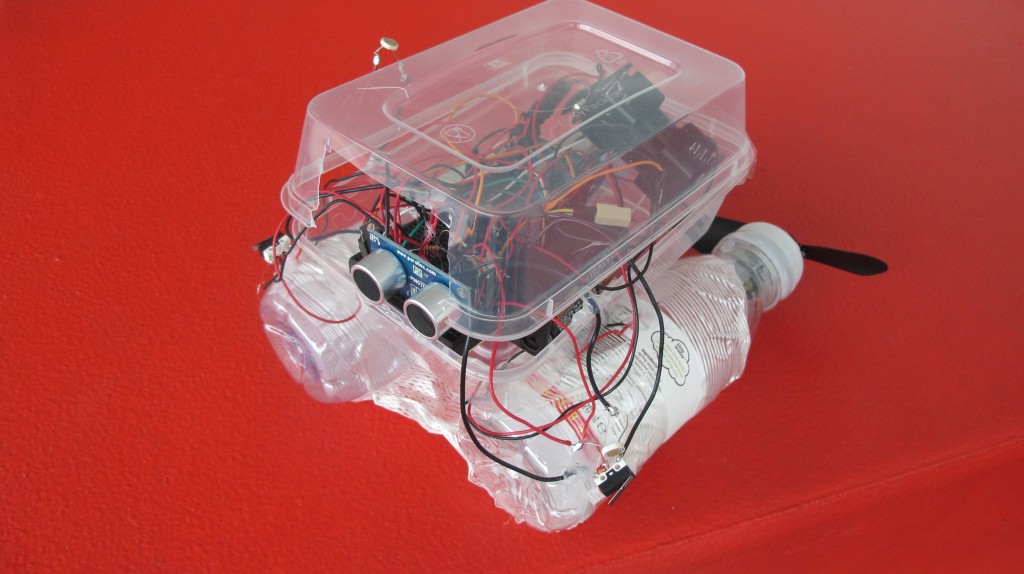
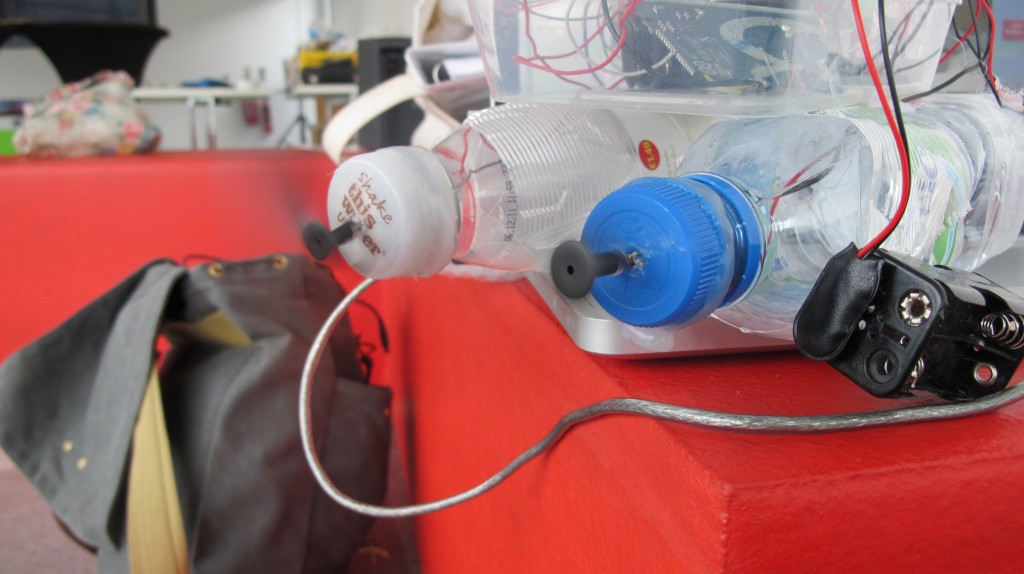
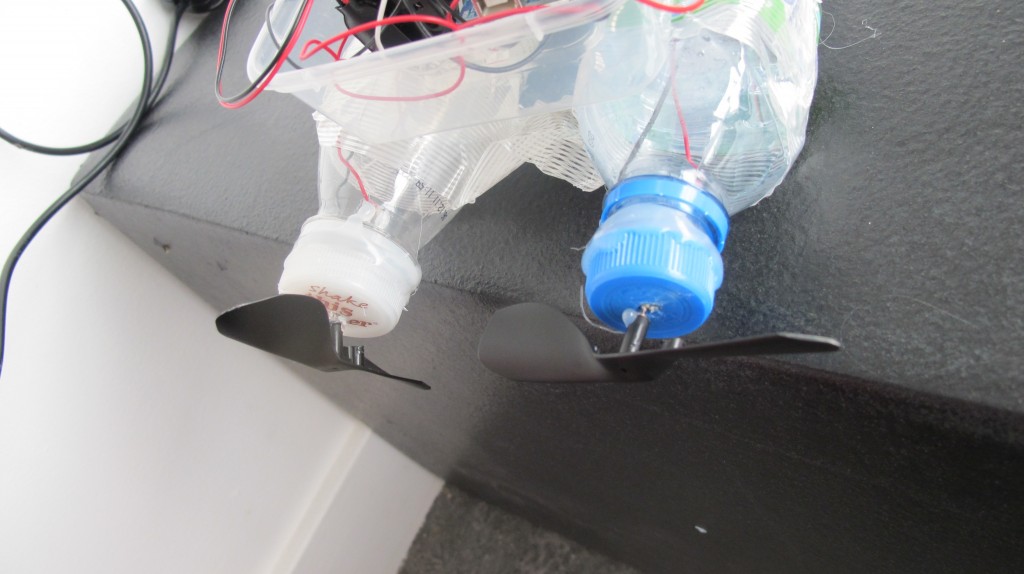
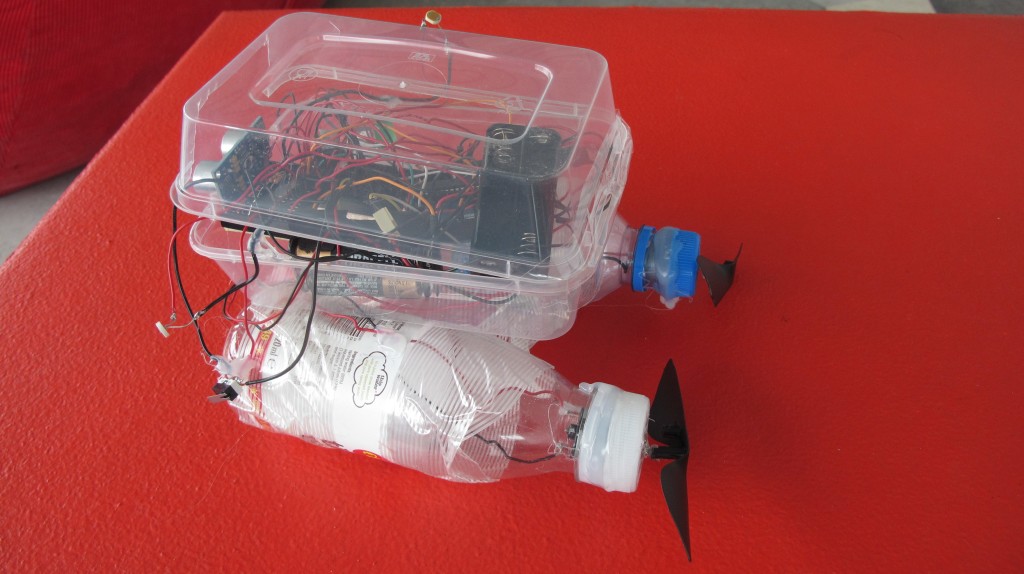
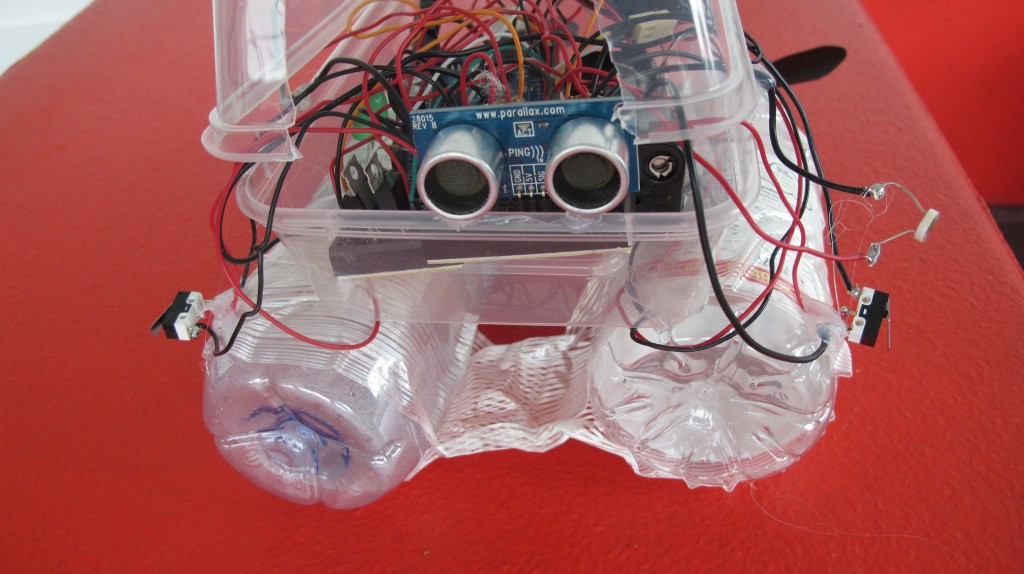
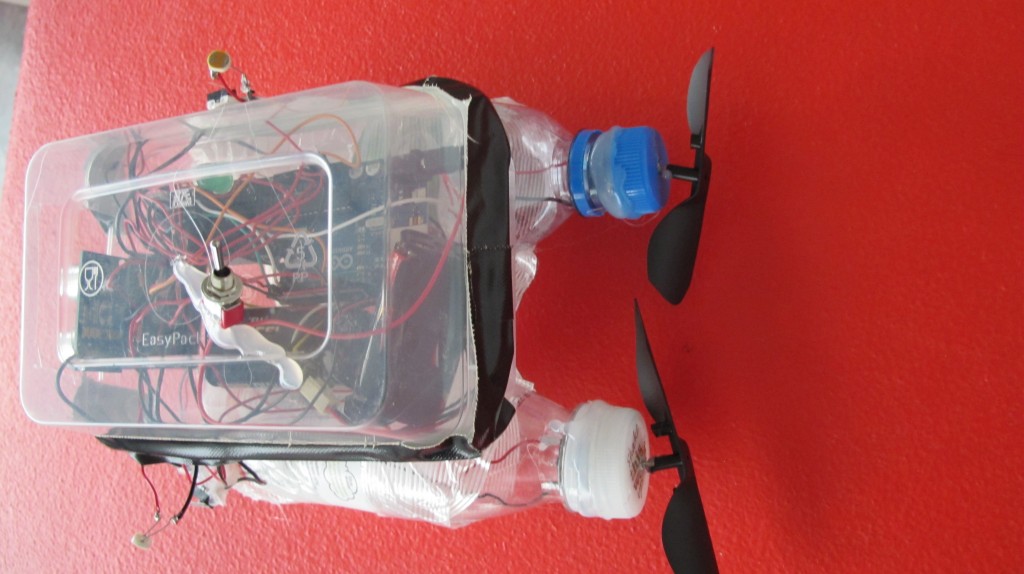
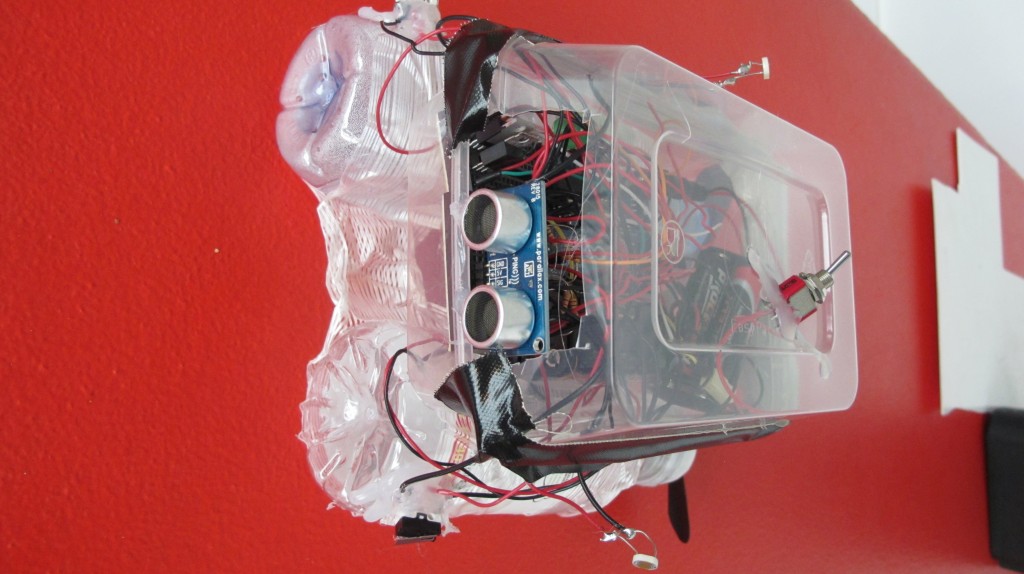
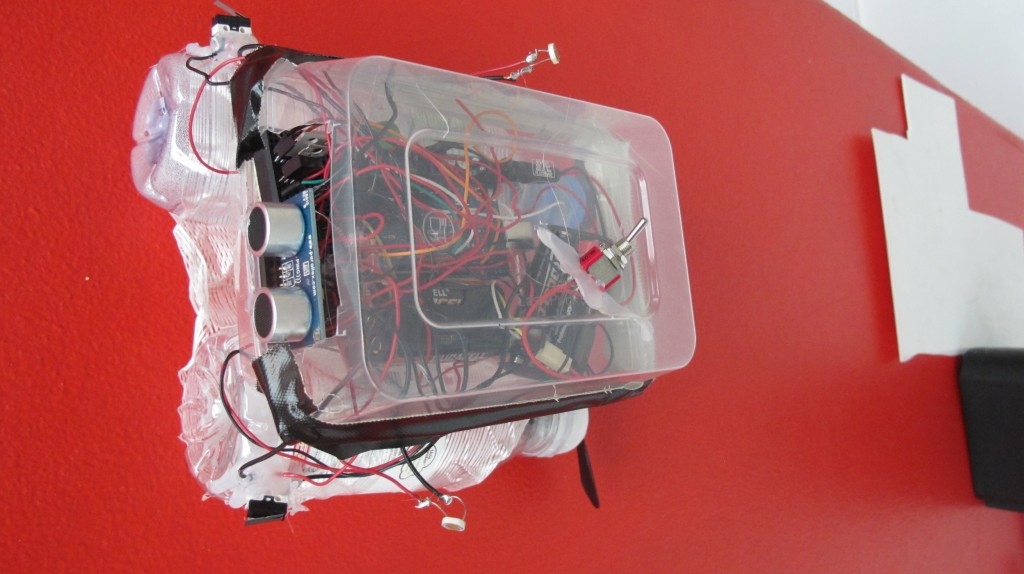
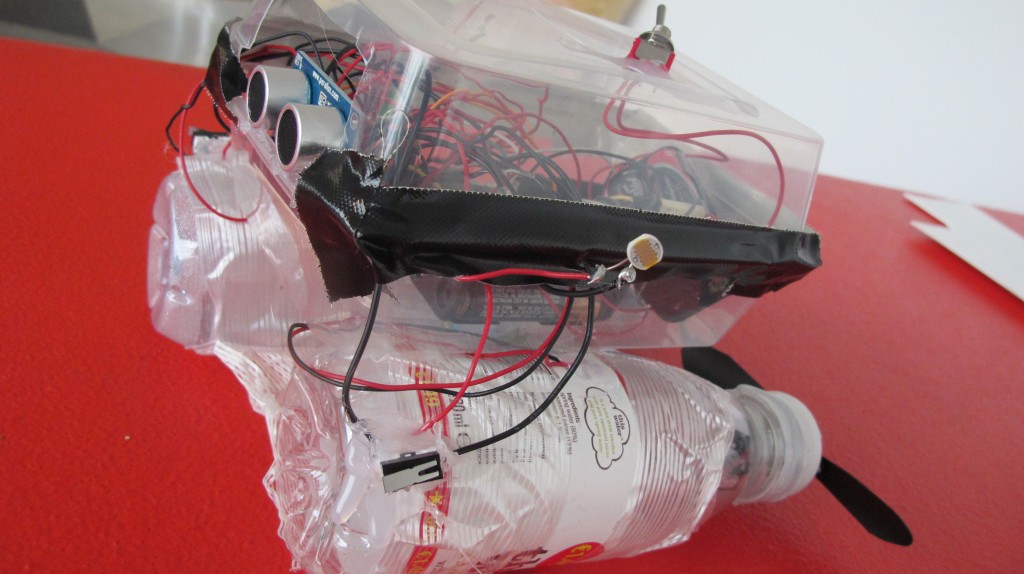
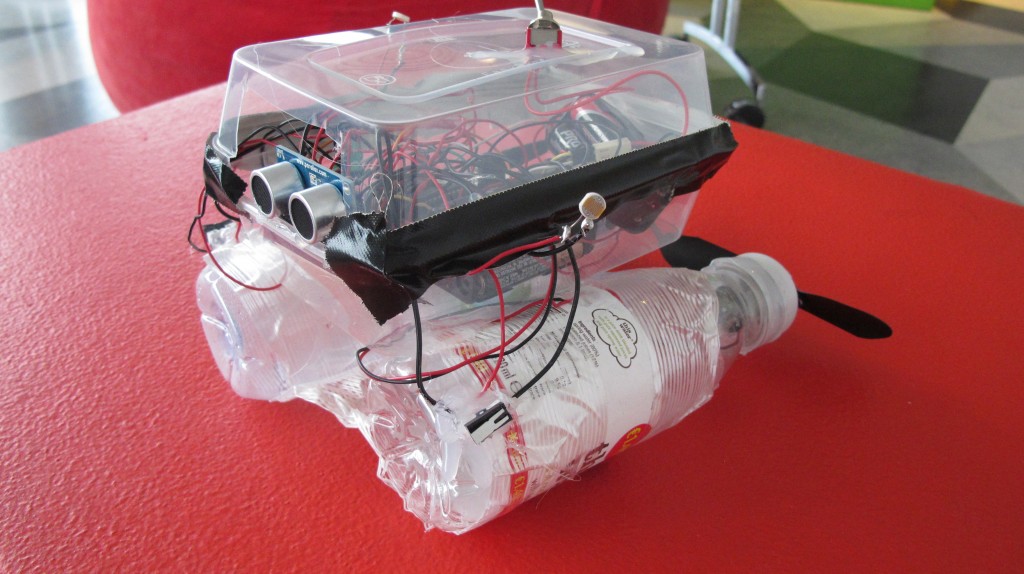
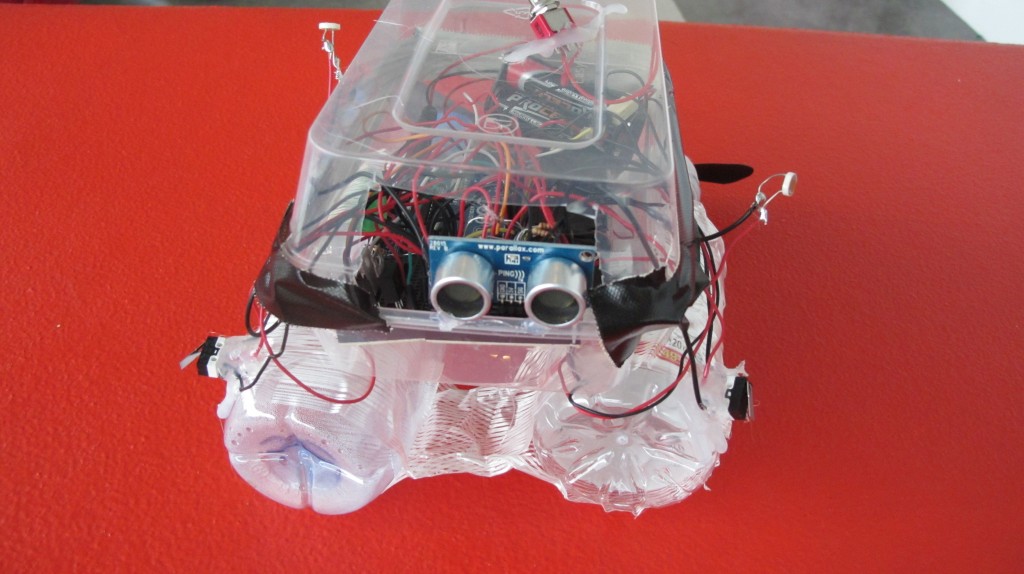
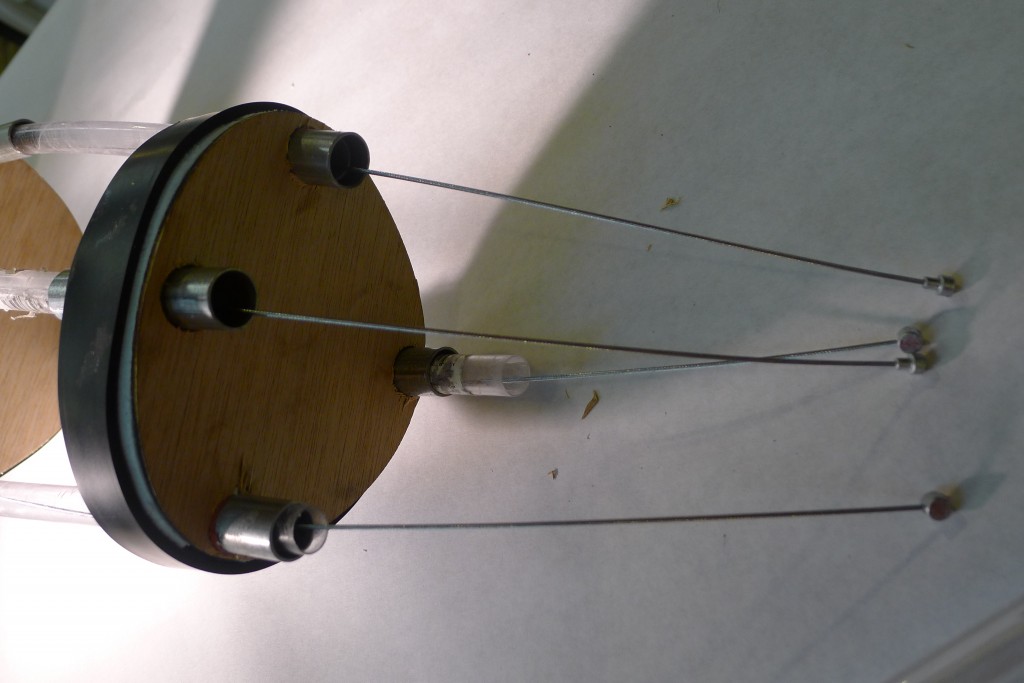
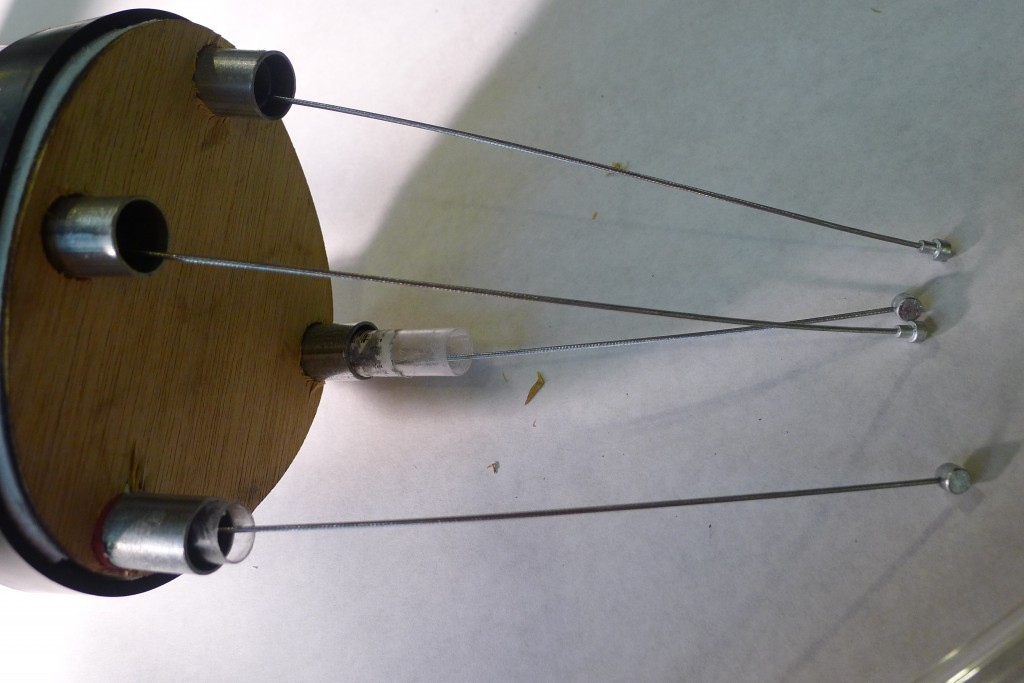
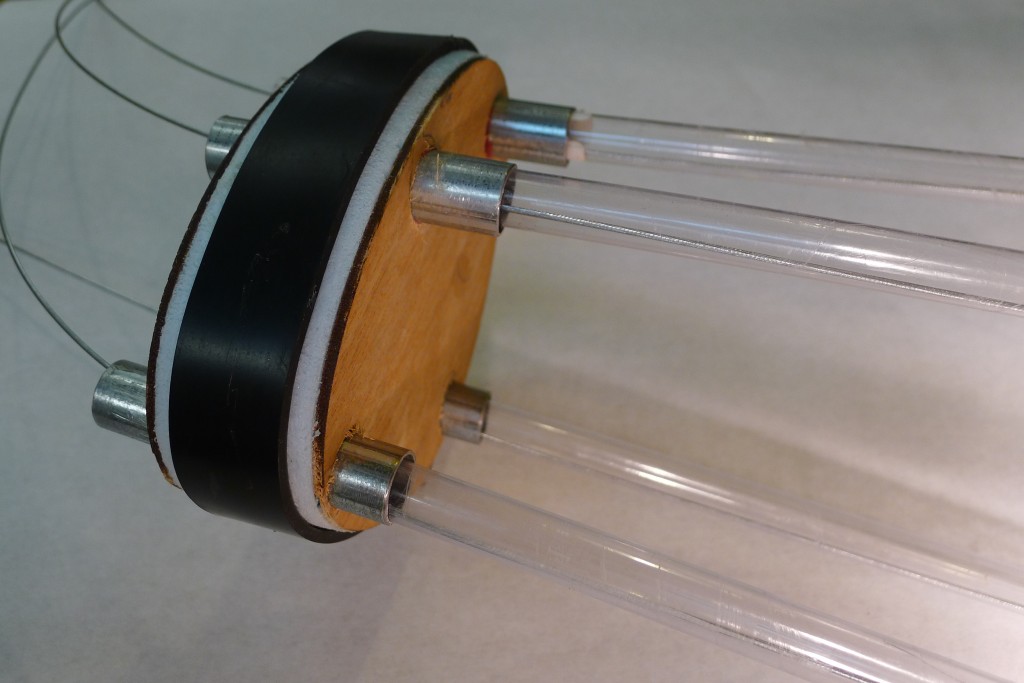
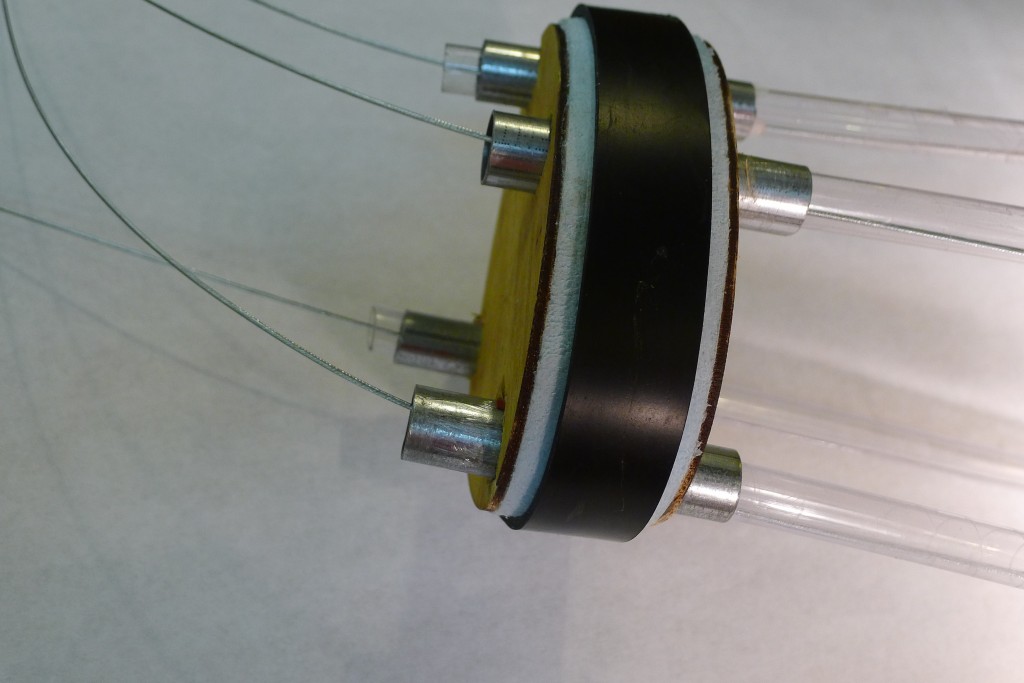
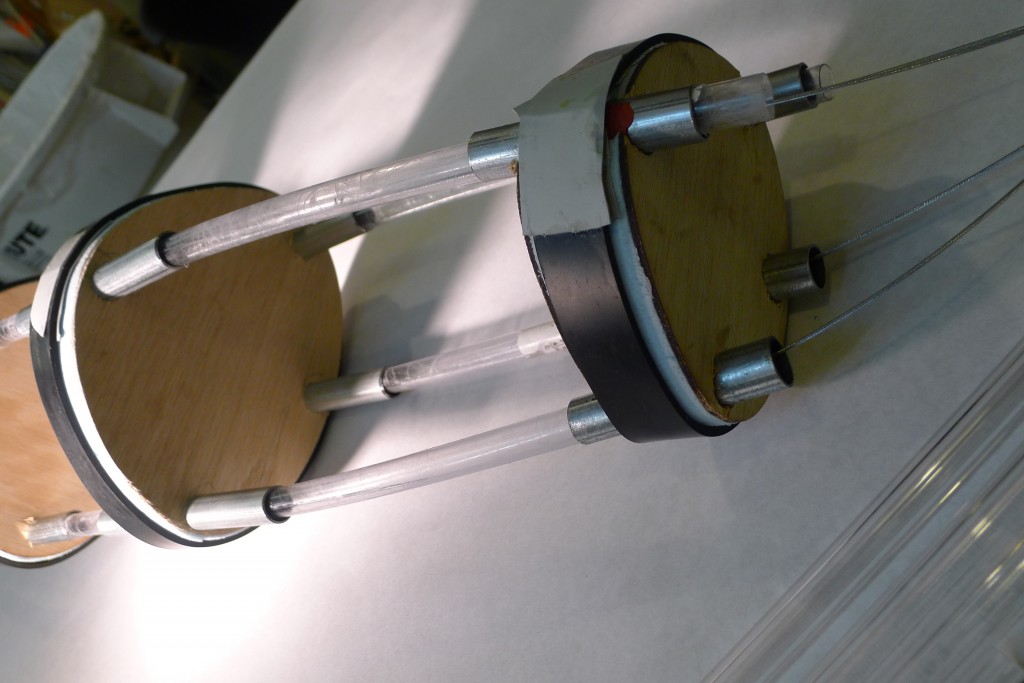
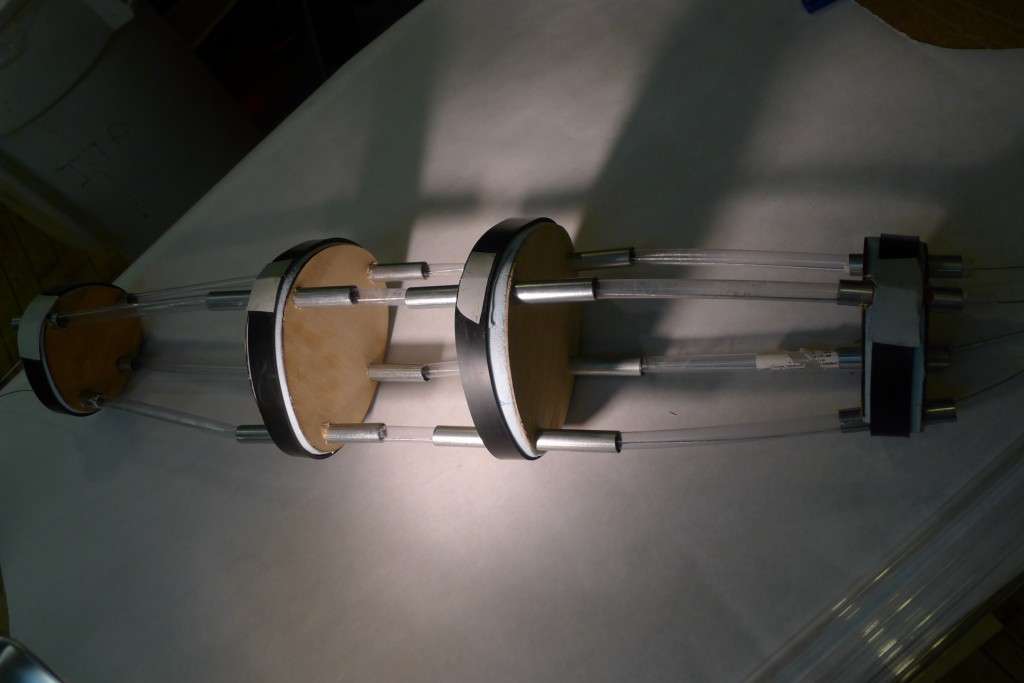
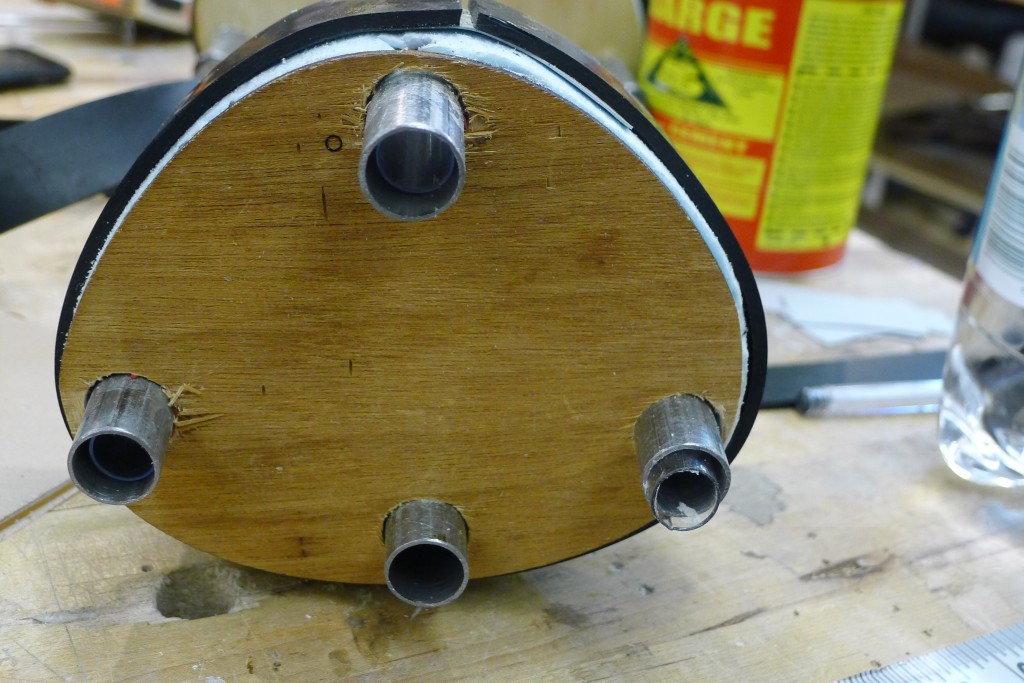
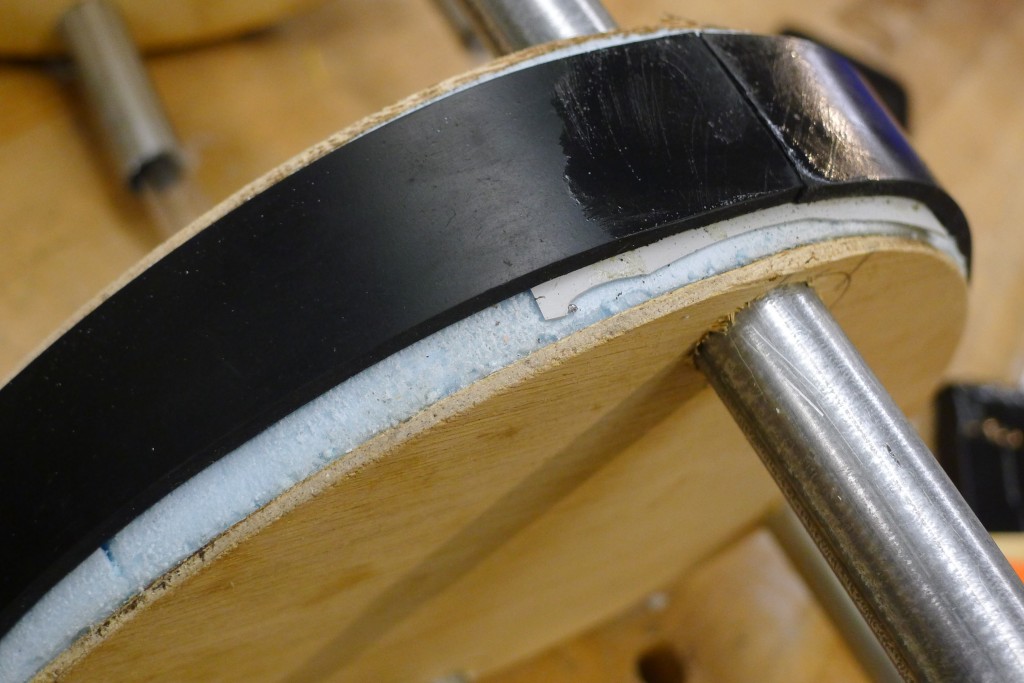
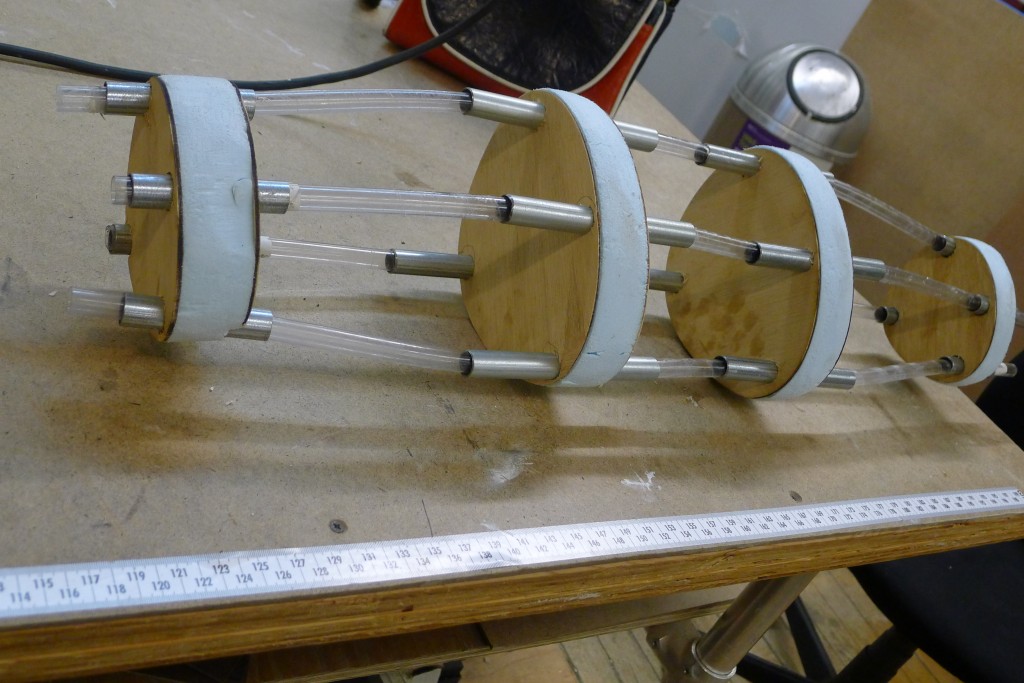
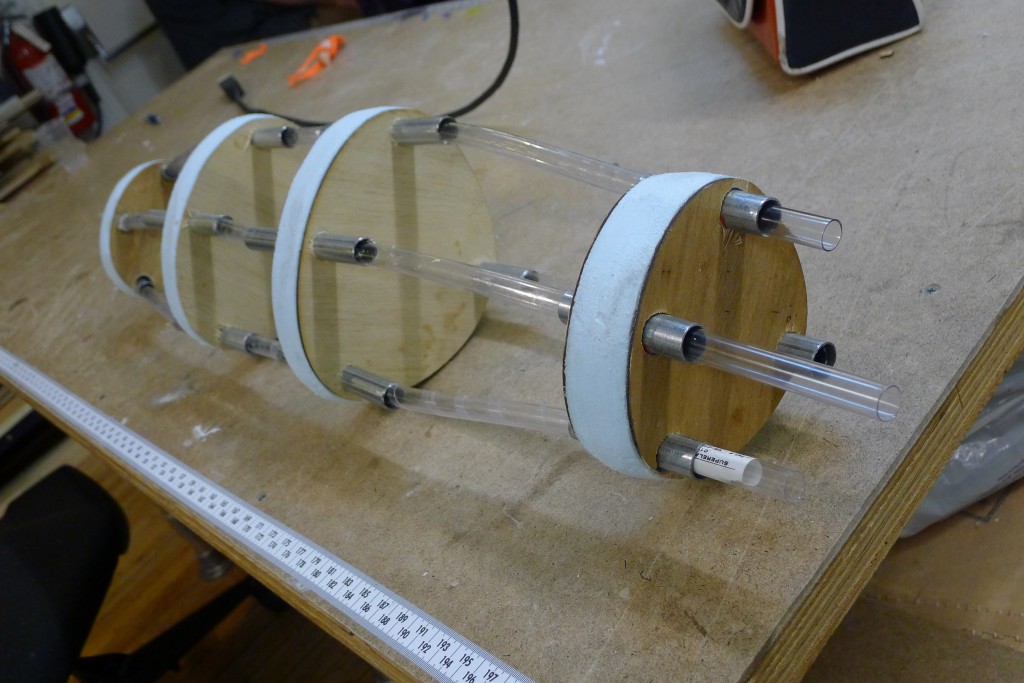
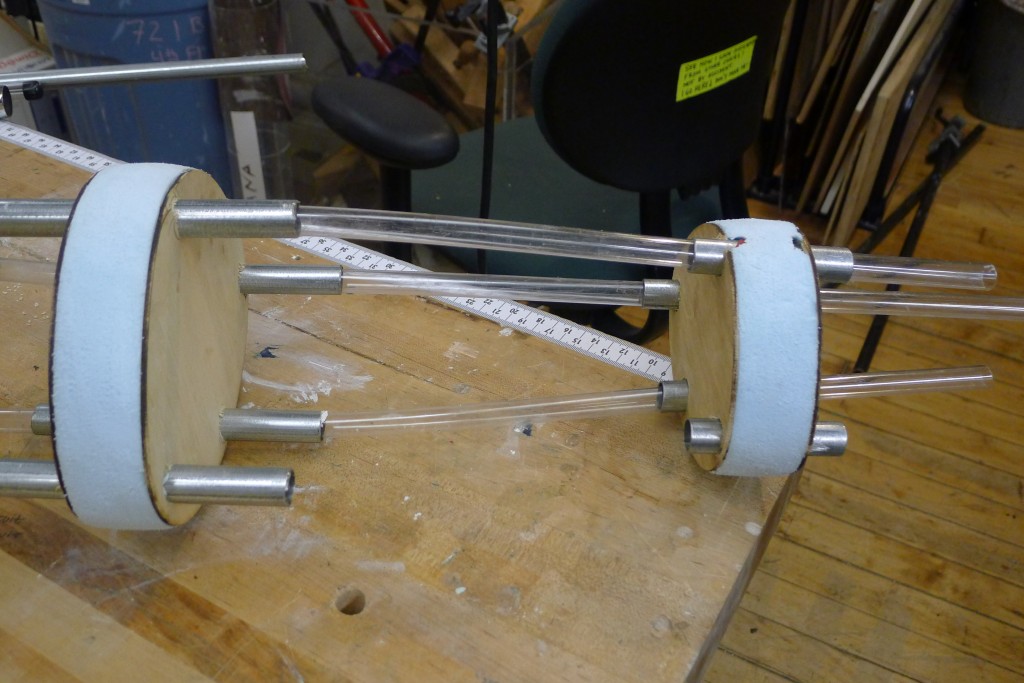
Mini Protei
more to come – just a few photos – thanks to the action shots by Jason Stevens (thanks!)


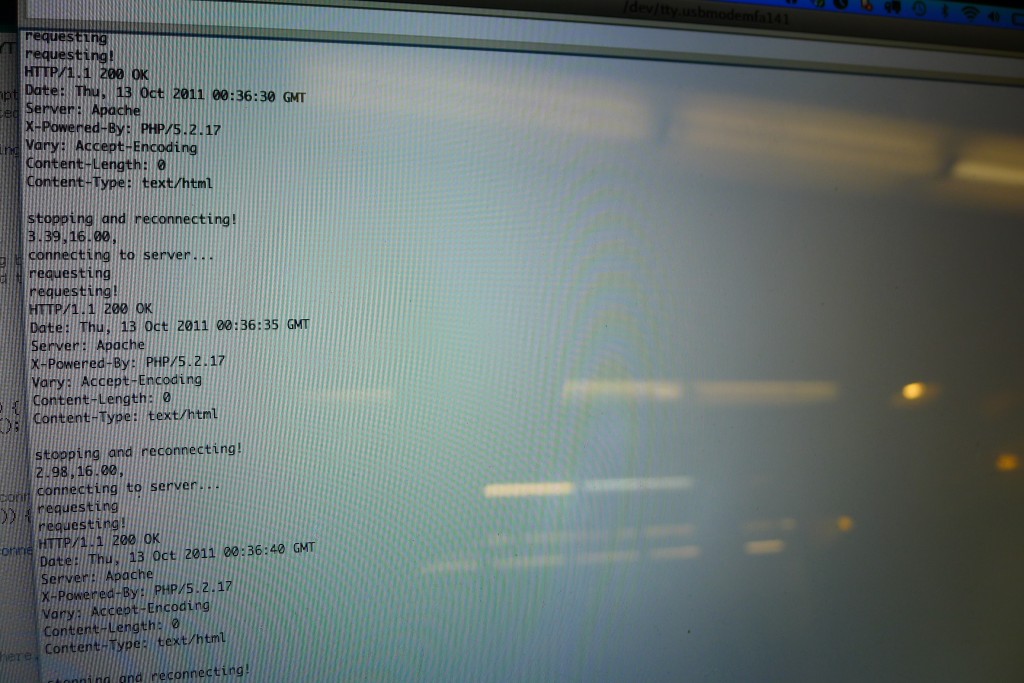
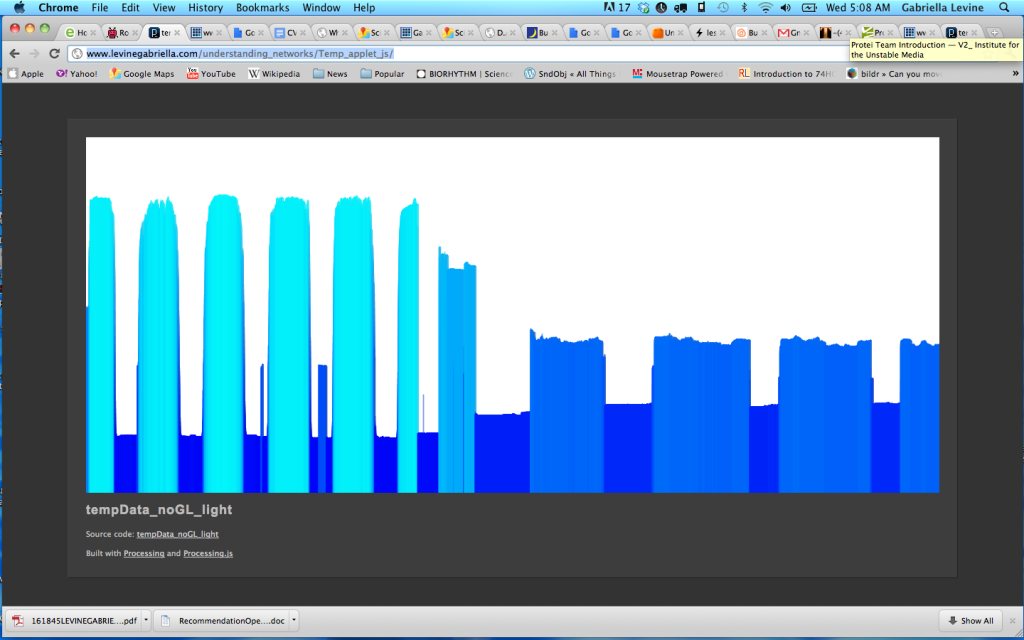
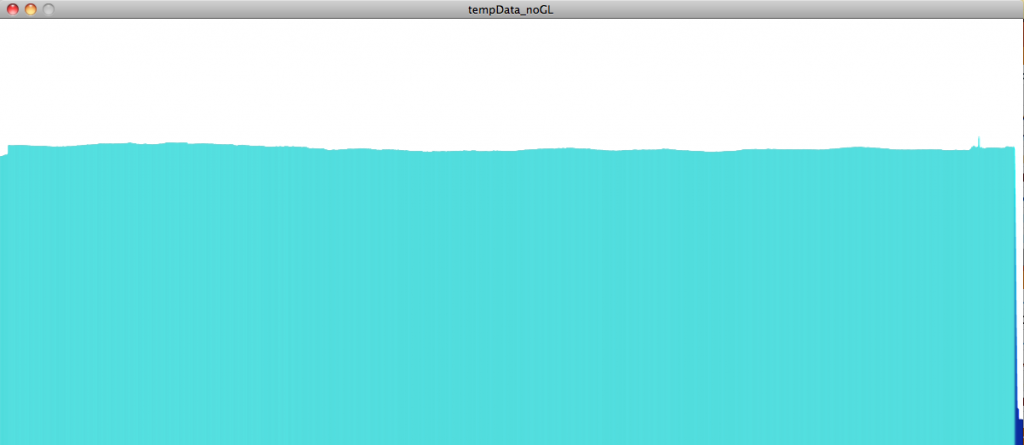
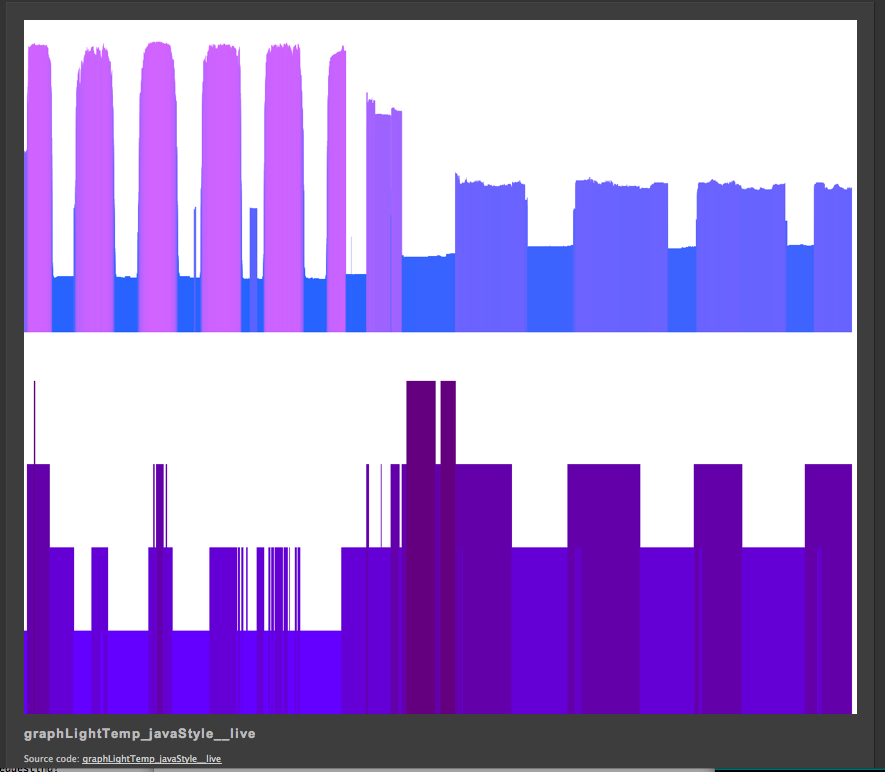
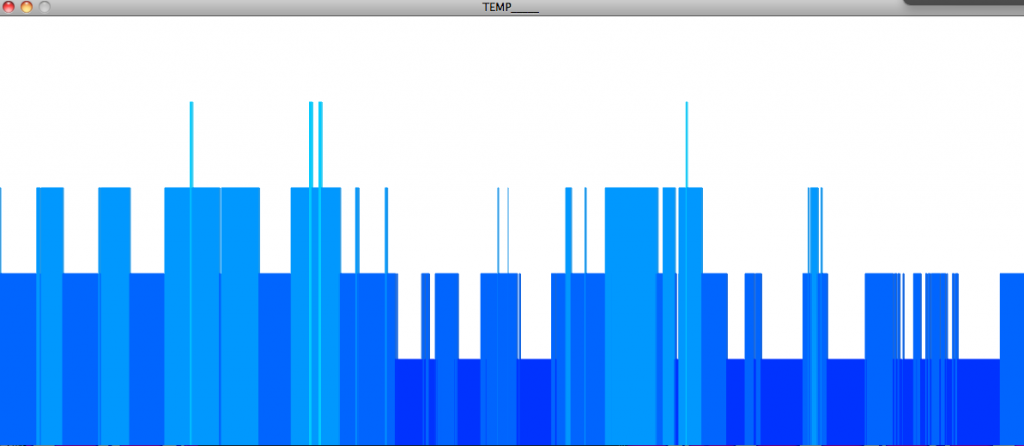
Logging data remotely to the web, no computer
So I switched over the client to here: http://levinegabriella.com/understanding_networks/liveApplet/

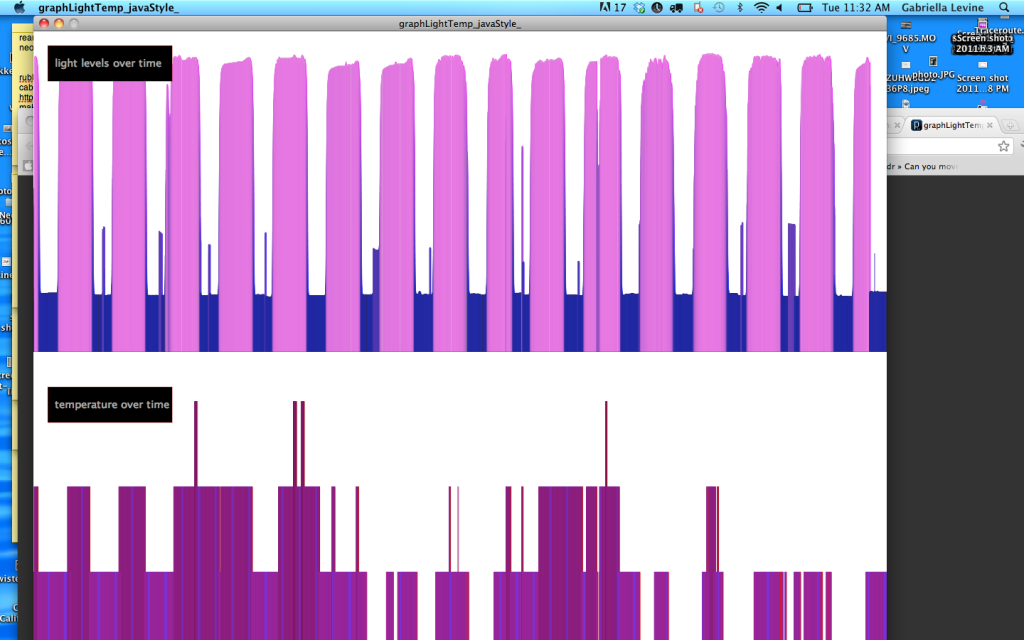
(I have to figure out why no text is appearing on the graph – i had temperature and light and date markers)
the php server is written here: http://levinegabriella.com/understanding_networks/dataLogger.php
The server reads and writes to a text file here: http://www.levinegabriella.com/understanding_networks/liveApplet/DATAcl.TXT
See code below for Arduino and php and processing
Next step: The day I left NY my dataLogging Arduino “crashed”, after working for a week . It could have been any number of things. The SD card, the server, a short?
Try Pachube, and Watch Dog to restart Arduino if it crashes.
Can i do some virtual debugging?
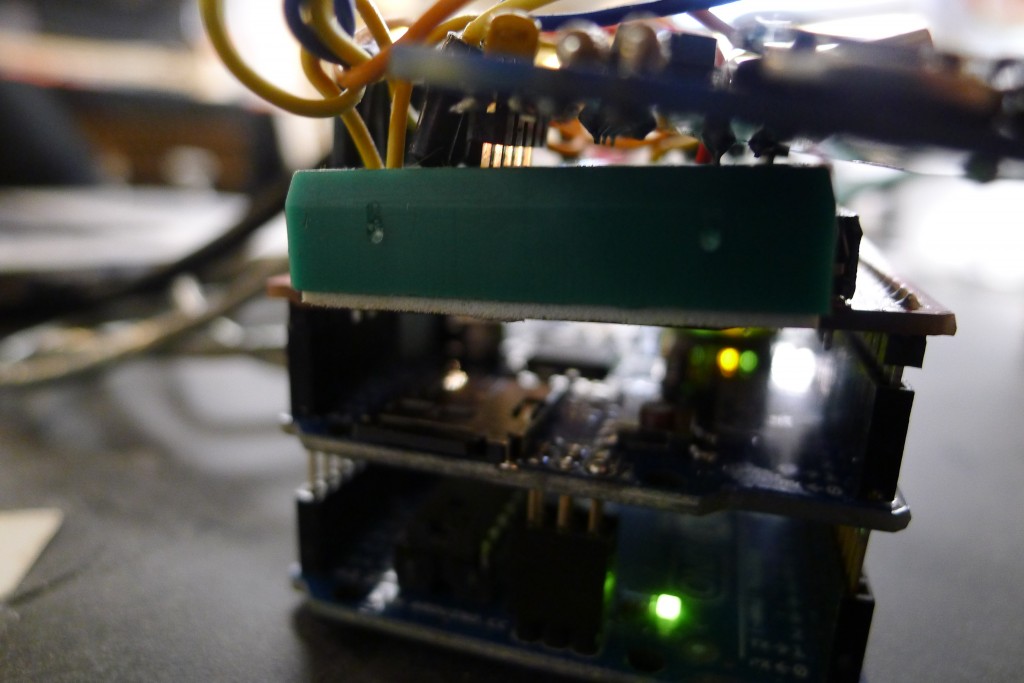
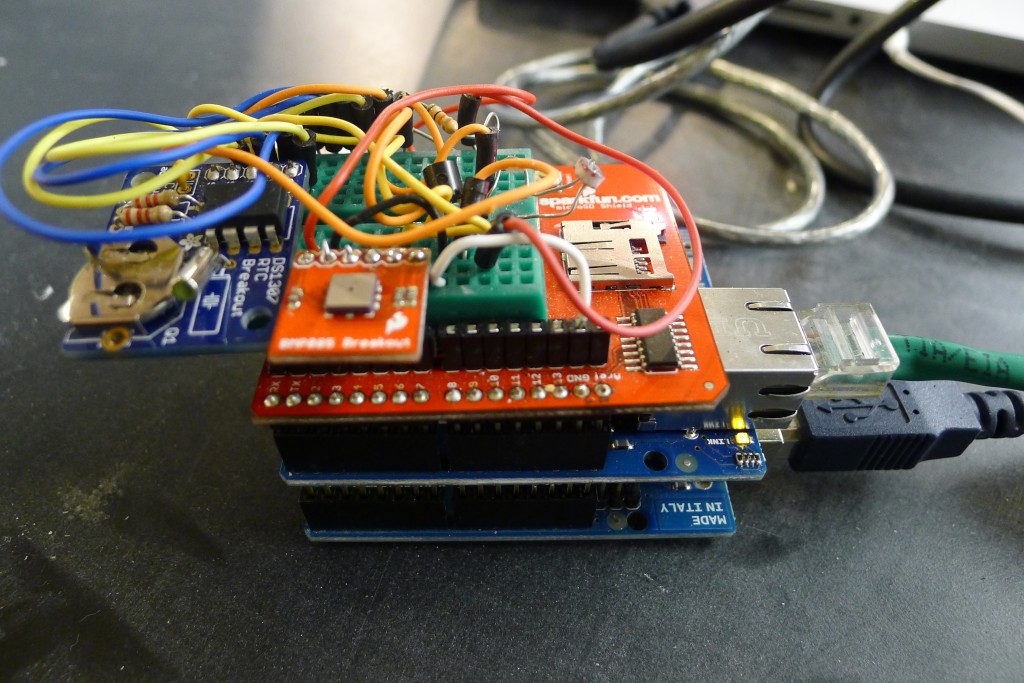
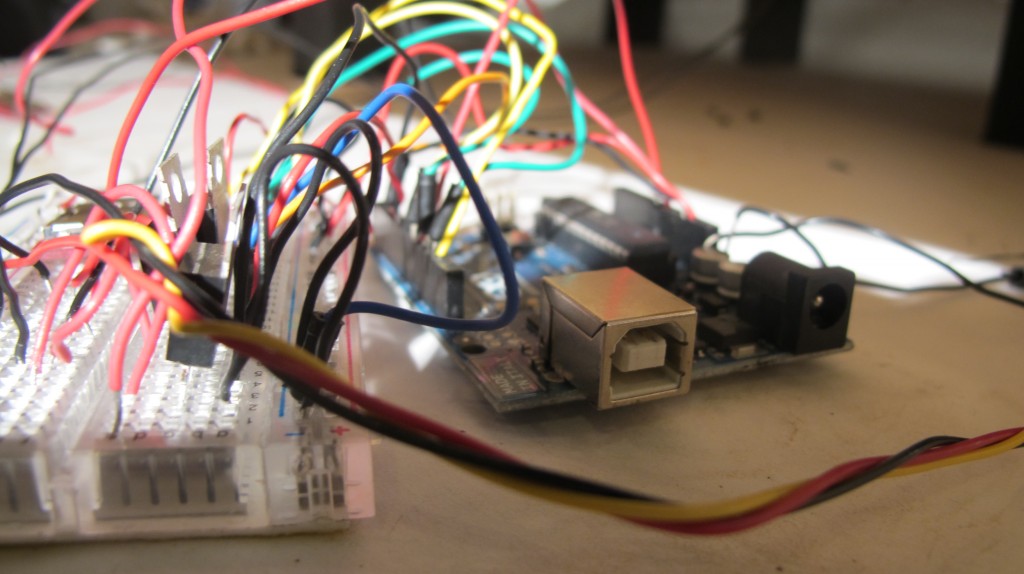
Also, Arduino UNO ran out of space (the functions include: data logger, ethernet connection to a server, temp sensor, light sensor, real time clock – But there are many more sensors on board (gps, humidity, accelerometer, barometric pressure) so I’ve moved everything over to the MEGA. Had to rearrange the SPI / I2C pin connections, but besides that it’s all good.
(all the code (php, processing, arduino) can also be downloaded here)
More to come…
<?php
// put the name and path of the text file in a variable.
// this is the text file where we'll store the data:
$filename = 'liveApplet/DATAcl.TXT';

//make sure the file is not empty:
if (file_exists($filename)) {
// get the contents of the file
// and put them in a variable called $fileContents:
$fileContents = file_get_contents($filename);

// if there is new data from the client, it'll
// be in a request parameter called "data".
if (isset($_REQUEST['data'])) {
// append what the client sent as 'data' to
// the variable holding the file contents:
$fileContents = $fileContents . "\n". $_REQUEST['data'];
// put the file contents back into the file
// you're overwriting the whole file when you do this:
file_put_contents($filename, $fileContents);
} else {
// there was no data sent in the request
// so show the old stuff:
// echo '<p>' . $fileContents . '</p>';
//split the string of the newLines:
$strings = explode("\n", $fileContents);
//loop over the array of the lines, adding a break at the end of each
foreach ($strings as $thisString){
echo $thisString . "<br/>\n";
}
}
}
?>
Arduino:
[/python]
/*
Web client
This sketch connects to a website (http://www.google.com)
using an Arduino Wiznet Ethernet shield.
Circuit:
* Ethernet shield attached to pins 10, 11, 12, 13
created 18 Dec 2009
by David A. Mellis
*/
#include
#include
#include
#include “RTClib.h”
#include
// Enter a MAC address for your controller below.
// Newer Ethernet shields have a MAC address printed on a sticker on the shield
byte mac[] = {
0x00, 0xAA, 0xBB, 0xCC, 0xDE, 0x03 };
IPAddress server(69,89,31,63); // my IP server
const int requestInterval = 30000;
long lastAttemptTime = 0; // last time you connected to the server, in milliseconds
boolean requested;
const int resetLED = 13;
float temp;
float voltage;
// Initialize the Ethernet client library
// with the IP address and port of the server
// that you want to connect to (port 80 is default for HTTP):
const int chipSelect = 4;//changed from 8
const int LOCATION_FILE_NUMBER_LSB = 0x00;
const int LOCATION_FILE_NUMBER_MSB = 0x01;
File dataFile;
RTC_DS1307 RTC;
EthernetClient client;
DateTime now;
void setup() {
// start the serial library:
Serial.begin(9600);
pinMode(A2, OUTPUT);
pinMode(A3, OUTPUT);
// A2 is the ground, A3 is the power:
digitalWrite(A2, LOW);
digitalWrite(A3, HIGH);
pinMode(10, OUTPUT);
if (!SD.begin(chipSelect)) {
Serial.println(“Card failed, or not present”);
// don’t do anything more:
}
Serial.println(“card initialized.”);
Wire.begin();
RTC.begin();
delay(50);
if (! RTC.isrunning()) {
Serial.println(“RTC is NOT running!”);
// following line sets the RTC to the date & time this sketch was compiled
RTC.adjust(DateTime(__DATE__, __TIME__));
}
dataFile = SD.open(“data.txt”, FILE_WRITE);
delay(500);
// start the Ethernet connection:
Ethernet.begin(mac);
if (Ethernet.begin(mac) == 0) {
Serial.println(“Failed to configure Ethernet using DHCP”);
// no point in carrying on, so do nothing forevermore:
for(;;)
;
}
// connectToServer();
// give the Ethernet shield a second to initialize:
delay(1500);
blink(resetLED, 3);
Serial.println(“connecting…”);
connectToServer();
}
void loop()
{
now = RTC.now();
if(client.connected()){
if(!requested){
requested = makeRequest();
// Serial.println(“requesting!”);
}
if(millis() – lastAttemptTime>requestInterval){
//if youre not connected and two minutes have passed, attempt to connect again
client.stop();
// Serial.println(“stopping and reconnecting!”);
// getData();
delay(1500);
//connectToServer();
}
// if there are incoming bytes available
// from the server, read them and print them:
}
if (client.available()) {
char c = client.read();
// Serial.print(c);
}
// if the server’s disconnected, stop the client:
if (!client.connected()) {
// Serial.println();
// Serial.println(“disconnecting.”);
client.stop();
delay(1500);
if(millis() – lastAttemptTime>requestInterval){
//if youre not connected and two minutes have passed, attempt to connect again
connectToServer();
//try to reconnect here…
}
}
}
void getData(){
voltage = 5 * analogRead(A0) / 1024.0;
//float temp = 5 * analogRead(A1) / 1024.0;
temp=(analogRead(A1))/10;
// Serial.print(voltage);
// Serial.print(F(“,”));
// Serial.print(temp);
// Serial.print(F(“,”));
// Serial.println(” “);
//
if (dataFile) {
DateTime now = RTC.now();
dataFile.print(now.month());
dataFile.print(‘/’);
dataFile.print(now.day());
dataFile.print(‘/’);
dataFile.print(now.year());
dataFile.print(F(“,”));
dataFile.print(now.hour());
dataFile.print(F(“:”));
dataFile.print(now.minute());
dataFile.print(F(“:”));
dataFile.print(now.second());
dataFile.print(F(“,”));
dataFile.print(voltage);
dataFile.print(F(“,”));
dataFile.print(temp);
dataFile.println();
}
dataFile.flush();
}
void connectToServer(){
// Serial.println(“connecting to server…”);
if (client.connect(server, 80)) {
requested = false;
}
lastAttemptTime = millis();
}
boolean makeRequest() {
// Serial.println(“requesting”);
getData();
// Make a HTTP request:
client.print(“GET /understanding_networks/dataLogger.php?data=”);
client.print(now.month());
client.print(‘/’);
client.print(now.day());
client.print(‘/’);
client.print(now.year());
client.print(F(“,”));
client.print(now.hour());
client.print(F(“:”));
client.print(now.minute());
client.print(F(“:”));
client.print(now.second());
client.print(F(“,”));
client.print(voltage);
client.print(F(“,”));
client.print(temp);
client.println(” HTTP/1.1 “);
client.println(“HOST: www.levinegabriella.com”);
client.println();
return true;
}
void blink(int thisPin, int howManyTimes){
for (int blinks = 0;blinks digitalWrite(thisPin, HIGH);
delay(200);
digitalWrite(thisPin, LOW);
delay(200);
}
}
//questions: what other sensors will be good?
//what is too much data
//i seem to be making my request twice
//when my request interval is more than 5000 i get
//10/13/2011,11:14:56,3.67,15.00
//10/13/2011,11:15:5,3.65,15.00
//10/13/2011,11:15:16,0.00,0.00
//10/13/2011,11:15:44,0.00,0.00
//why
//can you go back a directory
[/python]


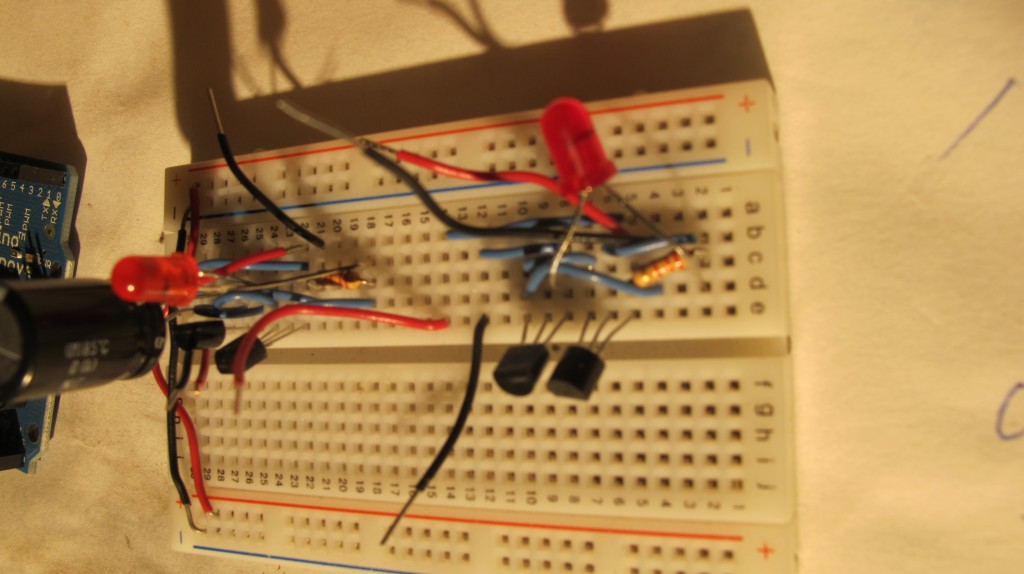
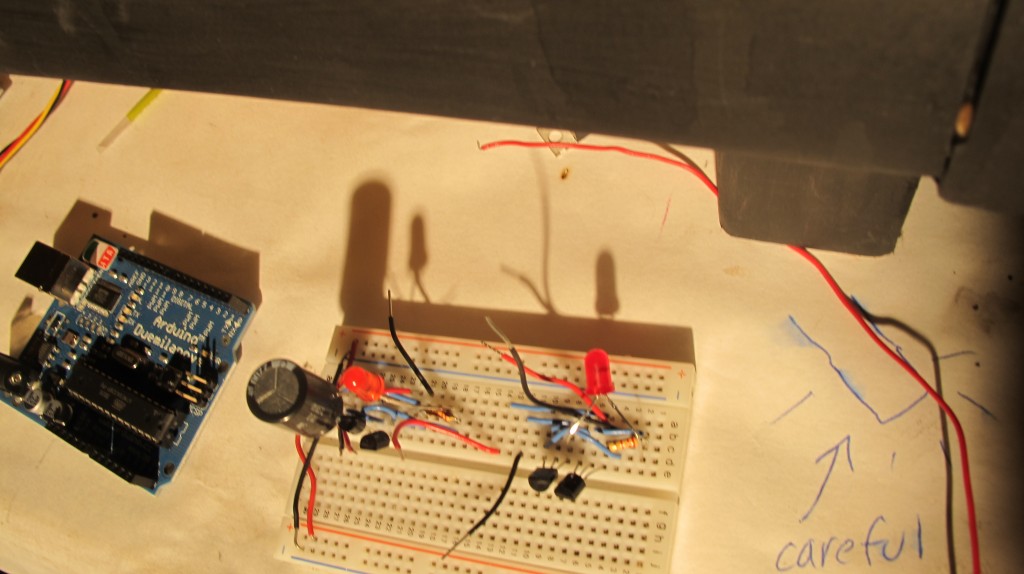
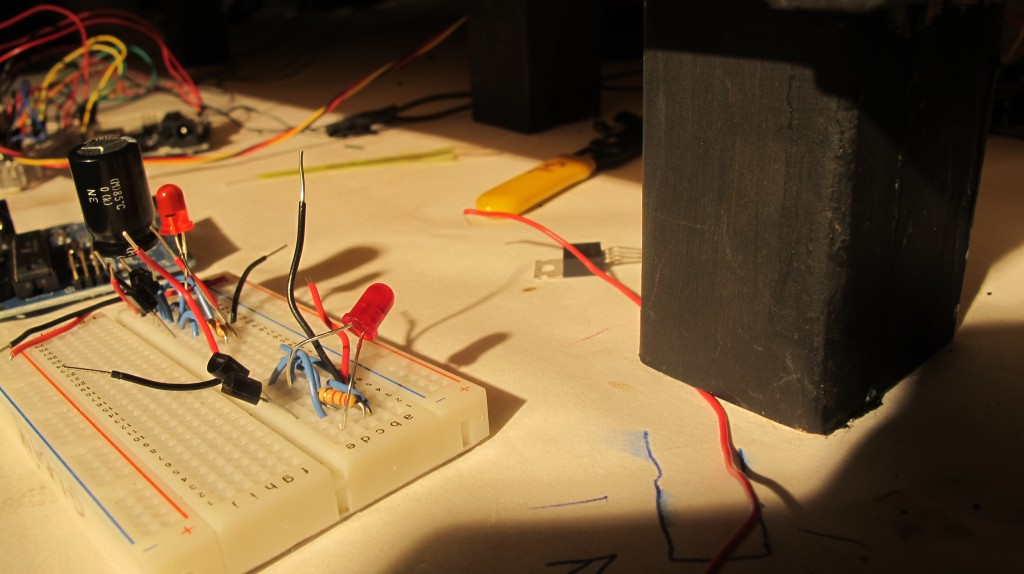
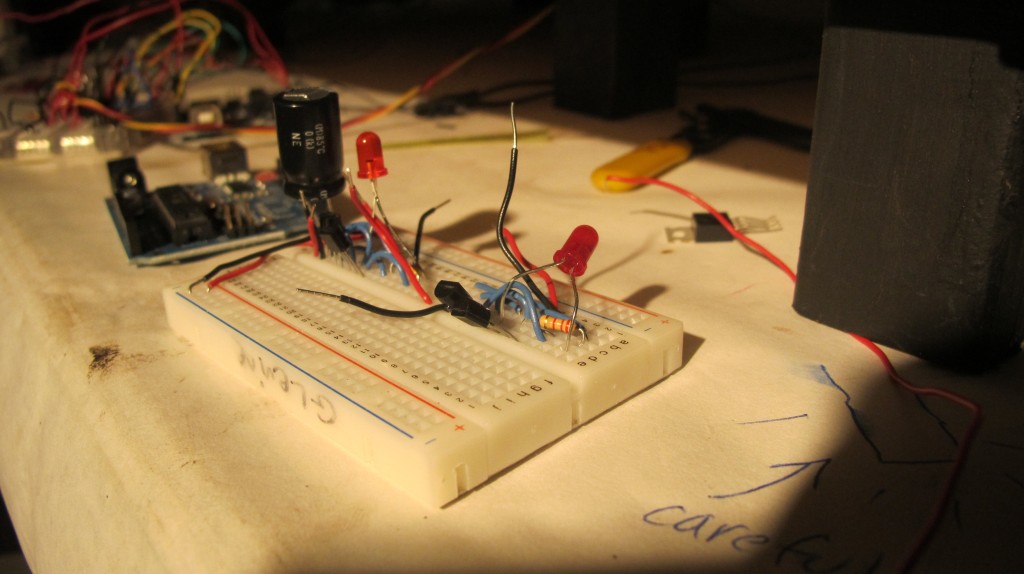
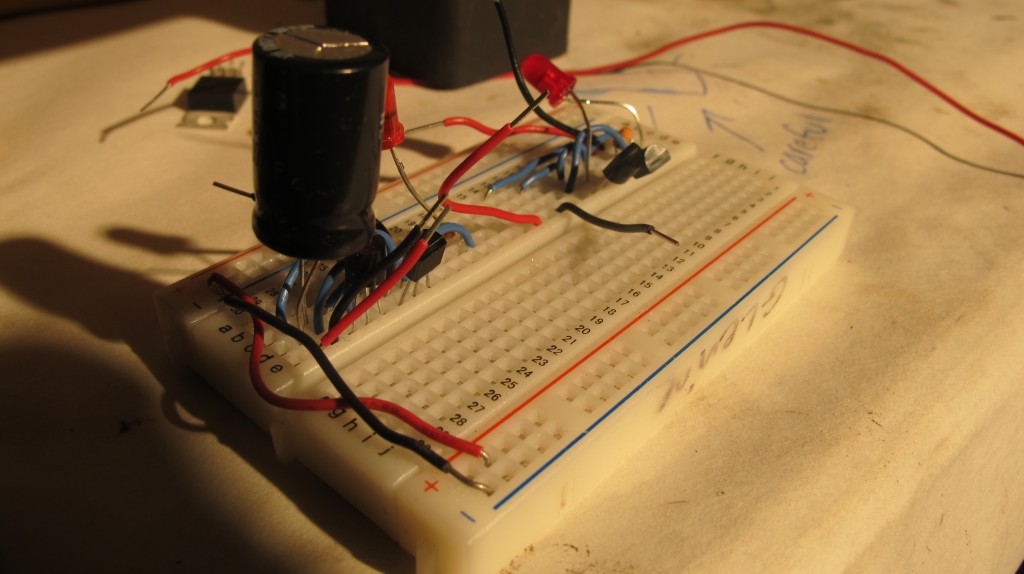
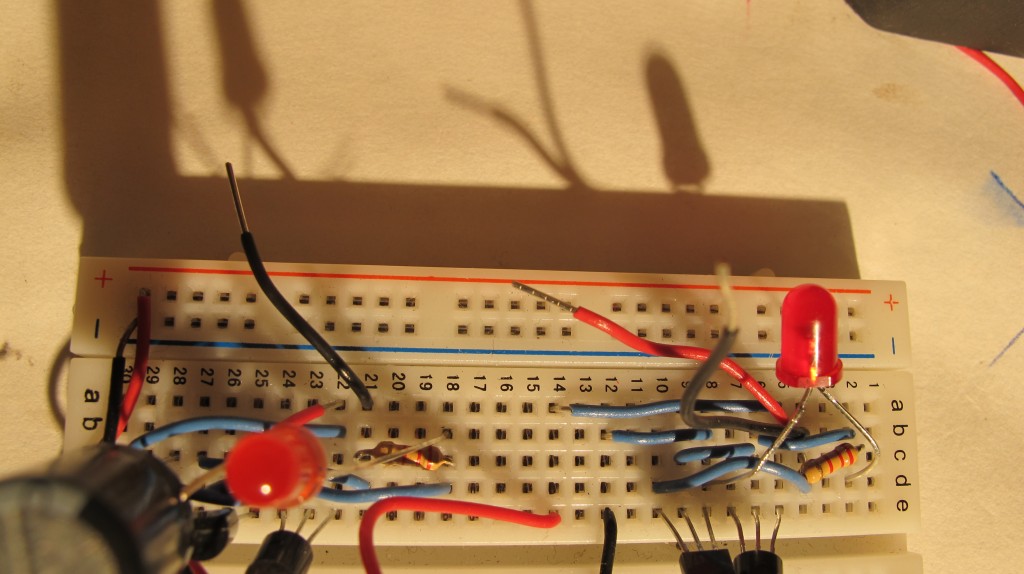
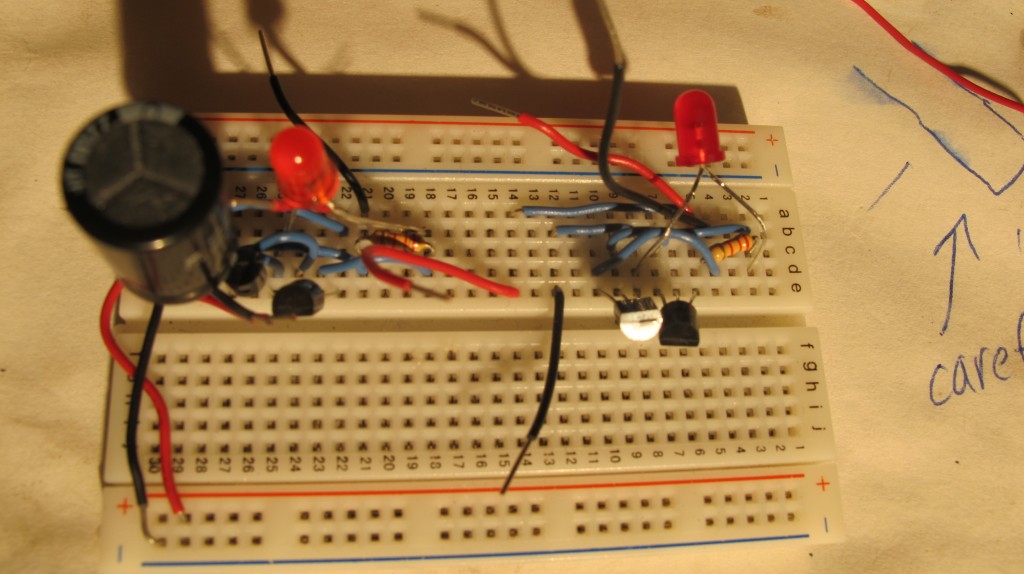
How to get data on the internet without a computer
I did this using the Arduino ethernet shield. 
Below is the script for the server that Arduino calls in its HTTP request.
The server has the following function: if there is data added to it through a GET request, it stores that data in a text file (called datalog.txt) that is also on the same server. That way my sensor data can be stored as a text file. Secondly, when the server is called with no request, it shows the text of the text file. This way, I can write a program to pull the data from that website and graph it (processing.js, perhaps… more to come later this week on that).
click here for a text file of the code in case it is not showing up correctly below
<?php
// put the name and path of the text file in a variable.
// this is the text file where we'll store the data:
$filename = 'datalog.txt';

//make sure the file is not empty:
if (file_exists($filename)) {
       // get the contents of the file
       // and put them in a variable called $fileContents:
       $fileContents = file_get_contents($filename);

       // if there is new data from the client, it'll
       // be in a request parameter called "data".
       if (isset($_REQUEST['data'])) {
               // append what the client sent as 'data' to
               // the variable holding the file contents:
               $fileContents = $fileContents . "\n". $_REQUEST['data'];
               // put the file contents back into the file
               // you're overwriting the whole file when you do this:
               file_put_contents($filename, $fileContents);
       } else {
               // there was no data sent in the request
               // so show the old stuff:
               echo $fileContents;
       }
}
?>
From the Arduino side, this is the code I use, for now, to append my text file. It is adapted from the example WebClient in the Ethernet library on Arduino.
I just had to enter my MAC address of the ethernet shield and the IP address of the server I am making the request to.
The next step will be to continually make requests as sensor data comes in, to have a legible CSV.
/*
  Web client

 This sketch connects to a website (http://www.google.com)
 using an Arduino Wiznet Ethernet shield.

 Circuit:
 * Ethernet shield attached to pins 10, 11, 12, 13

 created 18 Dec 2009
 by David A. Mellis

 */

#include <SPI.h>
#include <Ethernet.h>

// Enter a MAC address for your controller below.
// Newer Ethernet shields have a MAC address printed on a sticker on the shield
byte mac[] = { 0x00, 0xAA, 0xBB, 0xCC, 0xDE, 0x03 };
IPAddress server(69,89,31,63); // Google

// Initialize the Ethernet client library
// with the IP address and port of the server
// that you want to connect to (port 80 is default for HTTP):
EthernetClient client;

void setup() {
  // start the serial library:
  Serial.begin(9600);
  // start the Ethernet connection:
  if (Ethernet.begin(mac) == 0) {
    Serial.println("Failed to configure Ethernet using DHCP");
    // no point in carrying on, so do nothing forevermore:
    for(;;)
      ;
  }
  // give the Ethernet shield a second to initialize:
  delay(1000);
  Serial.println("connecting...");

  // if you get a connection, report back via serial:
  if (client.connect(server, 80)) {
    Serial.println("connected");
    // Make a HTTP request:
    client.println("GET /understanding_networks/dataLogger.php?data=it_works_yay HTTP/1.1");
    client.println("HOST: www.levinegabriella.com");
   // client.println("GET /understanding_networks/dataLogger.php?data=1233212321232123 HTTP/1.0");
  // http://www.levinegabriella.com/understanding_networks/dataLogger.php?data=123
    client.println();
  }
  else {
    // kf you didn't get a connection to the server:
    Serial.println("connection failed");
  }
}

void loop()
{
  // if there are incoming bytes available
  // from the server, read them and print them:
  if (client.available()) {
    char c = client.read();
    Serial.print(c);
  }

  // if the server's disconnected, stop the client:
  if (!client.connected()) {
    Serial.println();
    Serial.println("disconnecting.");
    client.stop();

    // do nothing forevermore:
    for(;;)
      ;
  }
}
two sides of arduino
soon to come: Scale, third side, more detail, more sensors

Open_source Rapid Prototyping

Rapid Prototyping, and open-source 3D fabricators
From idea to item in 2 hours!
http://www.palonenlabs.com/PalonenLABS/Projects/Merkinnat/2010/10/31_3D_printer.html
http://wiki.makerbot.com/cupcake
I am an open, hackable robot for making nearly anything.
Overview
The basic structure of a MakerBot is:
A 3D positioning system.
A toolhead that does work.
Electronics to drive it.
WHAT IS THE DIFFERENCE BETWEEN THE CUPCAKE AND THE fab@home
Find out more aout cupcake
are there other ones out there?
The Fab@Home Project is an open-source mass-collaboration developing personal fabrication technology.
It makes DIY 3D fabrication possible from home. It is a widespread group, started in 2006, comprised of members developing novel hardware, software and other tools for digital fabricators, as well as and users using it to make unique items.
http://www.fabathome.org/wiki/index.php/Fab@Home:Choose_Your_Fabber
http://creativemachines.cornell.edu/allresearch
Create a web page with your research and link to the entry below
On the date mentioned, be prepared to give a 5-10 minute presentation.
Don’t just search online, call or email service providers.
Your research should include the following:
DIFFERENCES: fab at home is an academically developed project
-price to make ?
-extruder vs.
Description of the fabrication method.
The fabrication is rapid prototyping / 3d printing:
single vs. dual syringe setup


syringes are powered (through two gears to a plunger) by a motor – the newest model 2 uses snap motors which can be powered using CAT-5 cables
images and videos of the machines and the parts it creates.
Materials supported by the machine.
It can print with any material that can be extruded through a syringe and retain its shape at rest – this ranges from silicone to chocolate frosting to biomaterials.
Tools needed:
CupCake
A deposition tool is a device which is mounted on a Fab@Home chassis, and which can deposit material in a controlled fashion to allow the Fab@Home system to build up a three-dimensional object, layer by layer.
dual or single syringe tool
if you want to do plastic printing: a thermoplastic tool can be used
A milling/cutting tool is an alternative attachment for the Fab@Home that converts it into a CNC or foam/vinyl cutter.
For example: Dremel Milling tool, vinyl cutting tool,
Sizes supported by the machine.
Special design considerations (number of axis, strength of material, wall thickness)
Don’t know if this fits in this category: one thing that really interests me is the : LPC2148 microcontroller chosen. Why?
National, on-line and local service providers.
Pricing, per parts, and if there is a tooling/ setup cost
if you’re not so into the DIY aspect, you can buy the kit : for a fab@home 2 syringe system kit – 2500 dollars;
There is a Fab@home catalog with all the items available as a kit or separate. But they are also off the shelf (home depot, radioshack, Ponoko, mcmaster, saelig, sdp/si)
you can ALSO order a fully assembled 1 or 2 syringe system for 2500 or 4500
Parts list: single syringe, Model 2
Download CAD files for all the system parts also (like the chassis, which is generally custom made out of plexi)??
File type requested for fabrication(DXF, STL…)
CupCake:
1. Find or design a 3D model (.STL) of your thing.
2. Use Skeinforge to convert your STL into a GCode file.
3. Use ReplicatorG to run the GCode and build the thing.
Fab@Home:
open-source studio program to manipulate geometries – Model 2: new standardized hardware and software interactions that support user-developed hardware and software programs


Model 1: Standard electronics :
The Fab@Home Model 1 standard electronics package includes:
An LPC-H2148 Microcontroller, the brain of the Model 1, with a USB connection to your personal computer
A Xylotex 4-Axis stepper motor amplifier, to provide the power and control signals to the motors which move the Model 1
A Winford Engineering DB-25 breakout board, which simplifies the connections between the amplifier board and the microcontroller
Various cables
Or an electronics variant
Model 2 :
uses Snap motors (integrated servo and controller modules, run off cat 5 cables)
hardware is off the shelf: software is opensource a C++ library is underway
wide range of materials – silicone, cement, stainless steel, cake frosting, and cheese. Some of our finished products include a battery, a flashlight, a bicycle sprocket, toy parts, and various food products


circuits for later
TIP120
FRED Photopopper
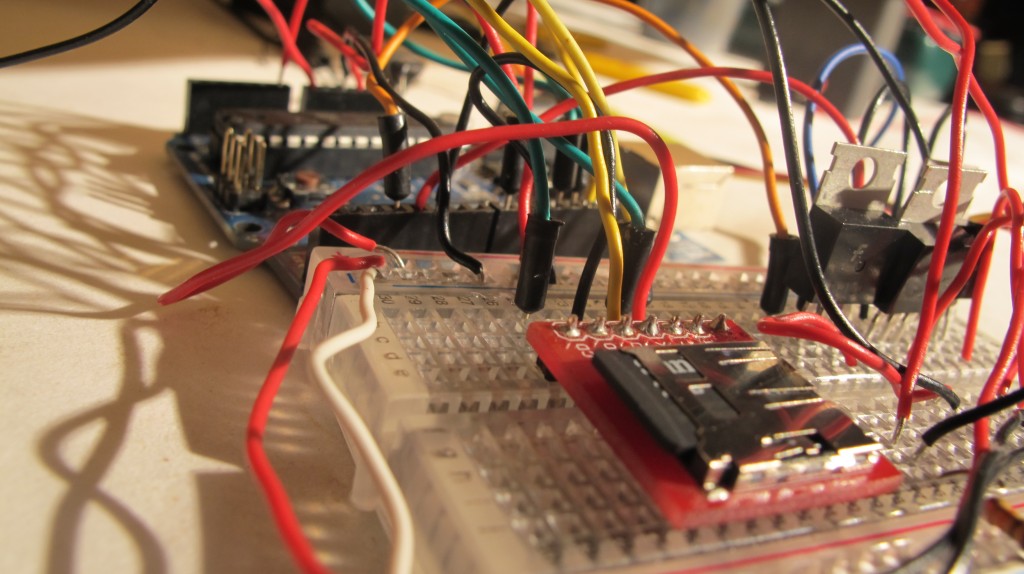
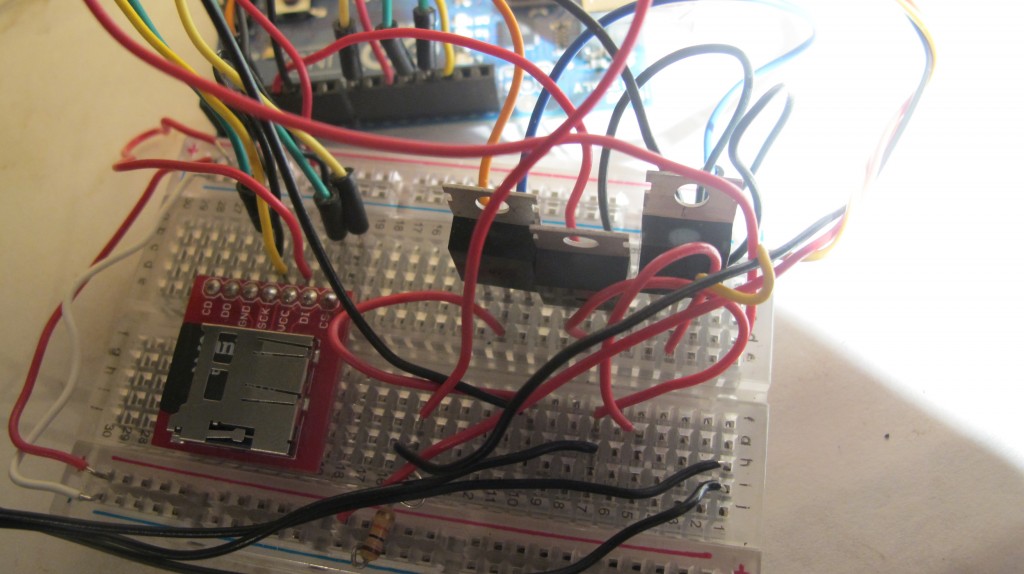
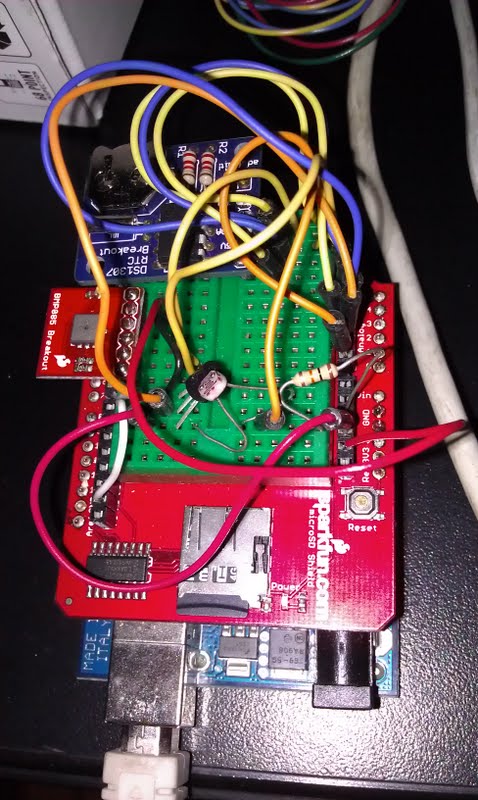
Solenoids and Data logging shield and RTS
humidity, air pressure, photocell, rts, data shield etc…
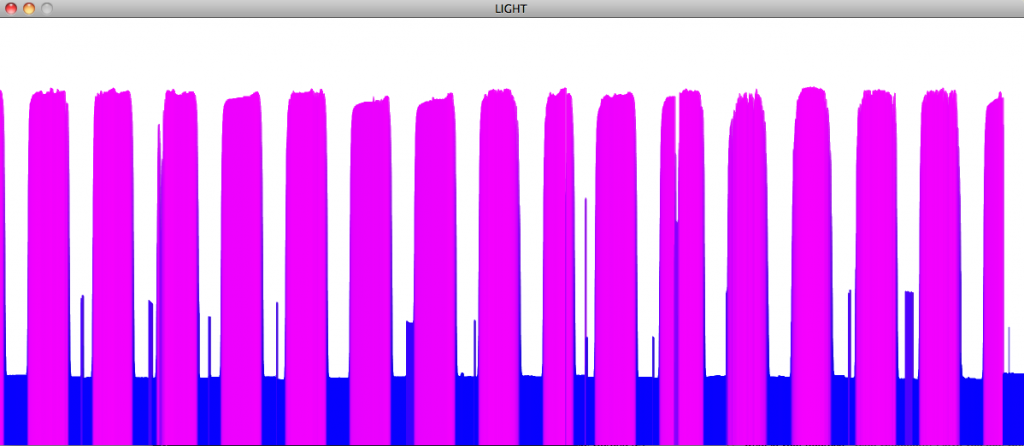
bytelight over time
Some visualizations of the colors of ByteLight over the course of a month

And this is zoomed in on two weeks in May:

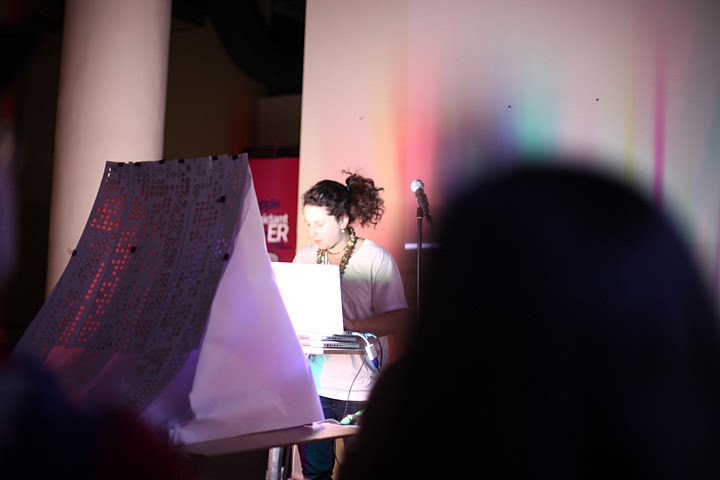

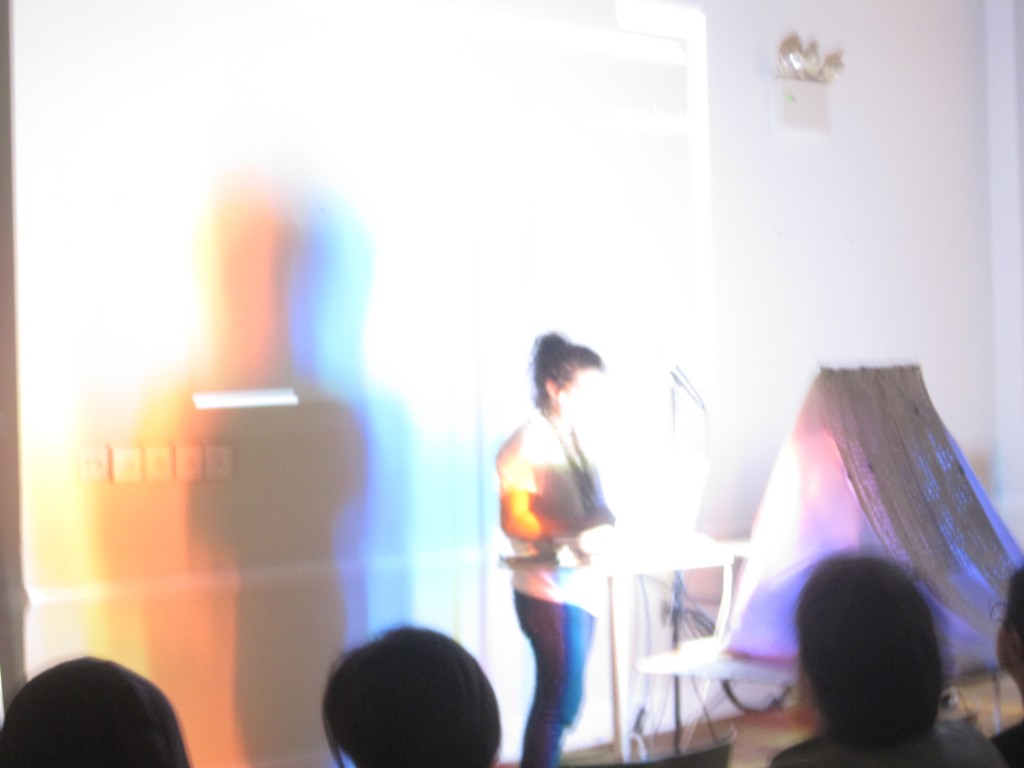

The Human Baud Repeater
My wish is to be inside a pixel.
I also want to translate ascii to baudot.
I also want to translate nonverbal communication into code.
The earliest standard character encoding to facilitate the transmission of data (basic text messages)
baudot – (1870, Emile Baudot, International Telegraph Alphatbet 1)
-a bit ironic to use because as soon as ascii was invented (which sent 7 or 8 bits per character) a keyboard was more suited than a five key system (similar to a piano keyboard).
-transmitters typed at 30 words per minute
-radio based teleprinters, 20th C
-US Army (1940s), weather transmission, Western Union teletype

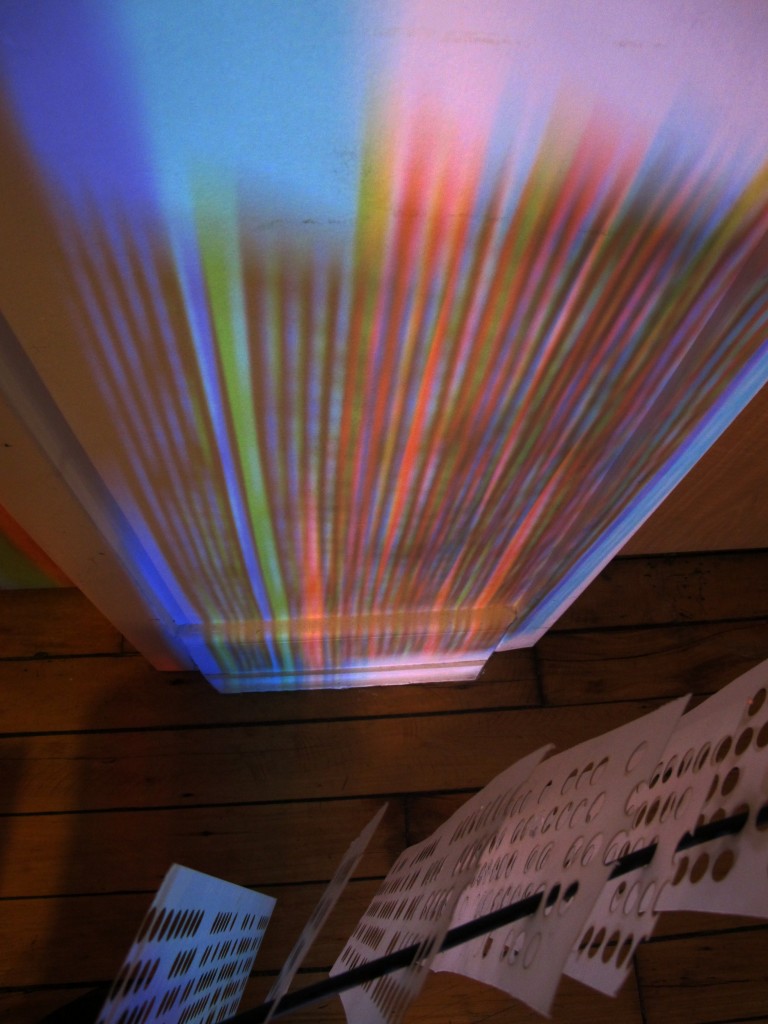
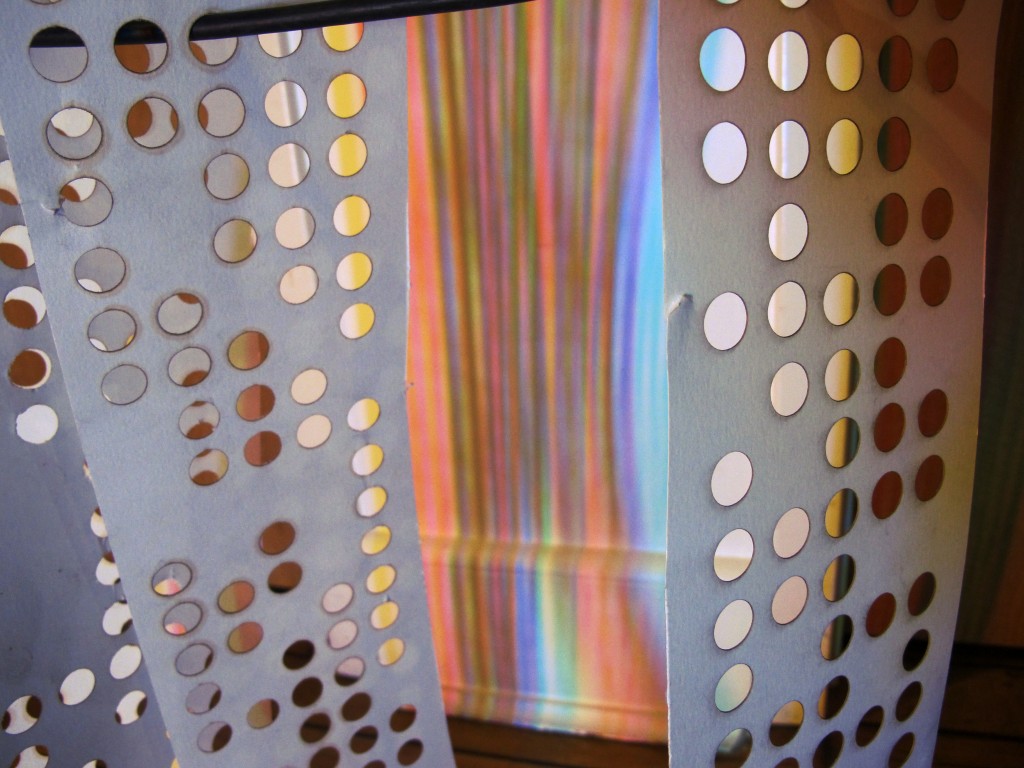
A character set, to represent each character in the alphabet as a series of 5 bits, with a shift symbol to represent capitals/special characters, and control characters characters (carriage returns and linefeeds). It is made to transmit information over radio signal or telegraph tower.
Baudot keyboard: 
perforated copy of the message on tape


Baud rate:
number of symbol changes made to the transmission medium per second (measured in symbols/second)
Carriage return 00100
Line feed 11011
Shift to figures 11111
Shift to letters 00010
ASCII: 1963 – 7 bit encoding scheme
human relay / repeater:
Swan Lake repeater, Winema NF

Surface Automotives

![]()


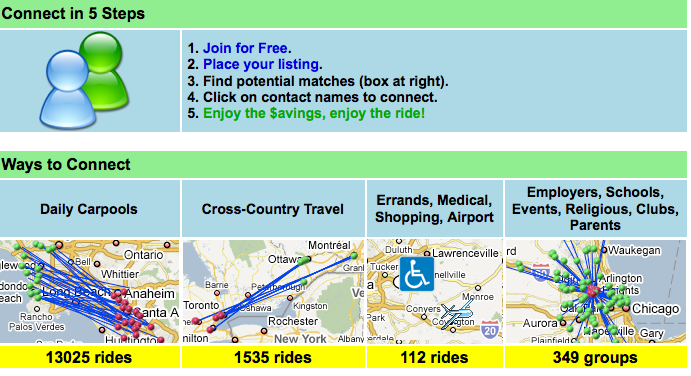
eRideShare.com
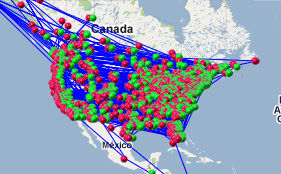
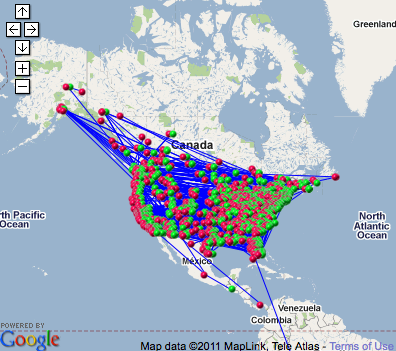
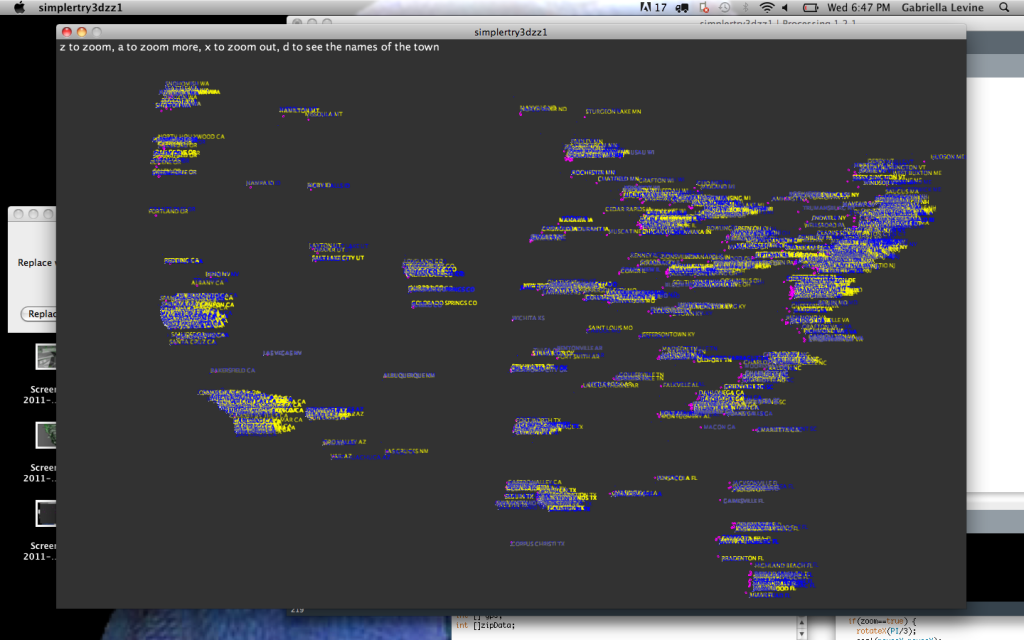
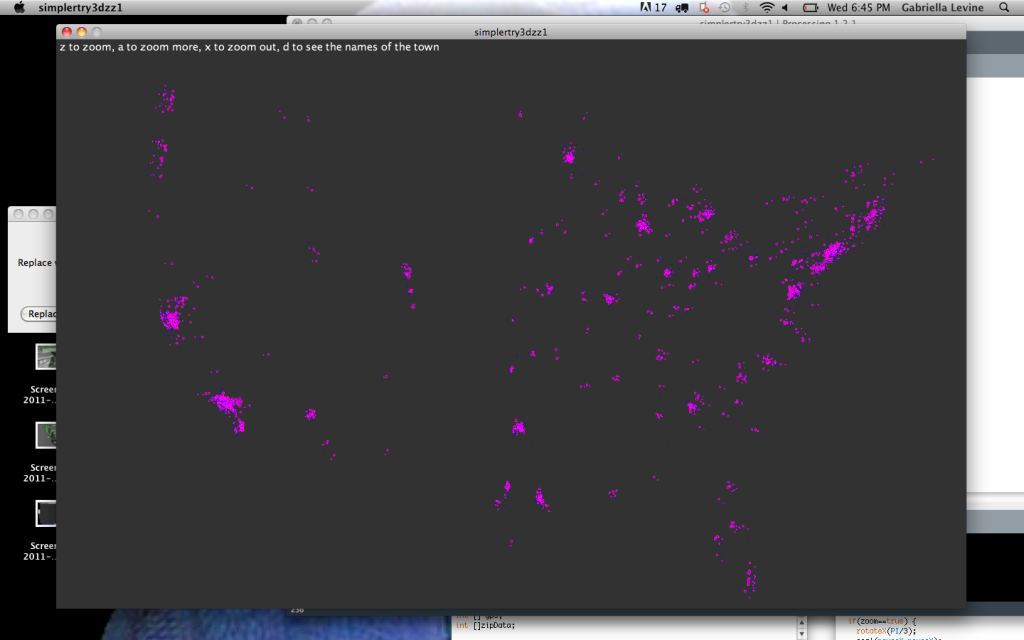
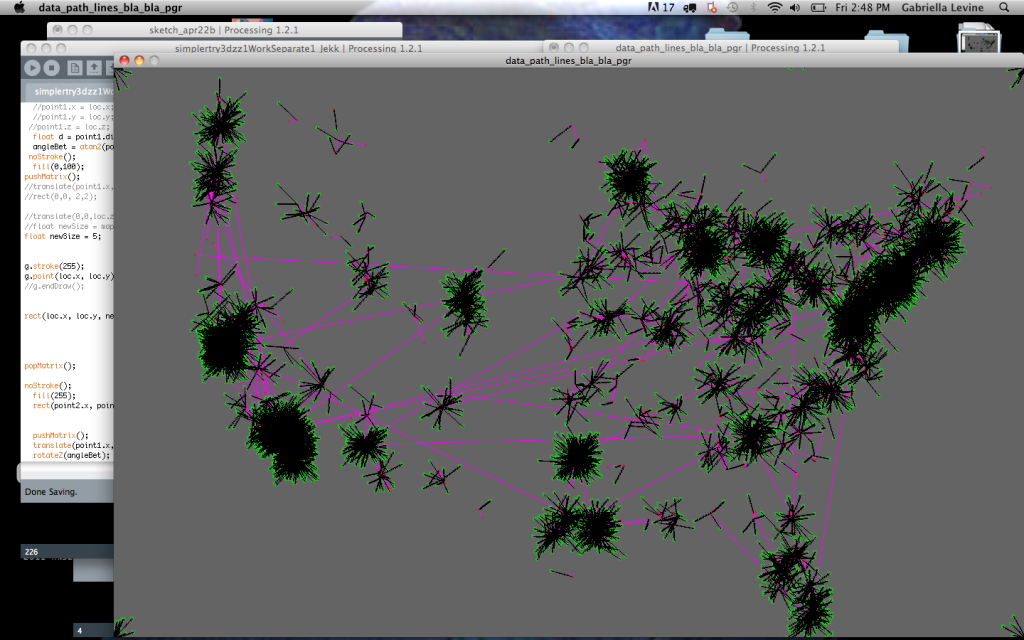
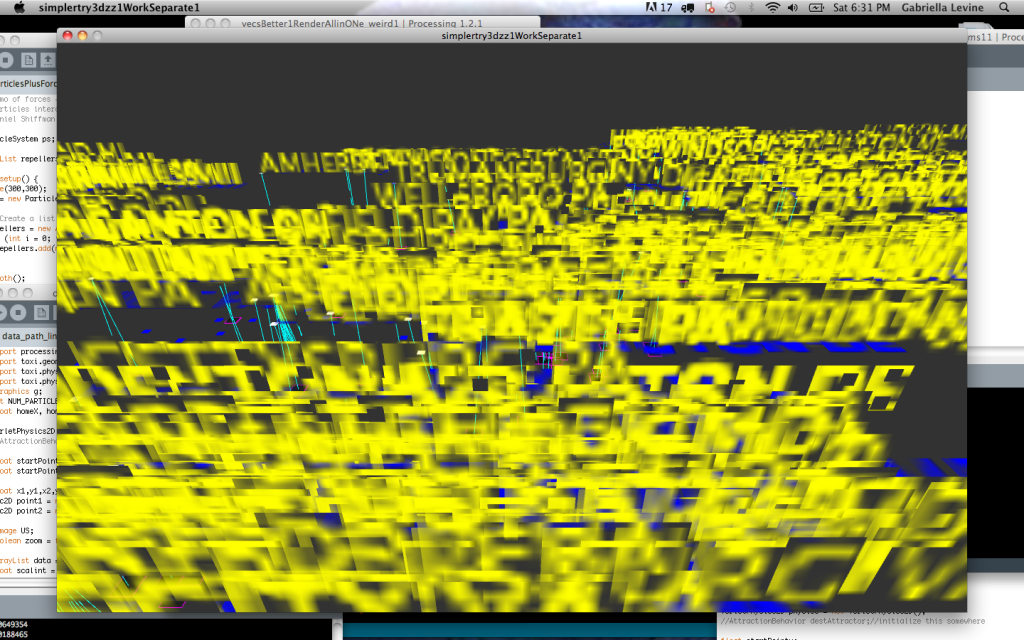
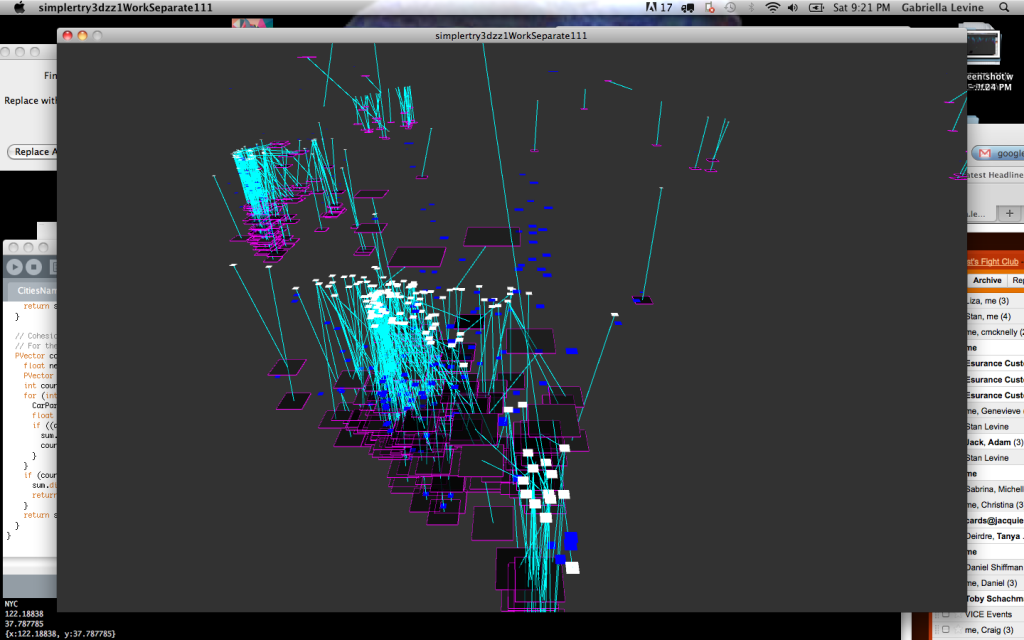
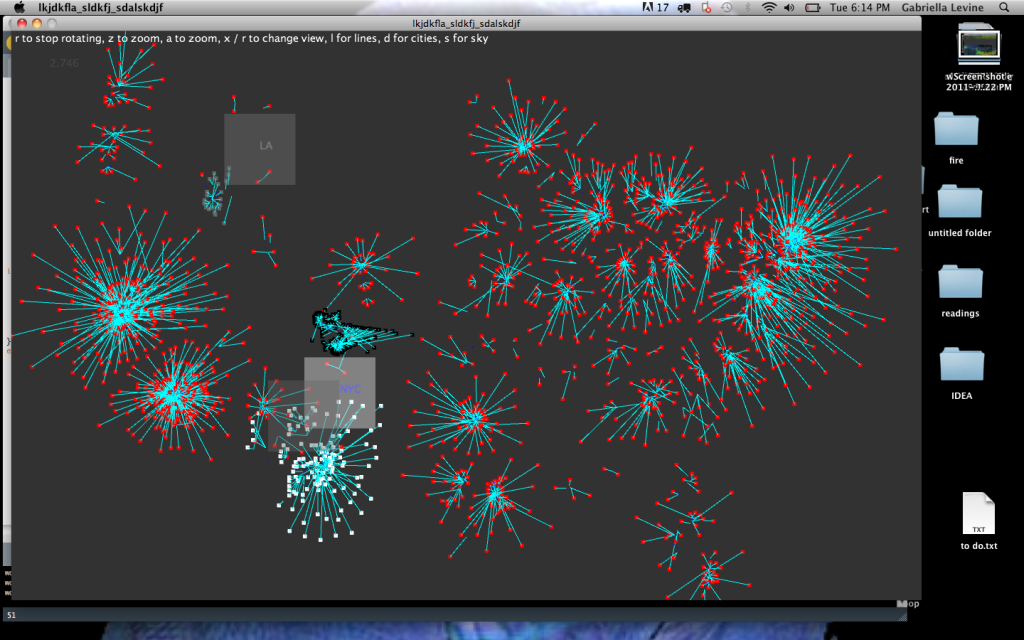
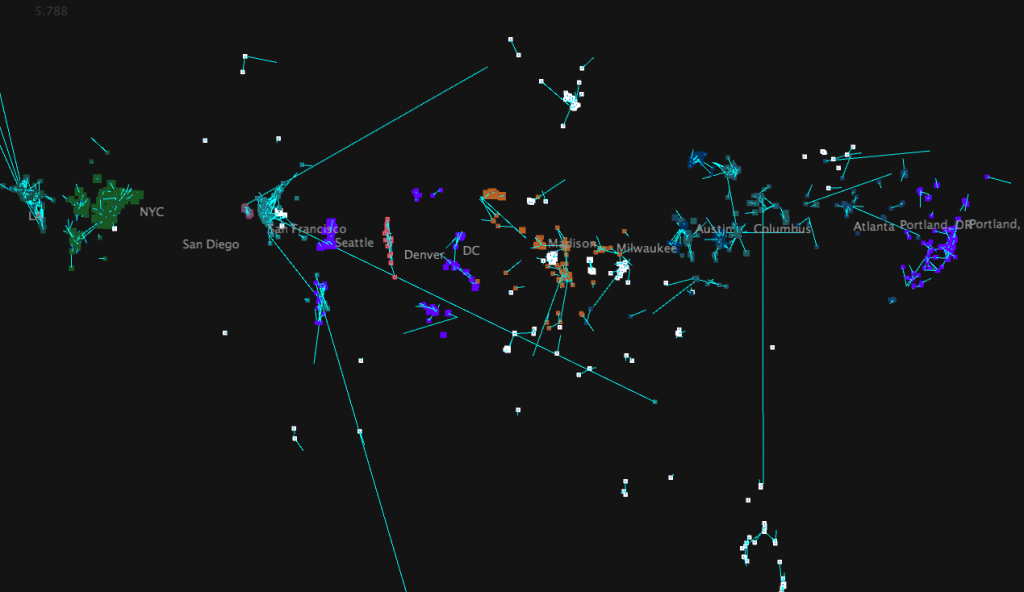
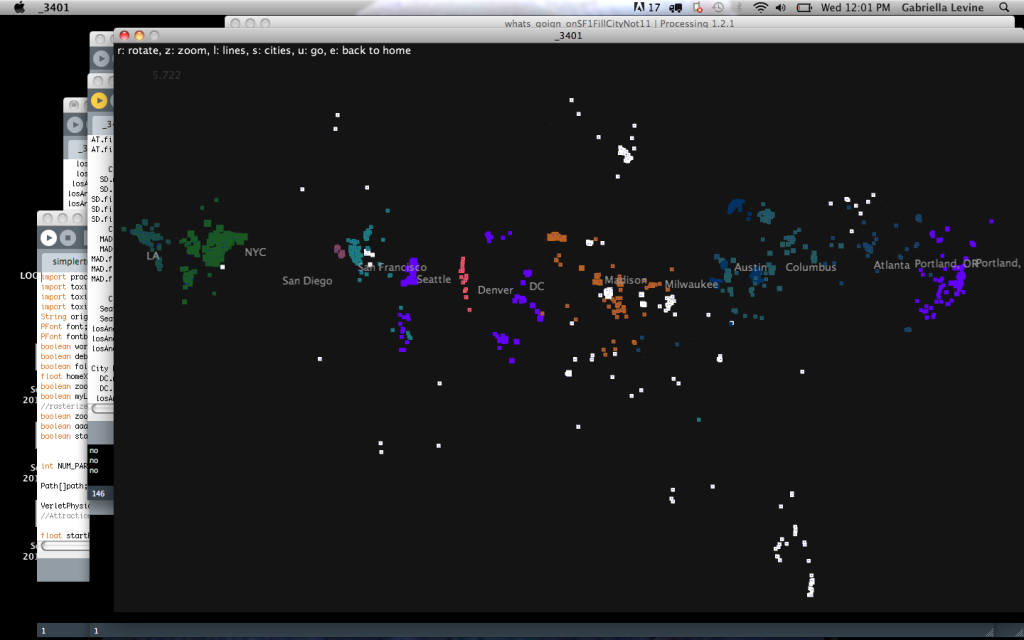
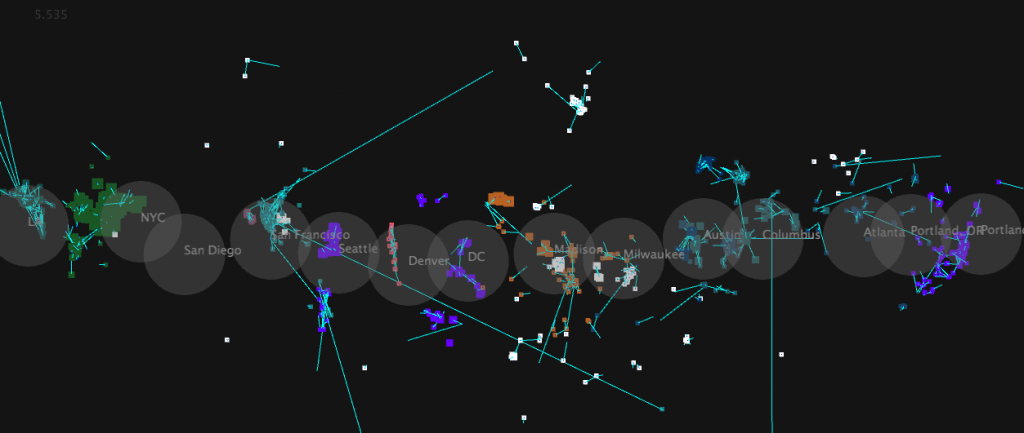
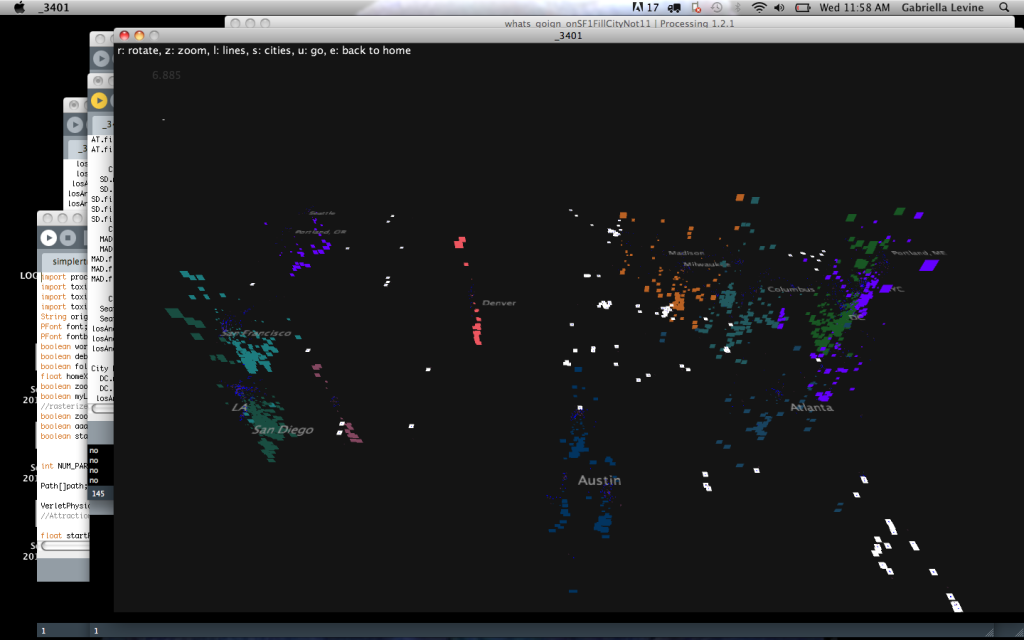
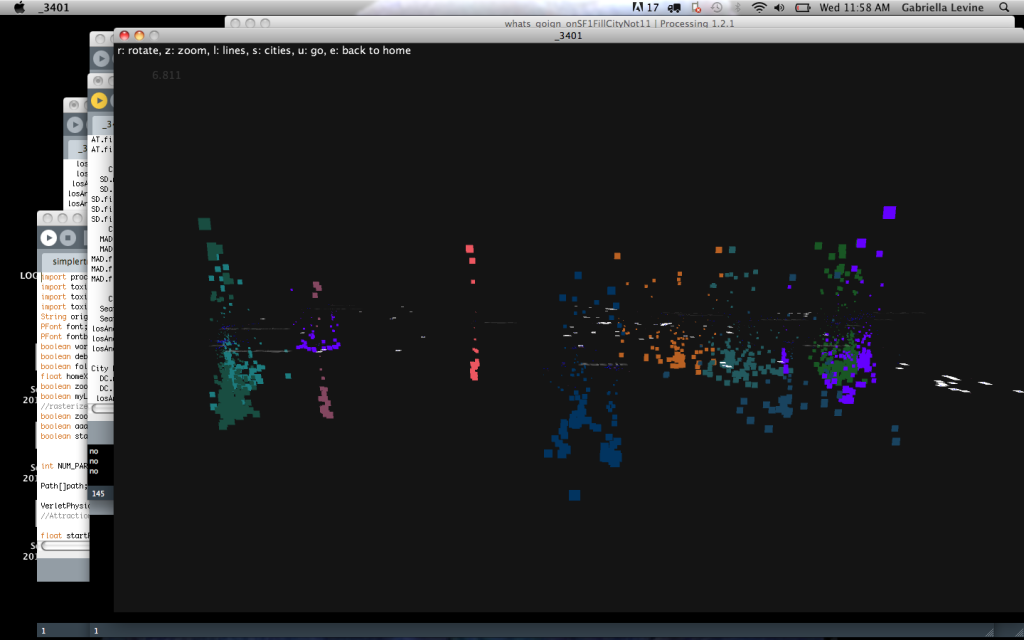
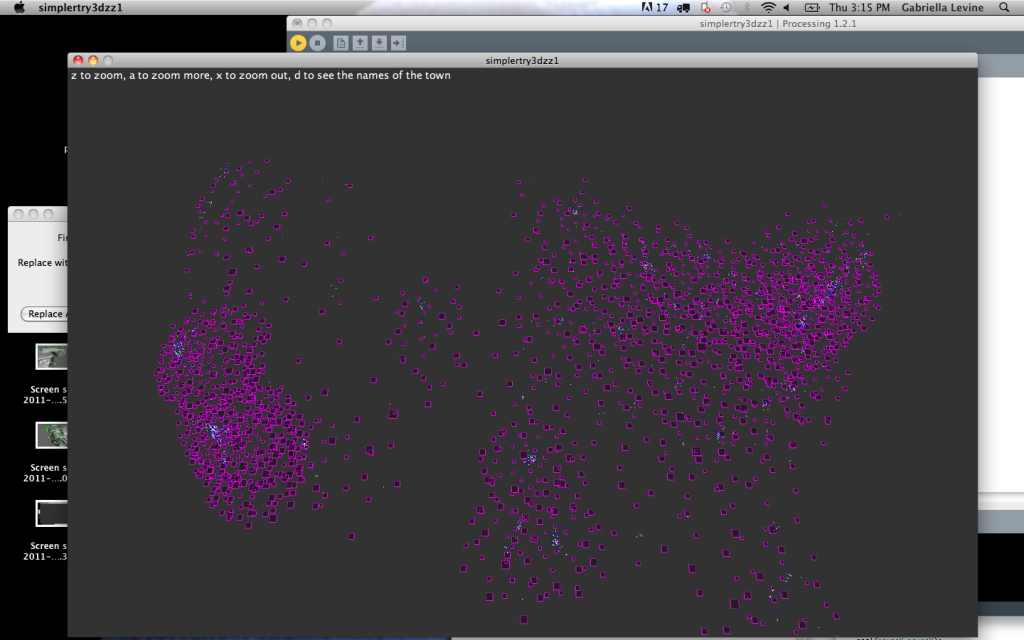
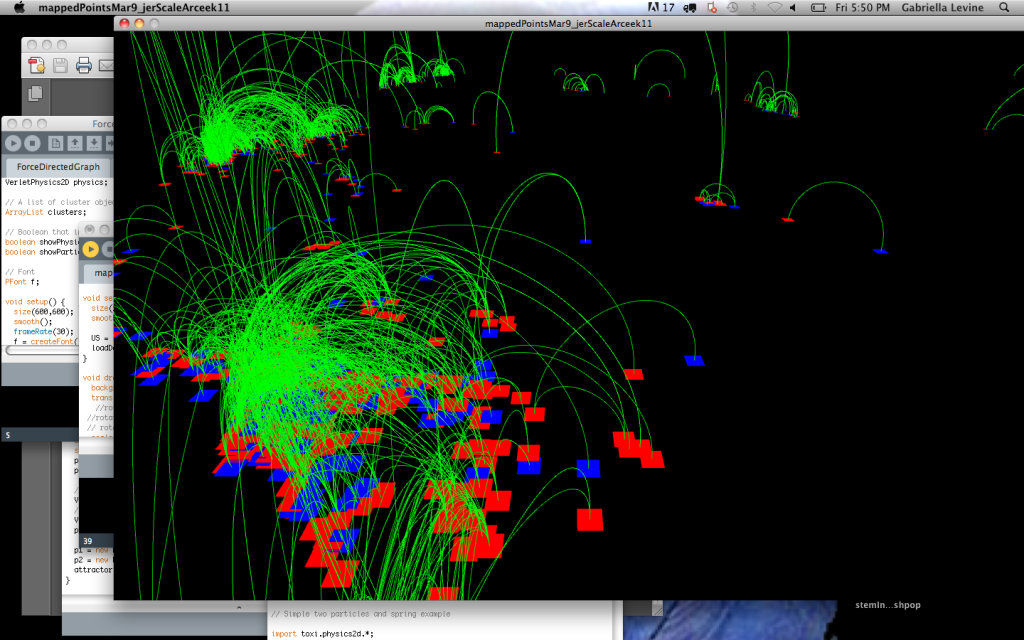
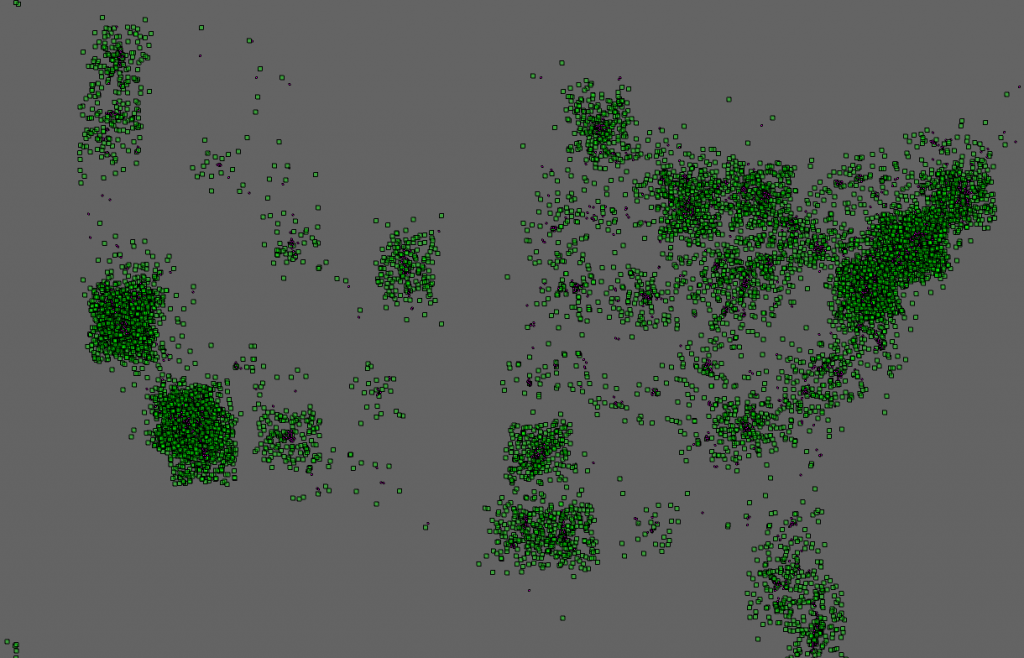
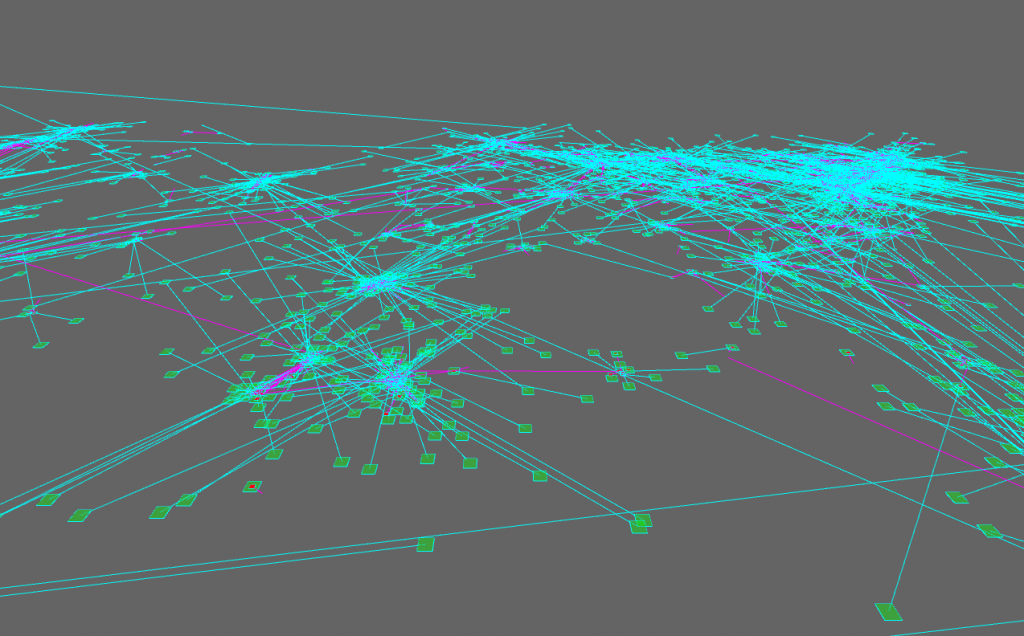
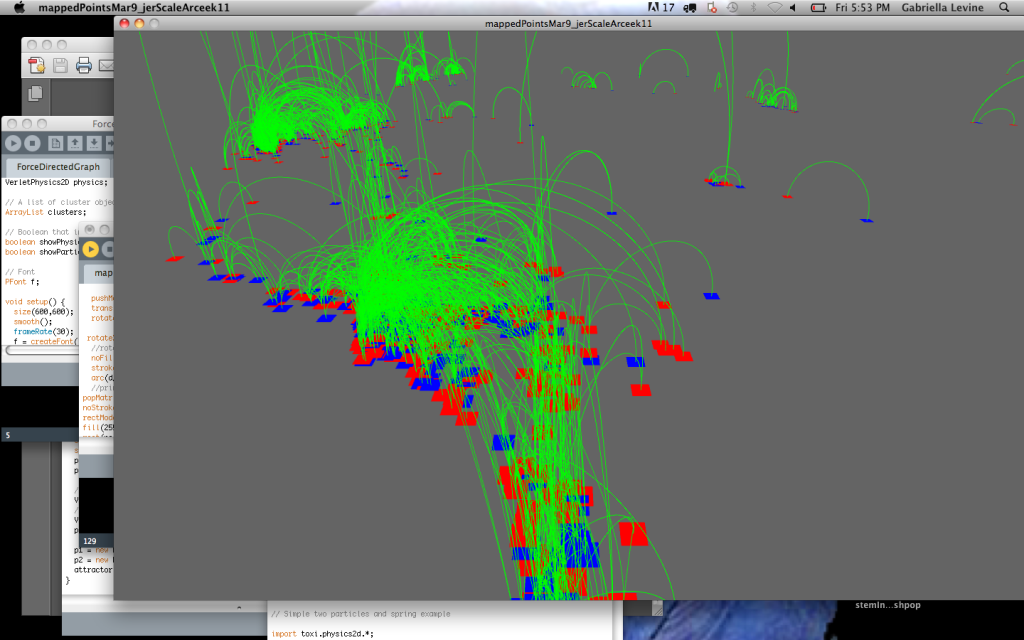
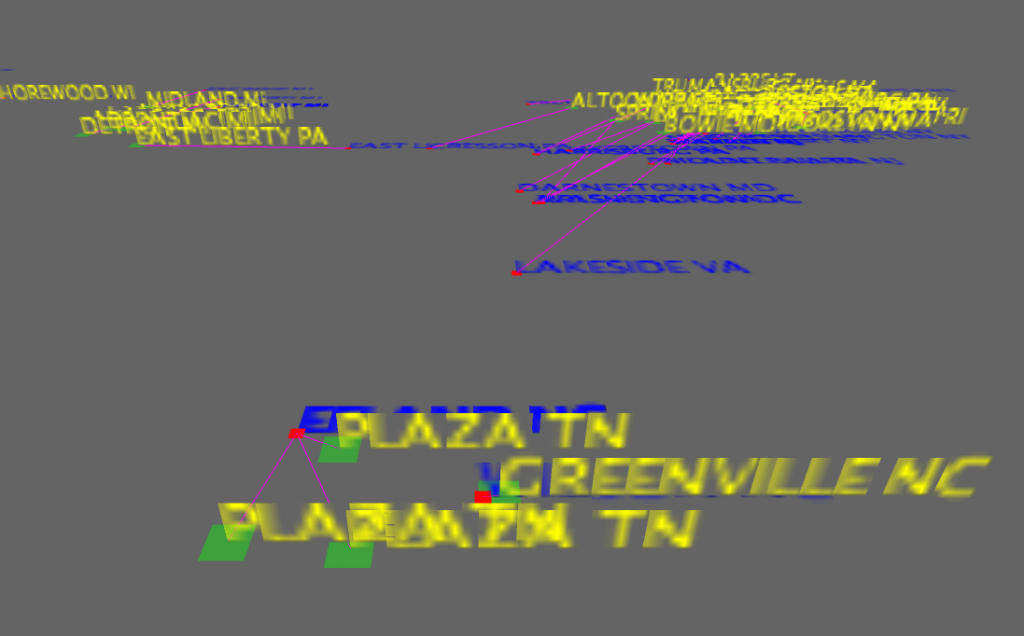
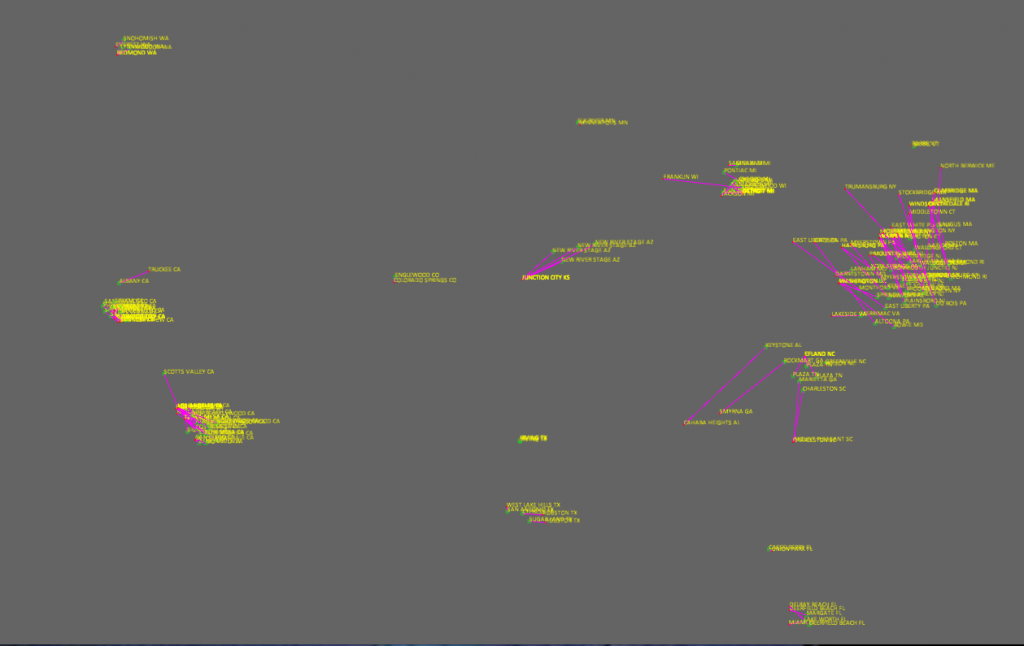
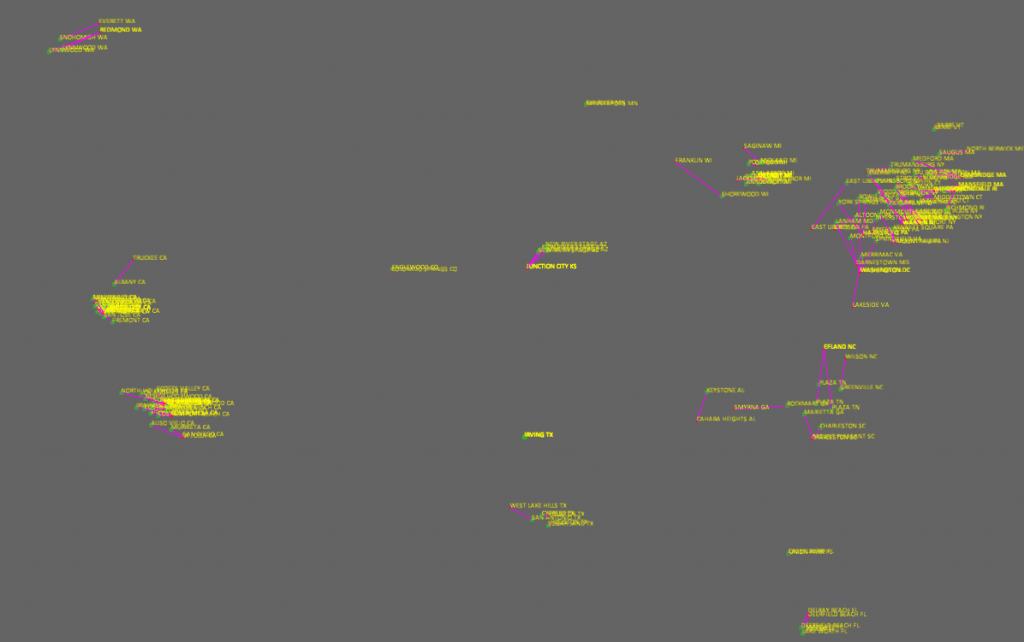
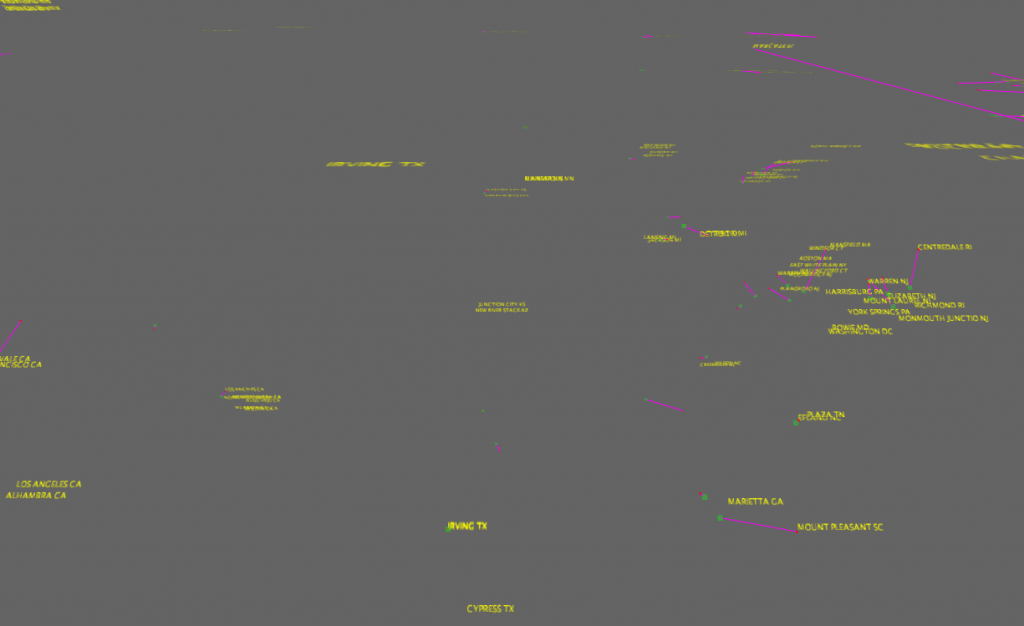
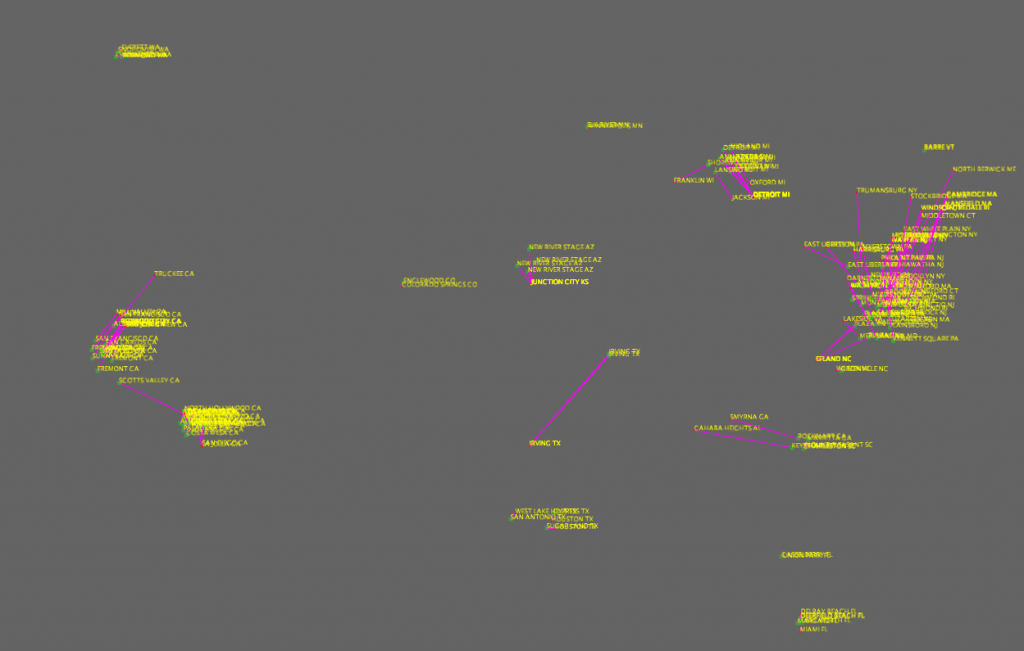
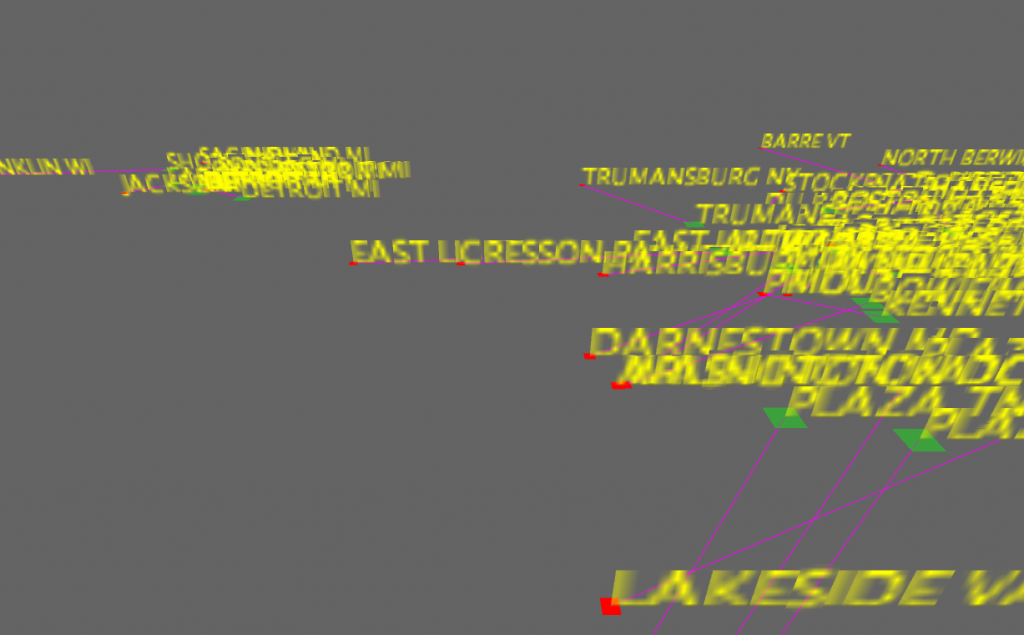
eRideShare.com is a website where people can easily connect and share rides. It is widely used throughout the world. Each day, there are about 10,000 ride share requests just in the United States. I’m using data from both short commuter ride requests as well as longer travel ride requests. This sketch is a representation of the rides occurring each day, with the temporal resolution adjusted so that each car particle leaves its home and travels to its destination when clicked on, or at random intervals.
I am pulling the ride requests each day – after visualizing the cars laid out geographically, I noticed a lot of activity in cities, especially in the coastal regions. There are many more short term ride requests, and many overlapping rides. I wanted initially to create an interactive map that the user could zoom into easily.
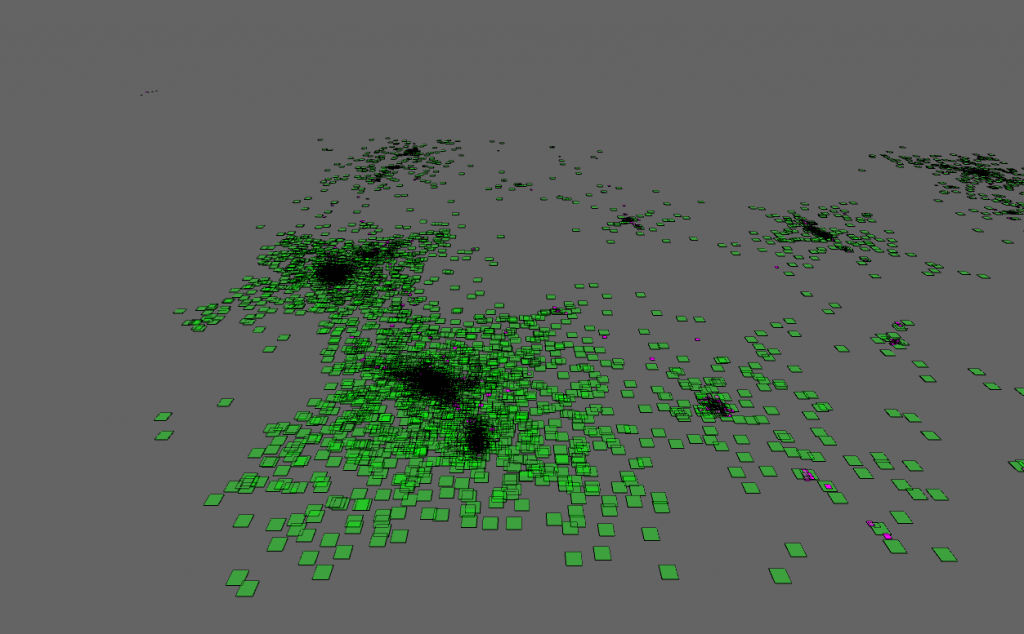
I decided to decontextualize the rides from their geographical setting in order to perhaps derive some new insight. So I assigned each car a city, and can arrange the cities in a line, in a circle, in order of population…
Technically:
I plotted it on google maps, but wanted to make the car particles “alive” and mobile.
So without an API (google made it difficult for me to get the gps coordinates as strings) I’m using Python and a data set from census.gov of zipcodes converted to GPS lats and longitudes, to parse
“98337,98409| 33063,33442| 95602,95821| 95123,94043| 90815,92618| 90815,92618| 90815,92618| 07060,07054| 92603,90731| P0E1G0,L4N2M3| 94117,94941| 01778,01748| 90813,92626| 20720,20004| 08724,07016| 18360,11050| ”
into:
122.071562 47.895381 SNOHOMISH WA 122.200571 47.988431 EVERETT WA
78.390533 40.50524 ALTOONA PA 78.586068 40.460779 CRESSON PA
78.091224 38.233937 MONTFORD VA 77.093197 38.887103 ARLINGTON VA
71.35741 42.287476 NATICK MA 71.125611 42.377045 CAMBRIDGE MA
83.279236 42.643856 PONTIAC MI 83.282892 42.822272 OXFORD MI
Further:
-Adjust the speed and the graphics (cars, houses, garages)
-web app, temporal accuracy
-Take into account the size of the cities
-Show route information better
-Heat map? other effective visualization tools?
-Interesting information about carpooling and sharing (individual cities,  per capita, cartogram? different modes of city arrangement)
-design?
–>Biggest thing I got out of it:
What can I learn from data? How can I represent it differently to extract different patterns?
Some iterations I went through:


Ferriferous progress
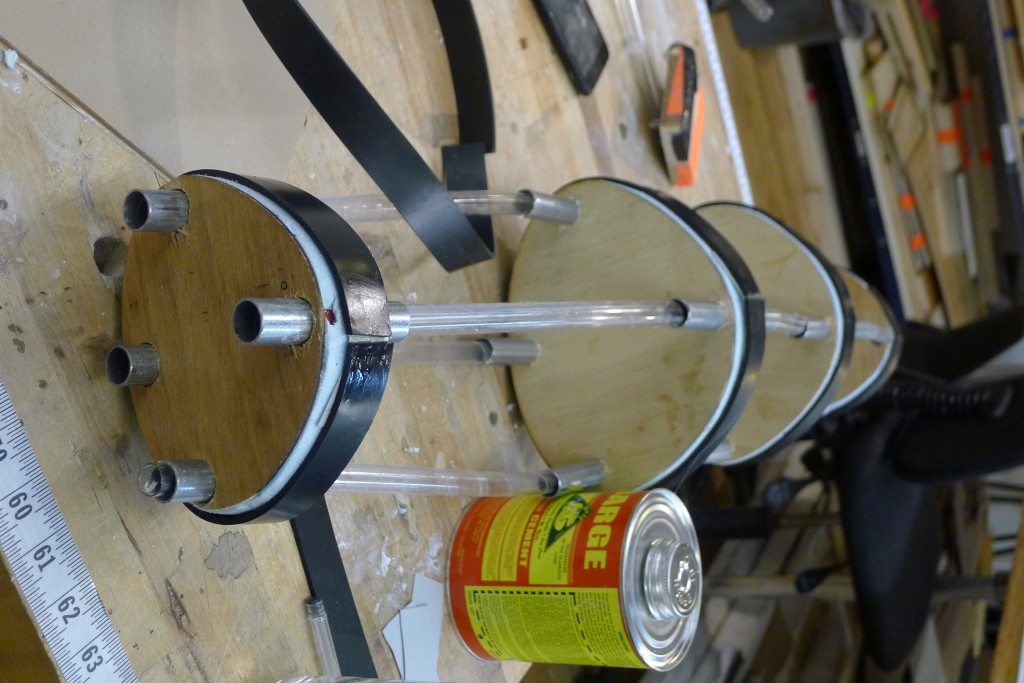
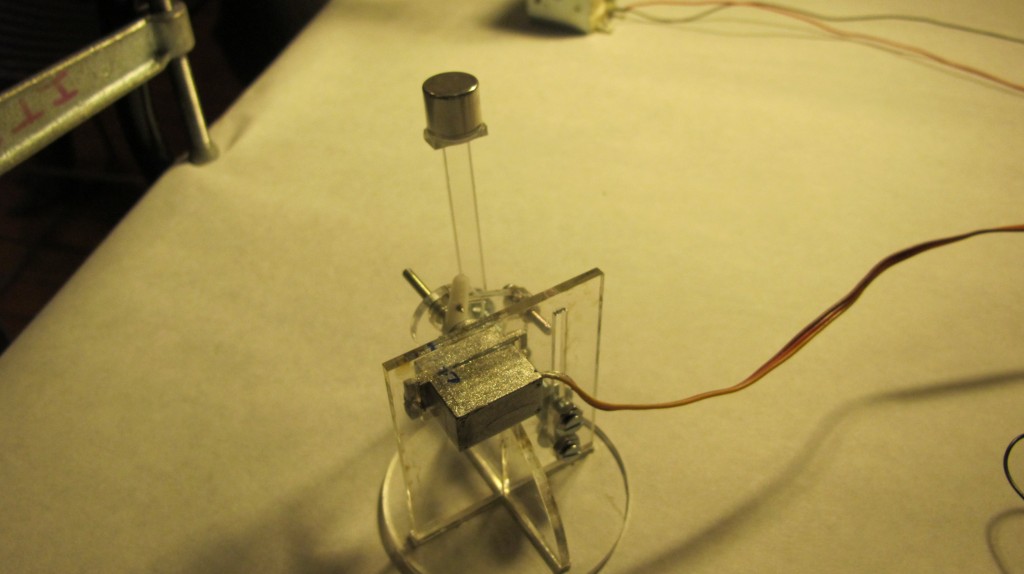
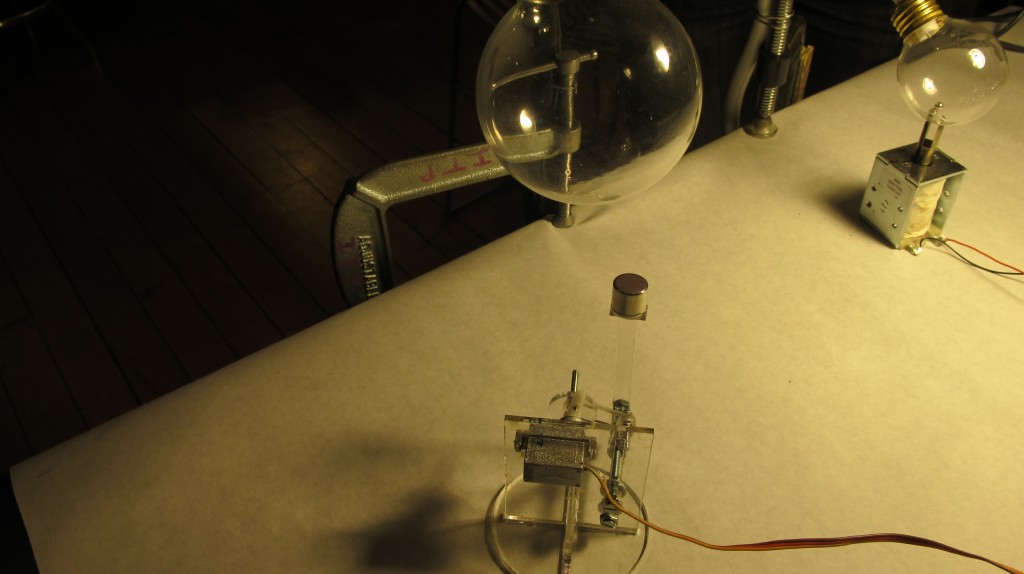
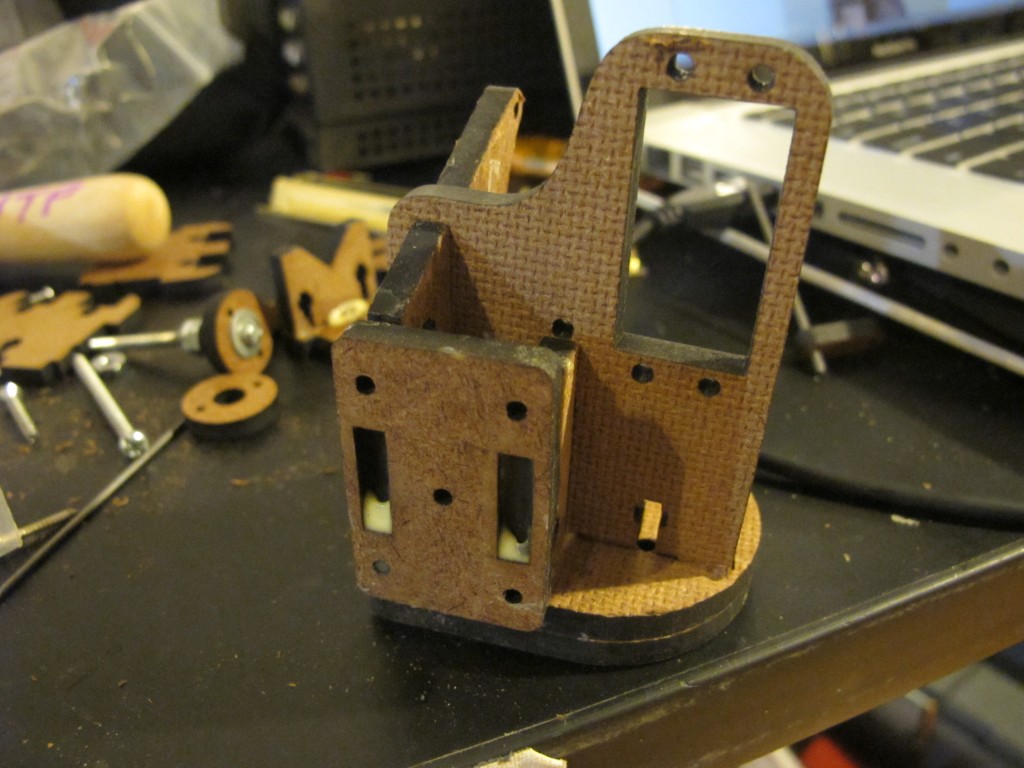
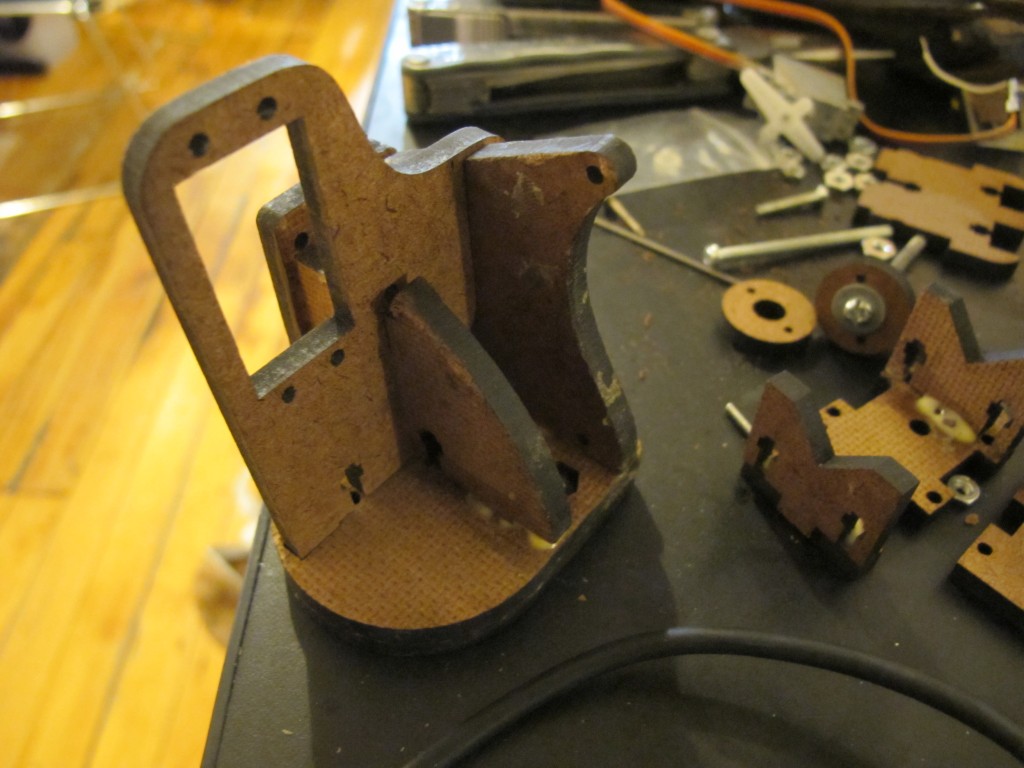
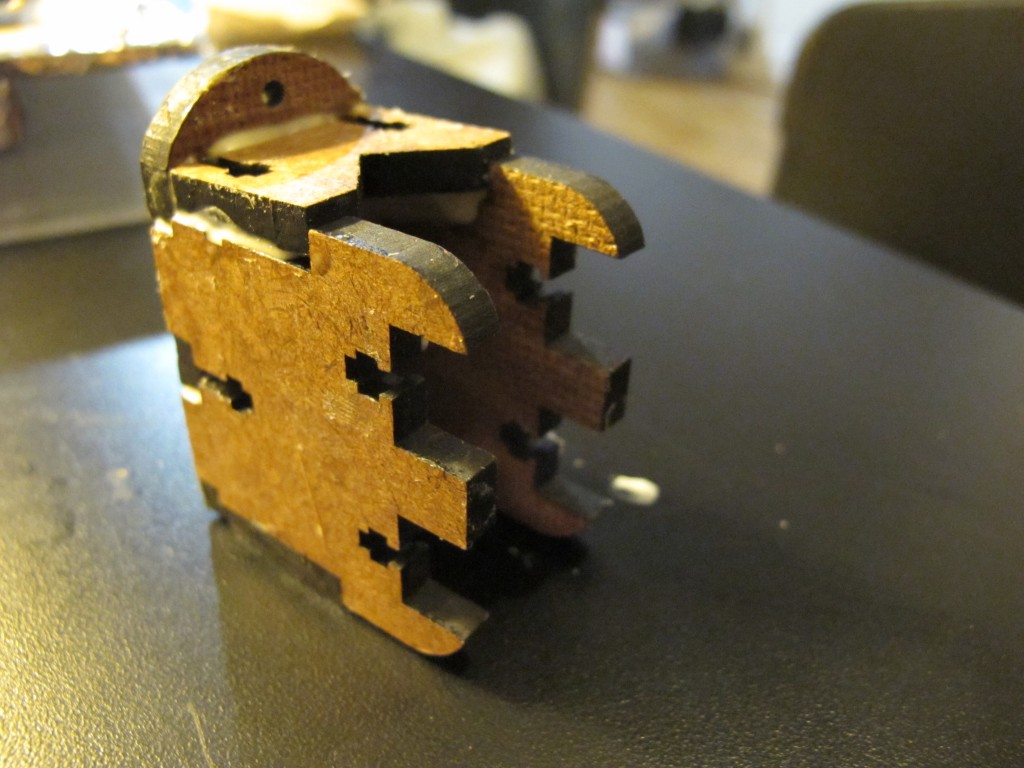
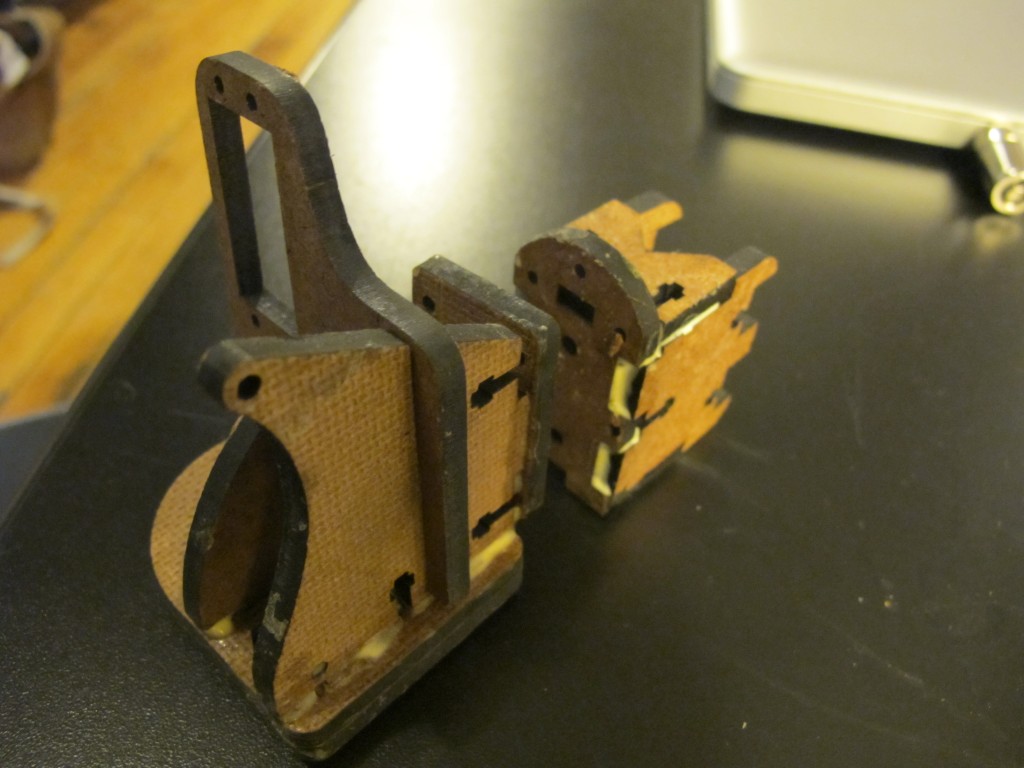
I made a prototype, based on MakerBot’s Unicorn PenPlotter, of a servo mechanism that will move vertically in linear motion:
Then we modified it to look simpler :


The circuit:

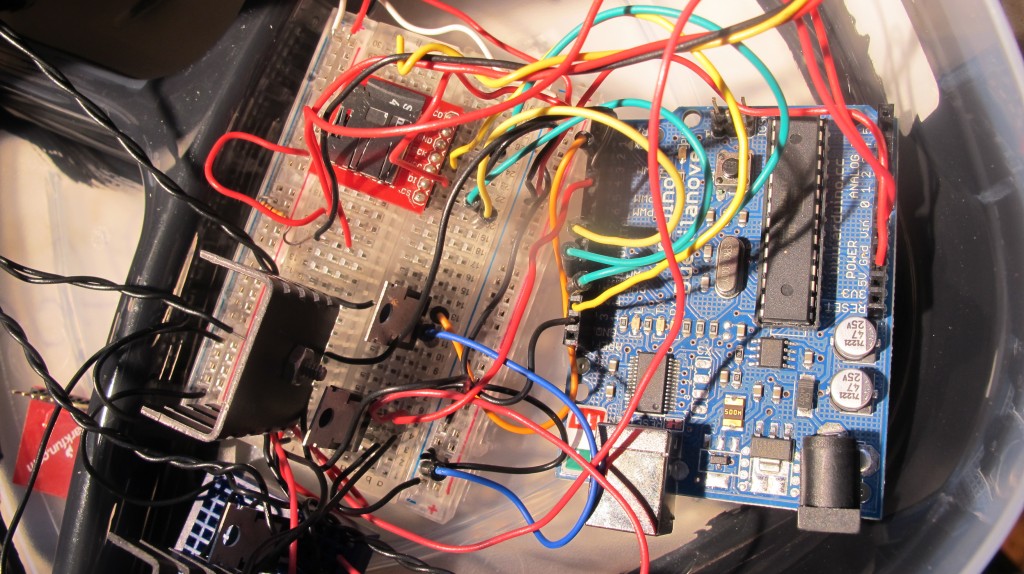
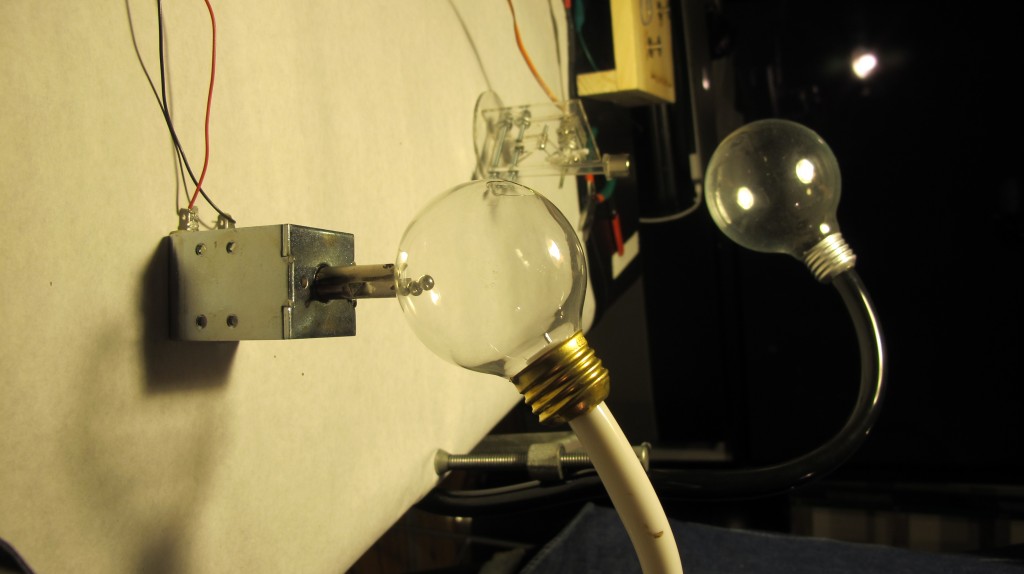
At first we thought we could use the solar kit to charge a 12V solenoid, which would, through arduino, read our data of solar light levels over the past month, and pulse an electromagnetic field through ferrofluid, thereby mapping our data at a condensed temporal resolution. However, although the solar kit has a 12 V battery, we were not getting nearly enough response from the solenoid because, perhaps, the charge controller limits the current? (I need to think through this more)


We also tried using different beam circuits to store voltage in capacitors then to discharge, pulsing a solenoid. Similarly, we could not quite get enough current.
We had a bit of trouble reading through the data from our micro SD card – We switched to the adafruit sd Card shield, and I think we might have been choosing the wrong chip Select pin? we couldn’t figure out why the file DATA.TXT was not opening correctly. After a while, we switched back to the sparkfun shield or the card reader, and it worked fine.
This is the code we practiced with, but later we got the data on the SD card to read directly onto the arduino (see below)
#include <Servo.h>
int changer = 1;
 int incomingData;//variable to read incoming data
Servo myservo;  // create servo object to control a servo
                // a maximum of eight servo objects can be created
 int servoState;
 int prevState;
  const int transistorPin = 9;    // connected to the base of the transistor

int pos = 0;    // variable to store the servo position
int myData[] = {1,2,3,4,5,6,7,8,9,10,11,12,13, 13,13,13,13,13,13,13,13,13,13,12,11,10,9,8,7,6,5,4,3,2,1};// = new Array[12];//1,myData2;


void setup()
{
    Serial.begin(9600);
       pinMode(transistorPin, OUTPUT);
  myservo.attach(9);  // attaches the servo on pin 9 to the servo object
Serial.print("Servo Data Test!!");

 }

void loop()
{


       for(int i=0;i<29;i=i++){
         if(i>12 || i<=1){changer*=-1;}
       int intt=map((myData[i]*20),0,20*13, 180,70);
       int solenoid = map((myData[i]*20),0,20*13, 700,1023);
          analogWrite(5, solenoid);
        myservo.write(intt);
       delay(50);
       }
  }
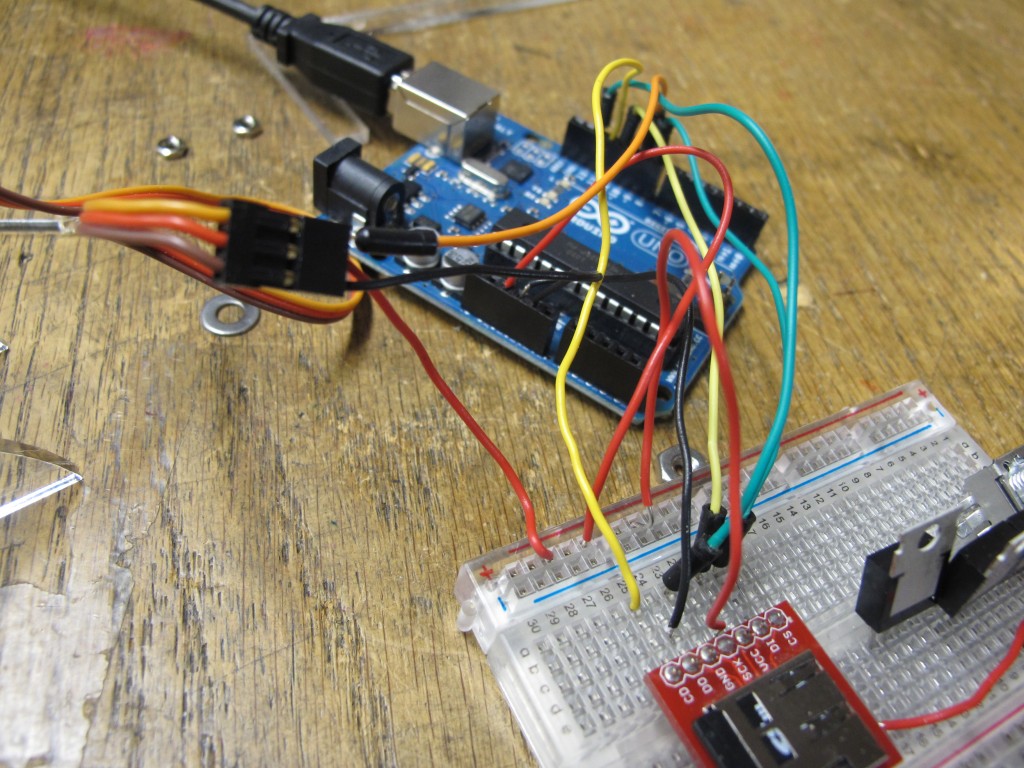
We are using the Sparkfun data logging shield
//CS pin : 8; VCC/GRNd; DO pin 12; DI pin 11
//using the sparkfun microsd data logger, (or the shield); writes millis and time in secs

#include <SdFat.h>
#include <SdFatUtil.h>
#include <ctype.h>

//Create the variables to be used by SdFat Library

Sd2Card card;
SdVolume volume;
SdFile root;
SdFile file;
 const int transistorPin = 5;    // connected to the base of the transistor
  int potValue1 = 0;               // value returned from the potentiometer
#include <Servo.h>
char name[] = "DATA.TXT";     //Create an array that contains the name of our file.

char contents[256];           //This will be a data buffer for writing contents to the file.
char in_char=0;
String line;
int index=0;                  //Index will keep track of our position within the contents buffer.
Servo myservo;  // create servo object to control a servo
void setup(void)

{
    Serial.begin(9600);        //Start a serial connection.
       pinMode(transistorPin, OUTPUT);
    pinMode(8, OUTPUT);       //Pin 10 must be set as an output for the SD communication to work.
    card.init();               //Initialize the SD card and configure the I/O pins.
  myservo.attach(9);  // attaches the servo on pin 9 to the servo object
    volume.init(card);         //Initialize a volume on the SD card.
    root.openRoot(volume);     //Open the root directory in the volume.
}
void loop(void){
   // file.open(root, name, O_CREAT | O_APPEND | O_WRITE);    //Open or create the file 'name' in 'root' for writing to the end of the file.

    //sprintf(contents, "Millis: %d    ", millis());    //Copy the letters 'Millis: ' followed by the integer value of the millis() function into the 'contents' array.
    //file.print(contents);    //Write the 'contents' array to the end of the file.

 // file.close();            //Close the file.

 file.open(root, name, O_READ);    //Open the file in read mode.
    in_char=file.read();              //Get the first byte in the file.
    //Keep reading characters from the file until we get an error or reach the end of the file. (This will output the entire contents of the file).

    while(in_char >=0){            //If the value of the character is less than 0 we've reached the end of the file.
        Serial.print(in_char);    //Print the current character
        //line = file.read();//read each line?
       // Serial.println(line);

       in_char=file.read();      //Get the next character


        float newFloat = map(in_char, 0,9,0,180);

        myservo.write(in_char);
        float solin_char= map(in_char, 0,9,500,1023);
        analogWrite(5, solin_char);
        delay(300);


    }
    file.close();    //Close the file
    //delay(1000);     //Wait 1 second before repeating the process.
}
Some more videos of progres and the mechanism:
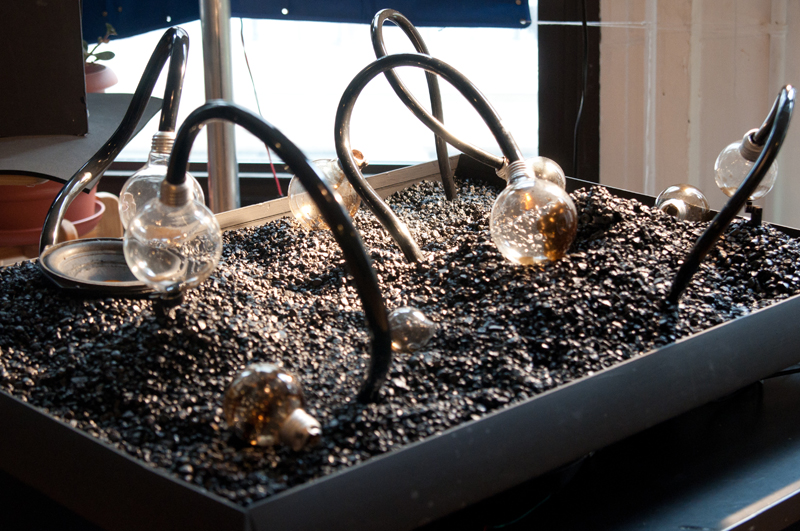
more with Ferrofluid and Solar Energy
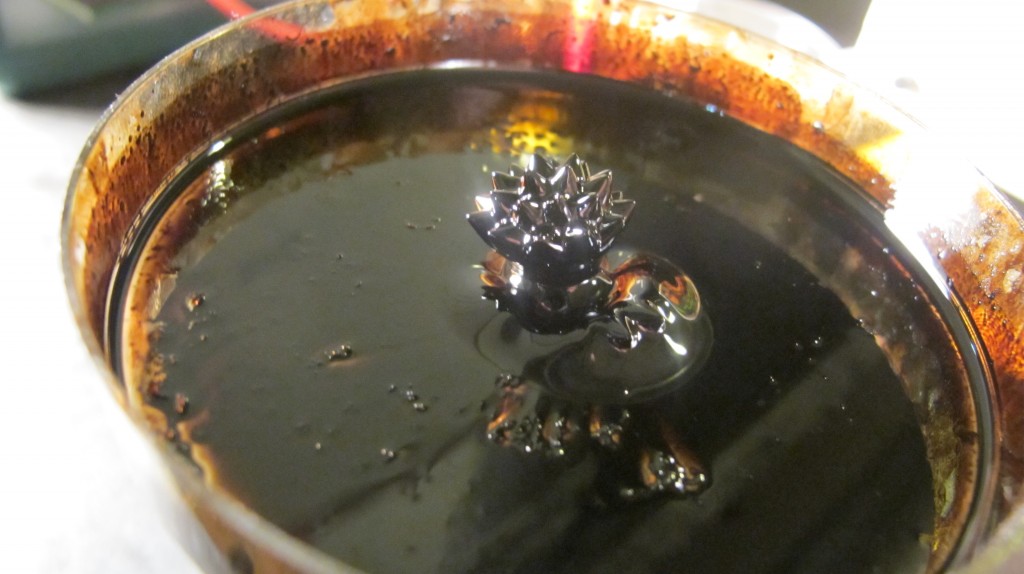
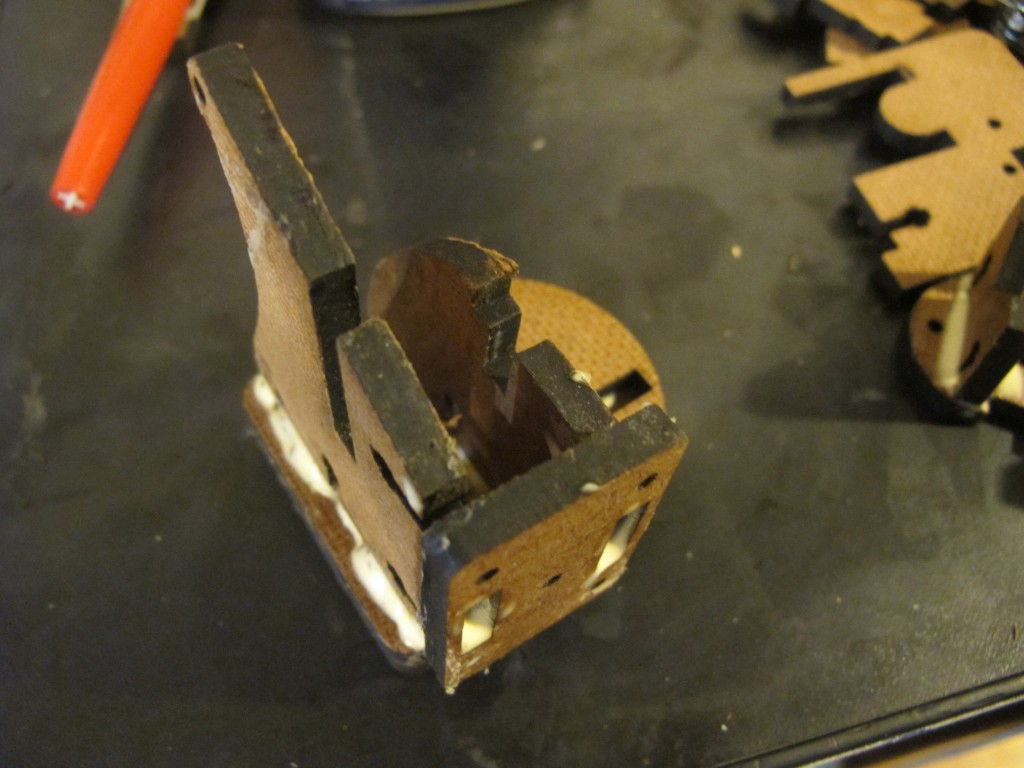
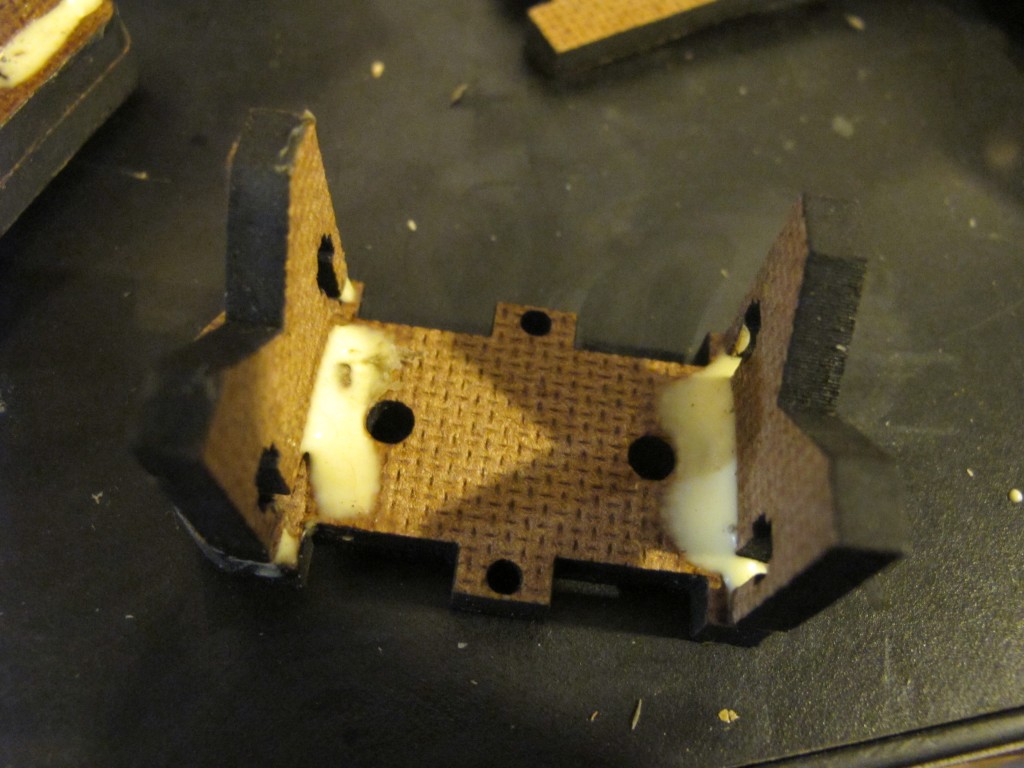
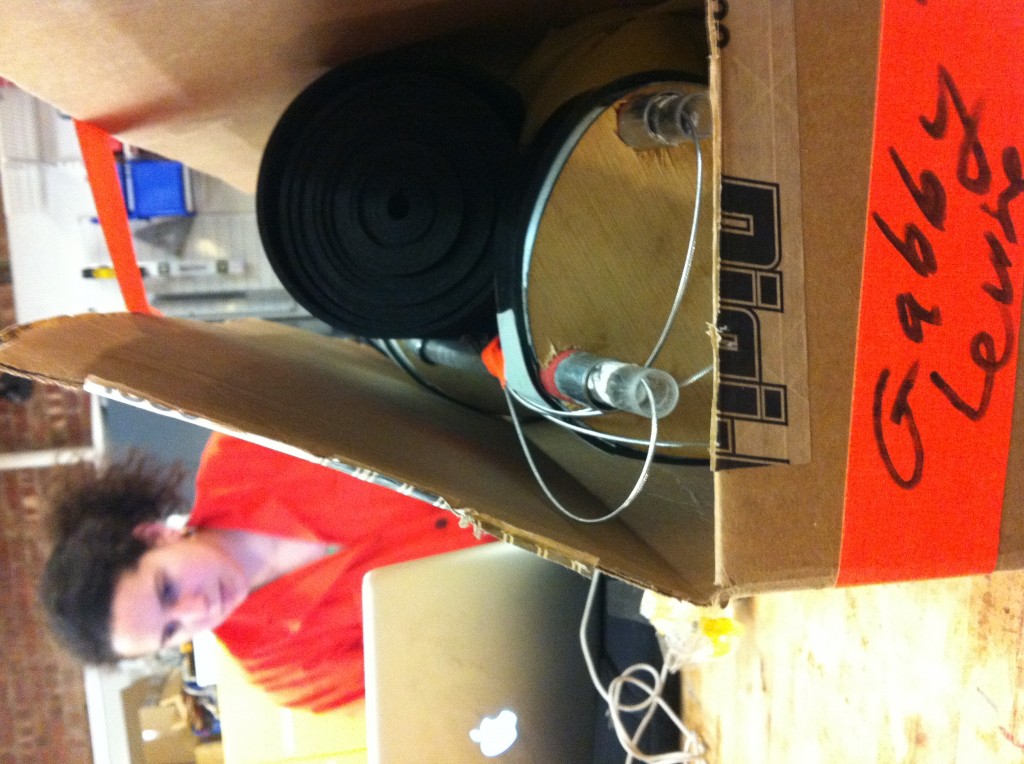
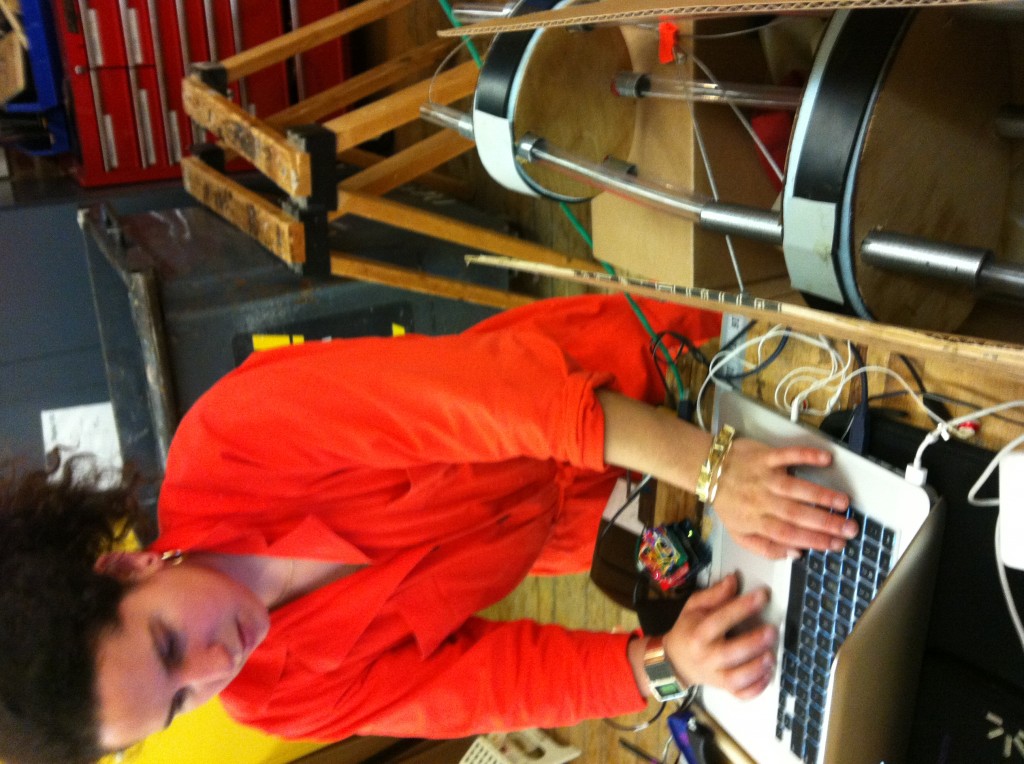
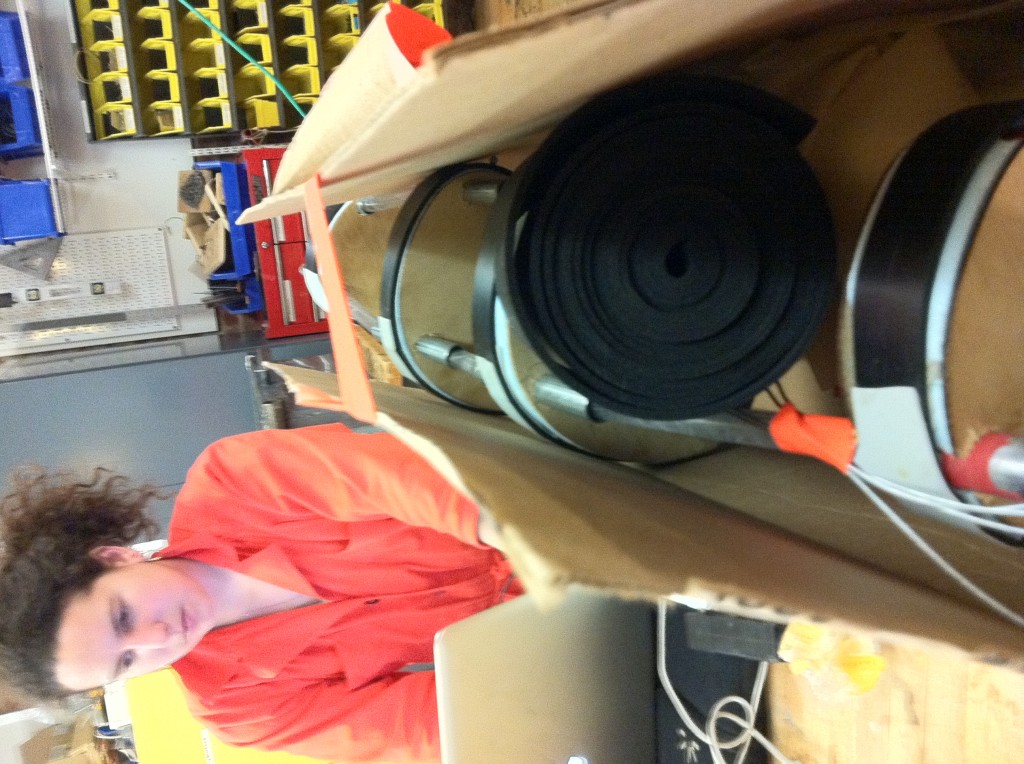
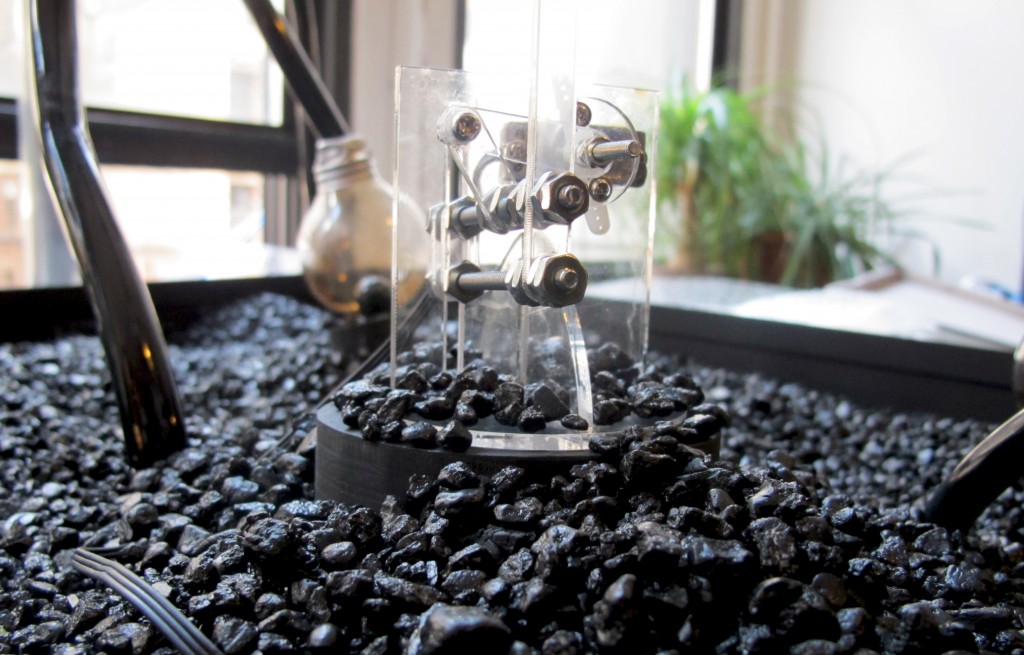
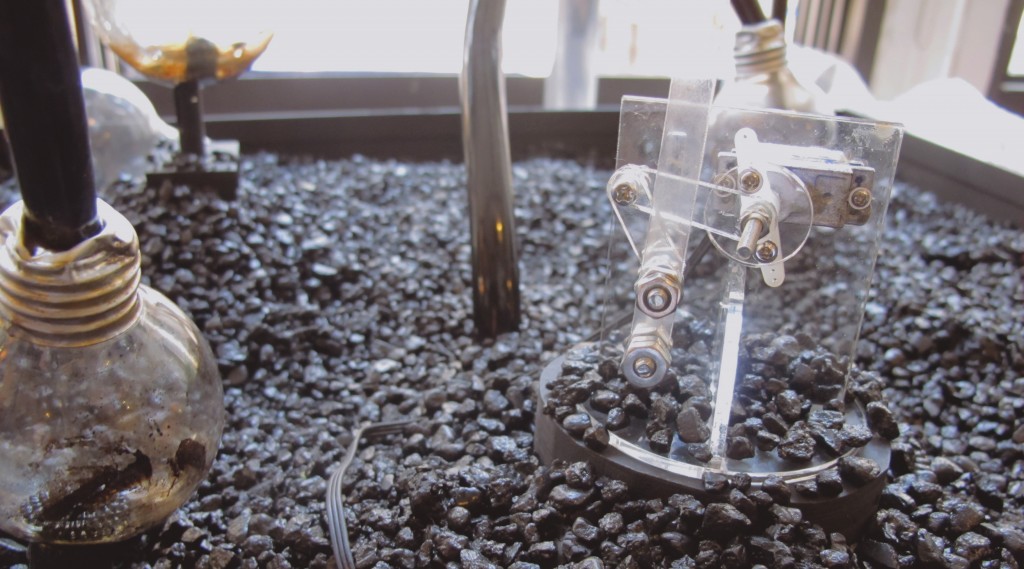
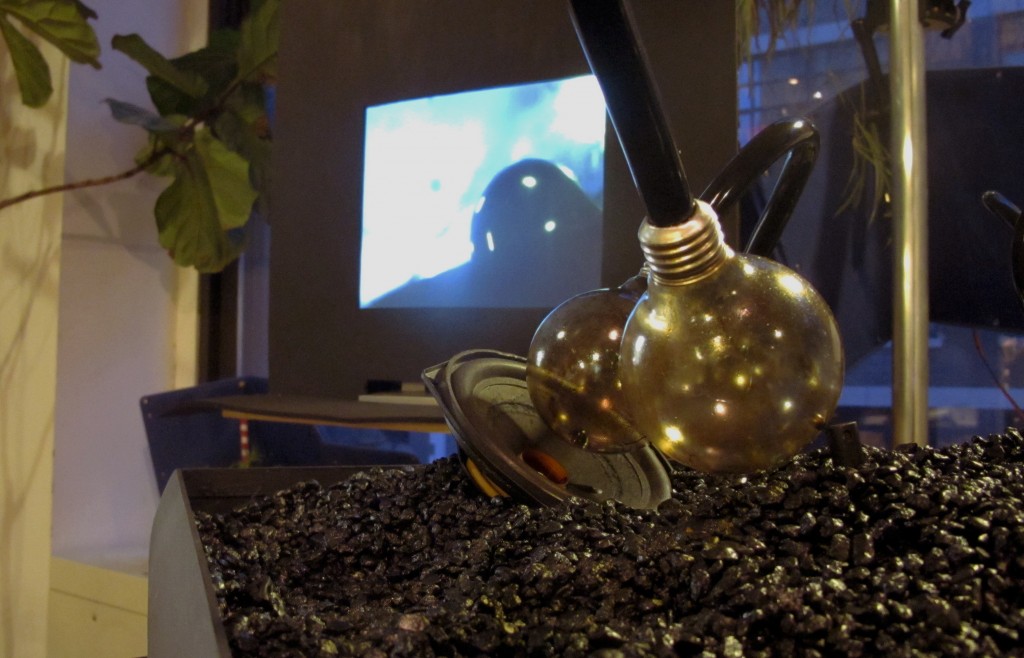
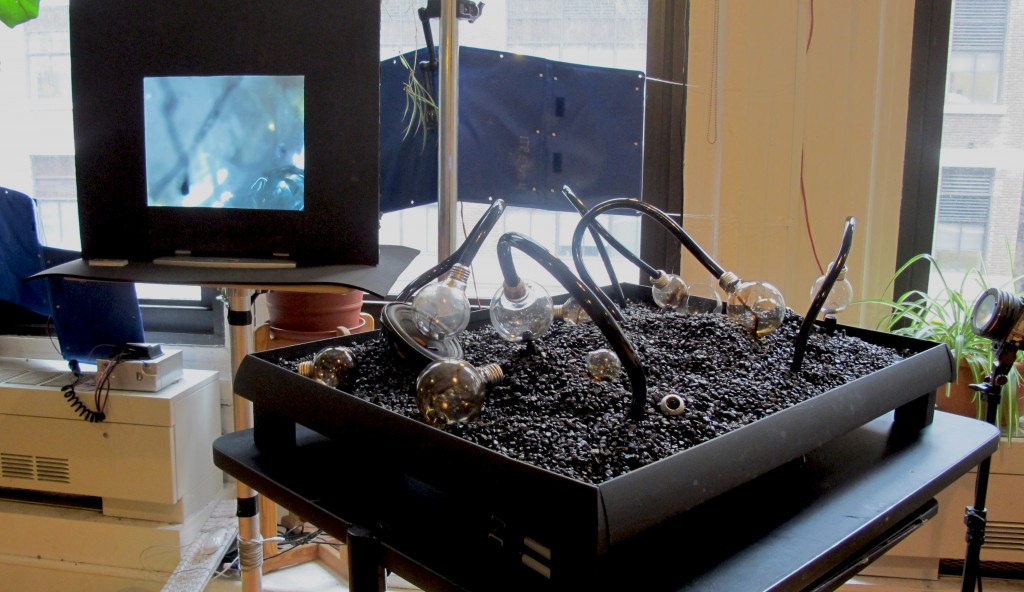
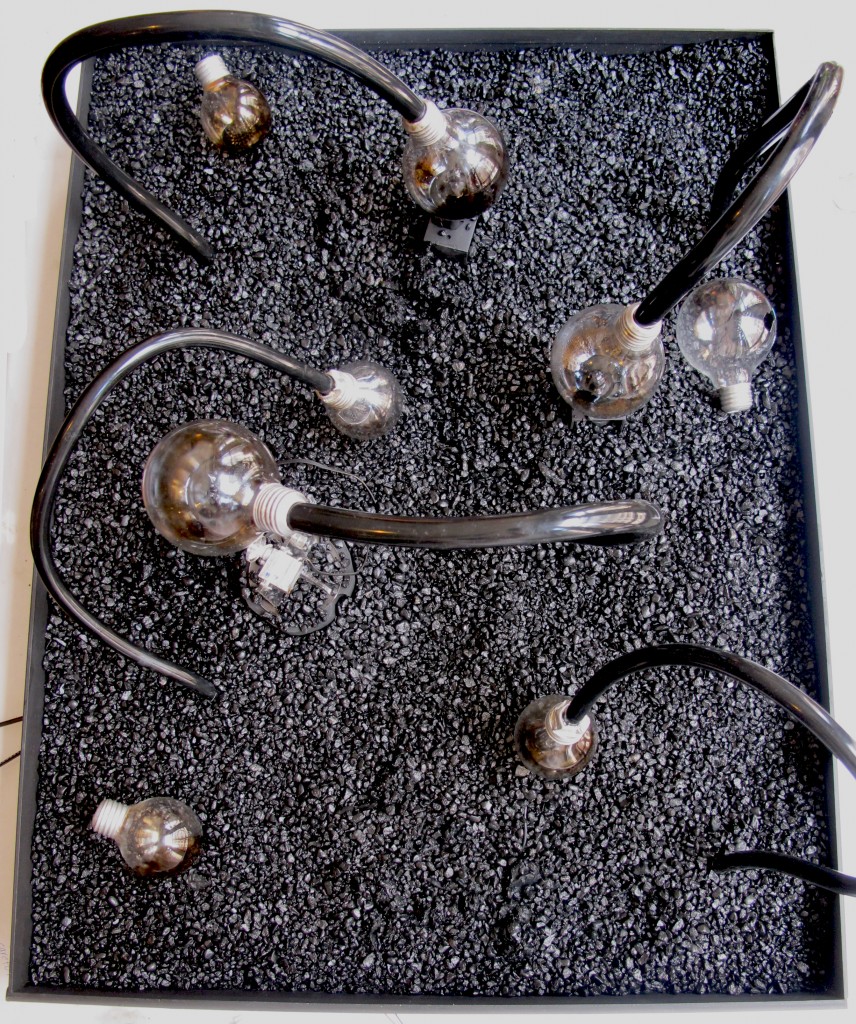
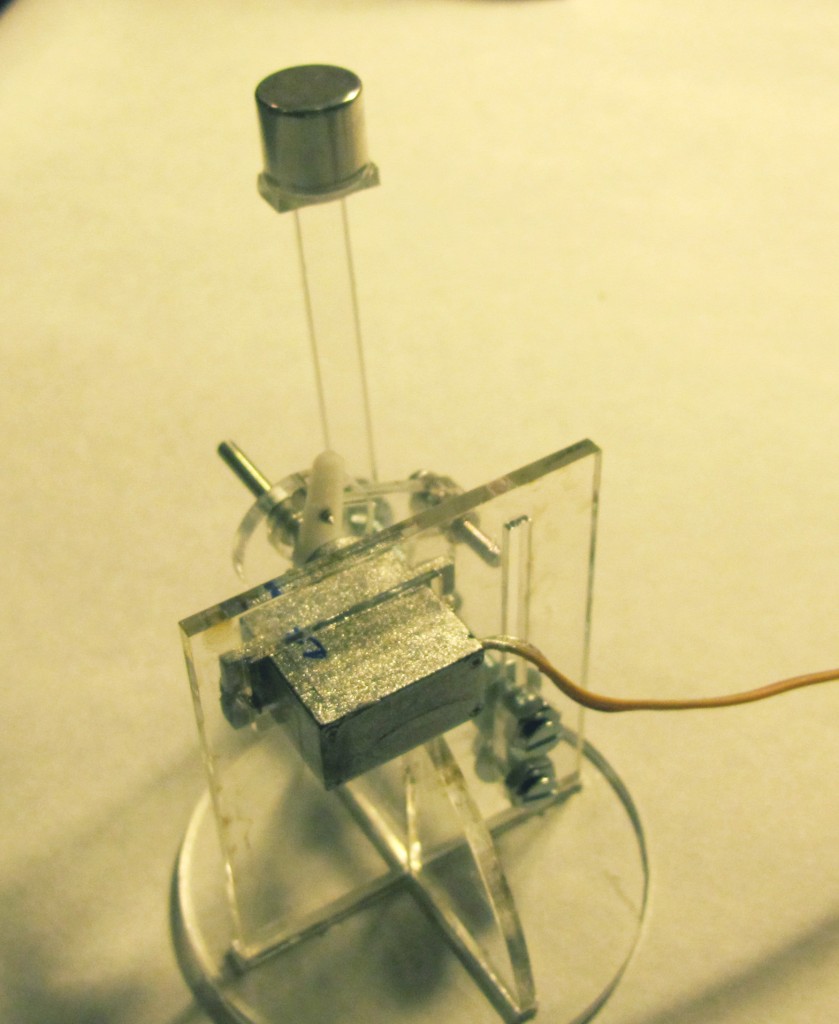
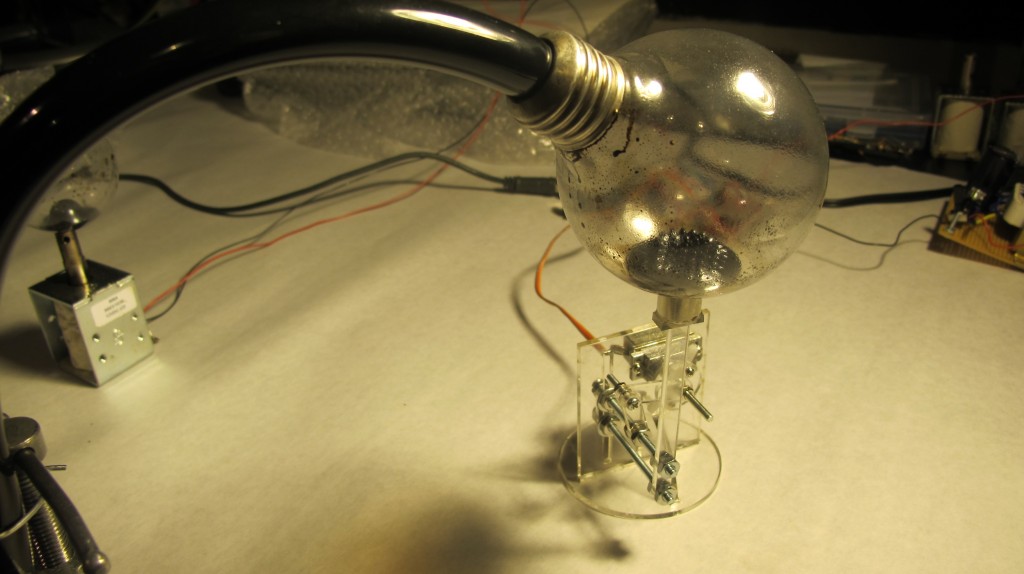
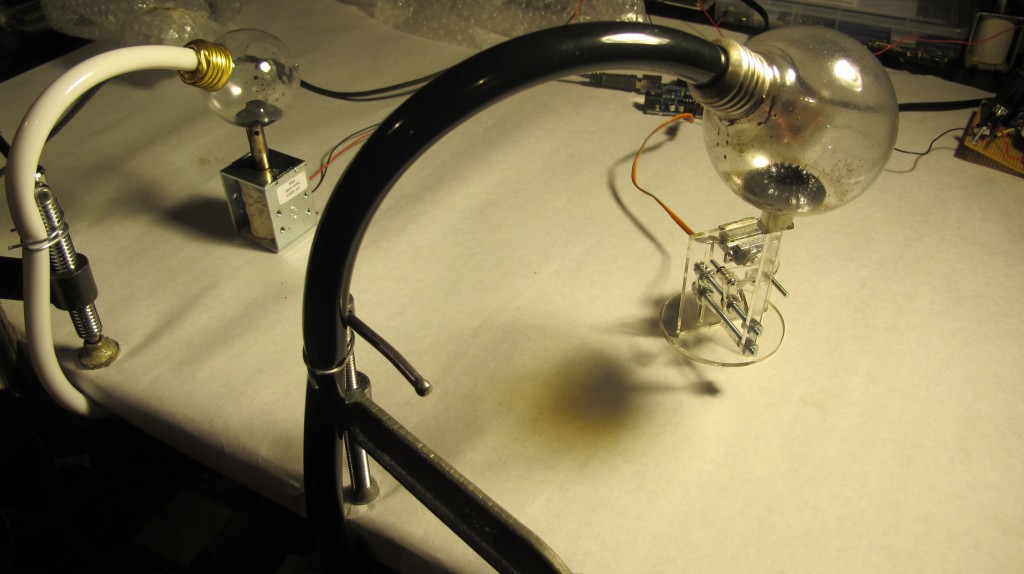
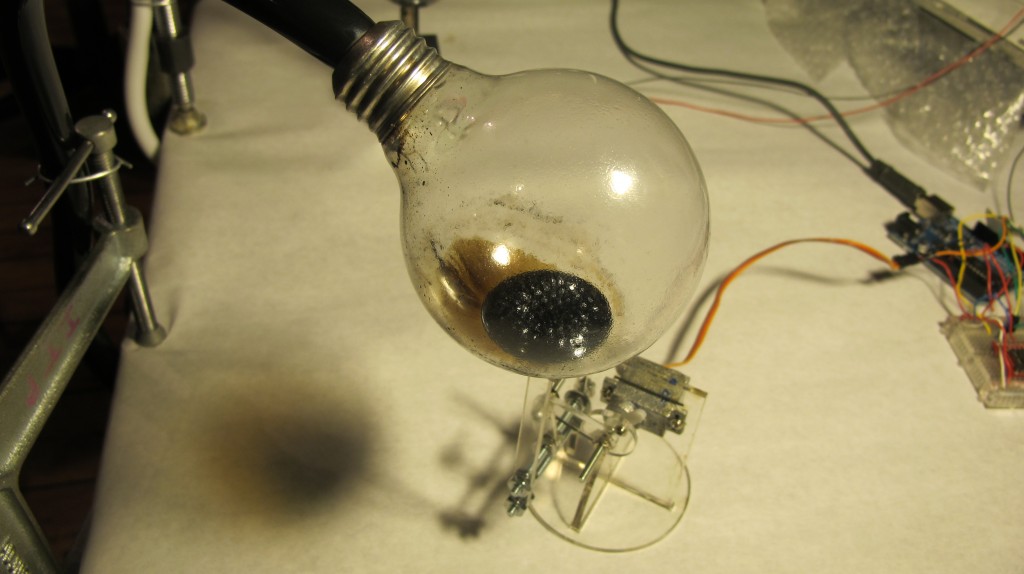
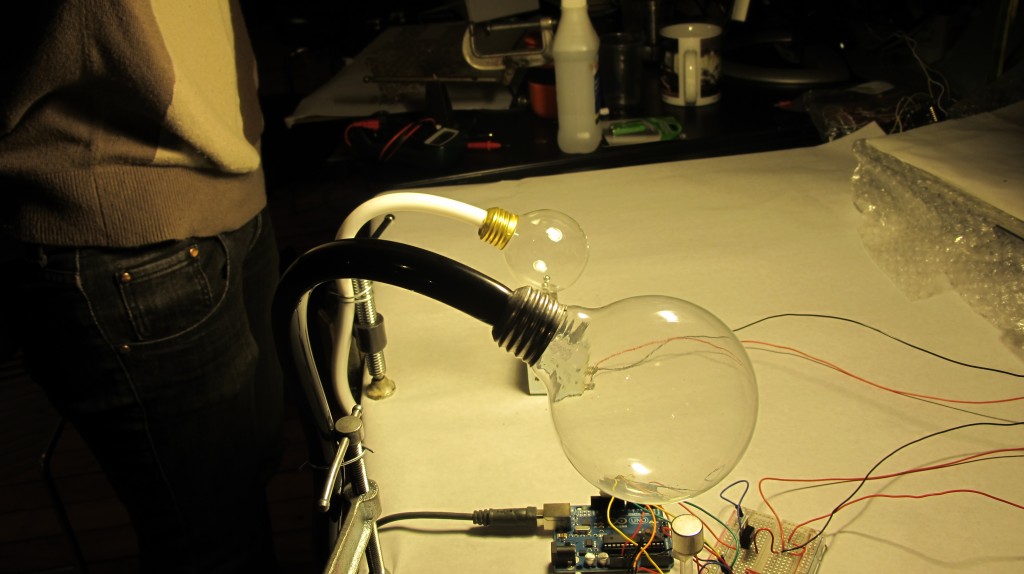
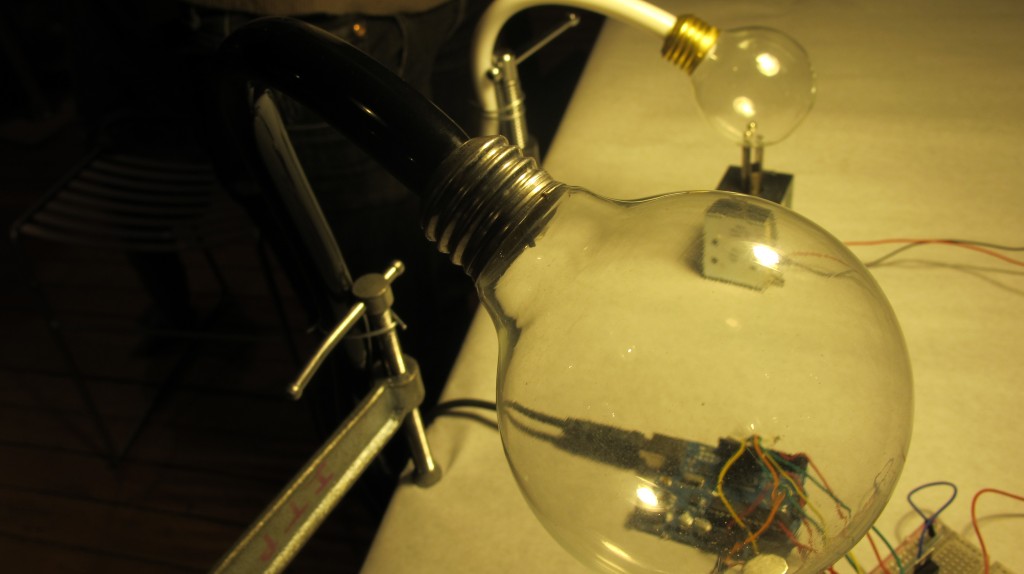
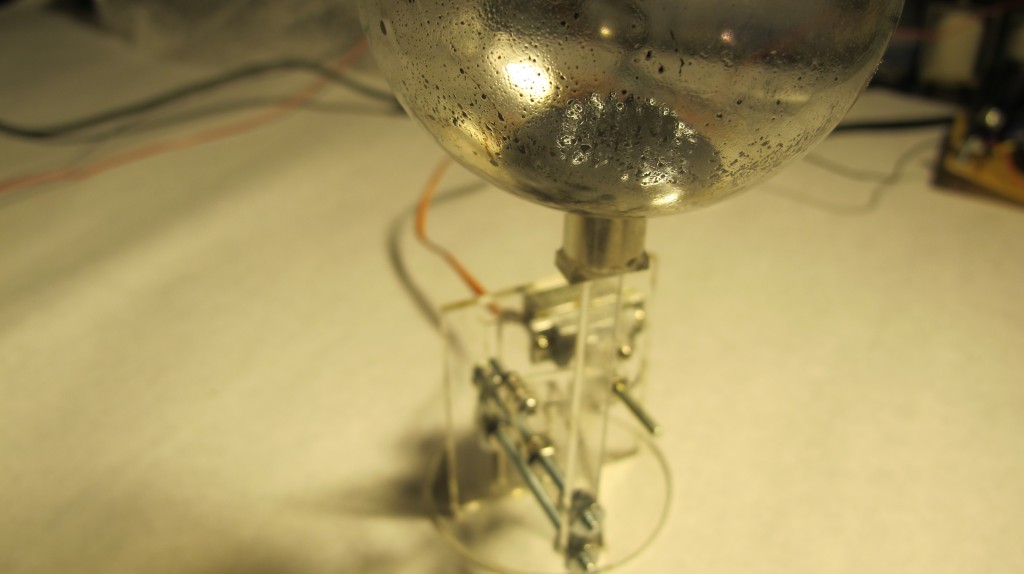
Using the MakerBot Unicorn PenPlotter as a guideline for a mechanism that uses a servo to laterally back and forth along a single axis, I made a mechanism that oscillates the proximity of a rare earth magnet back and forth in the proximity of ferrofluid. We are iterating through our collected data, to visualize and graph energy and weather data we are collecting over the month, in the planar layer of ferrofluid.
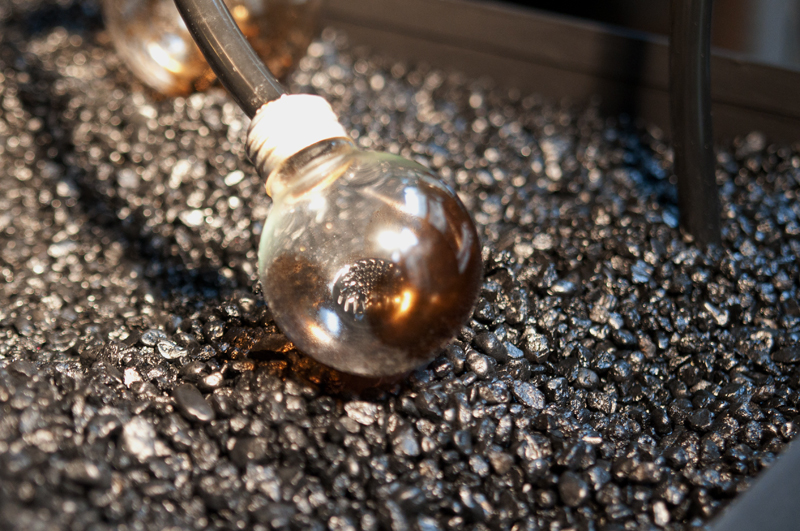
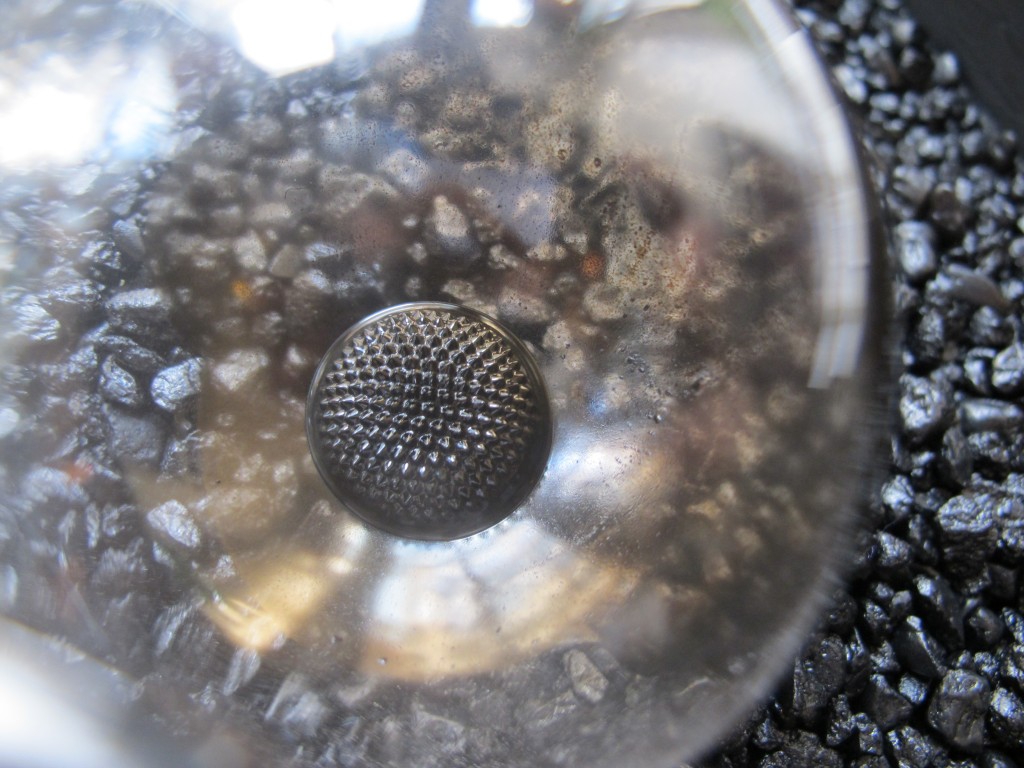
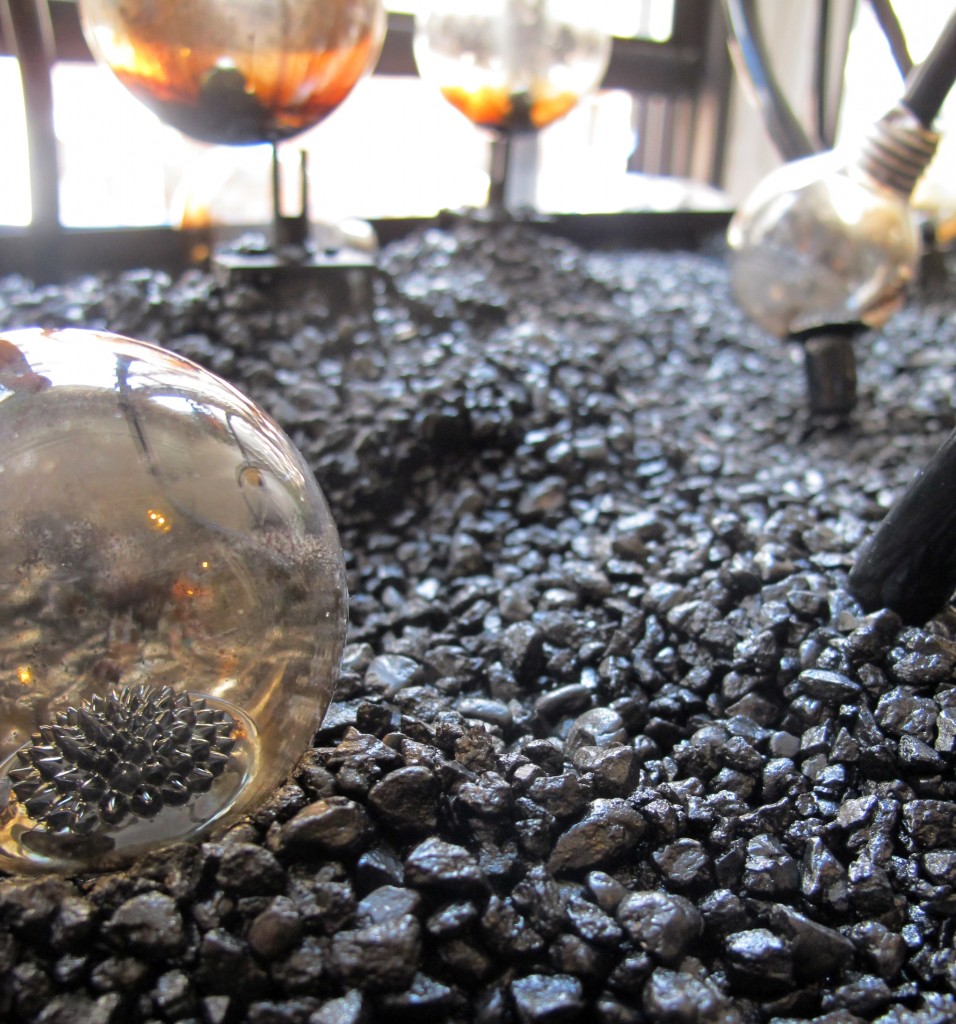
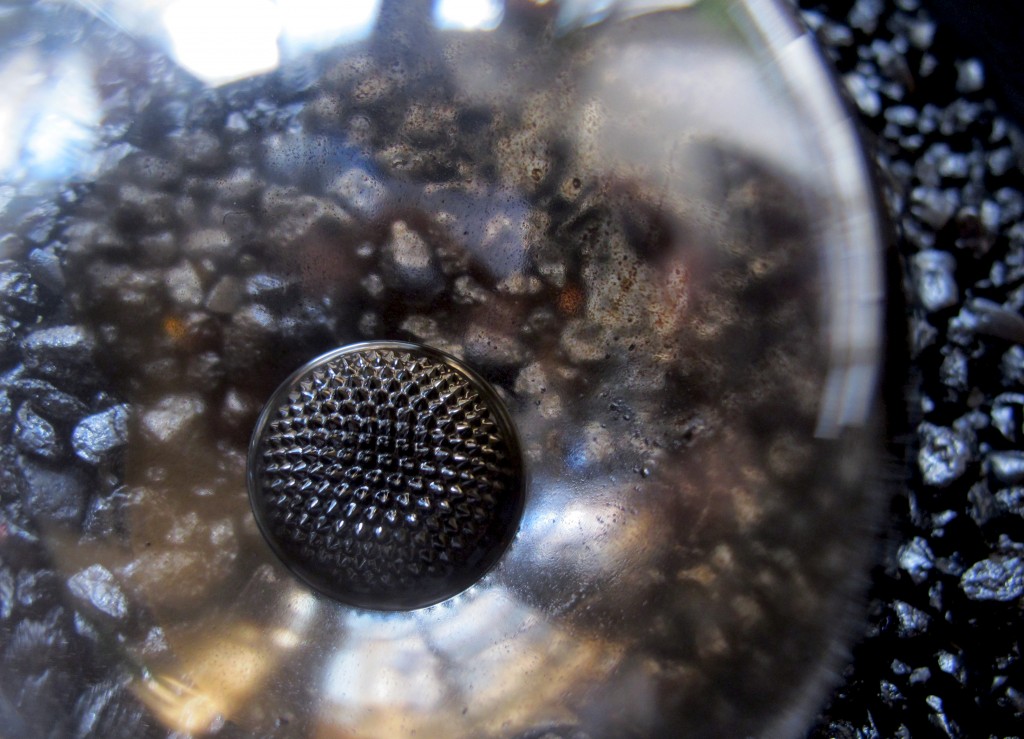
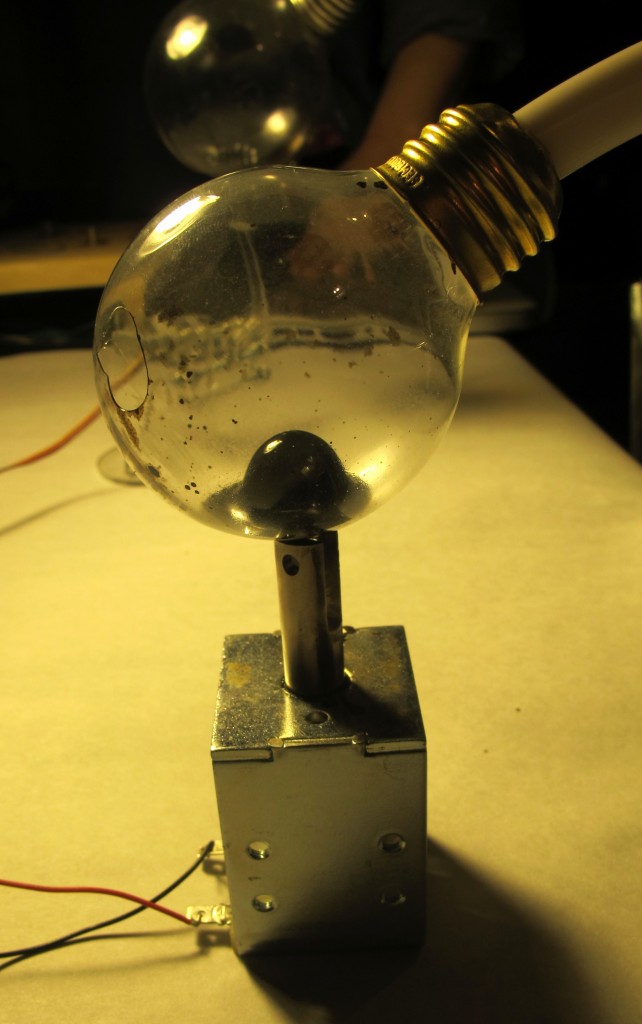
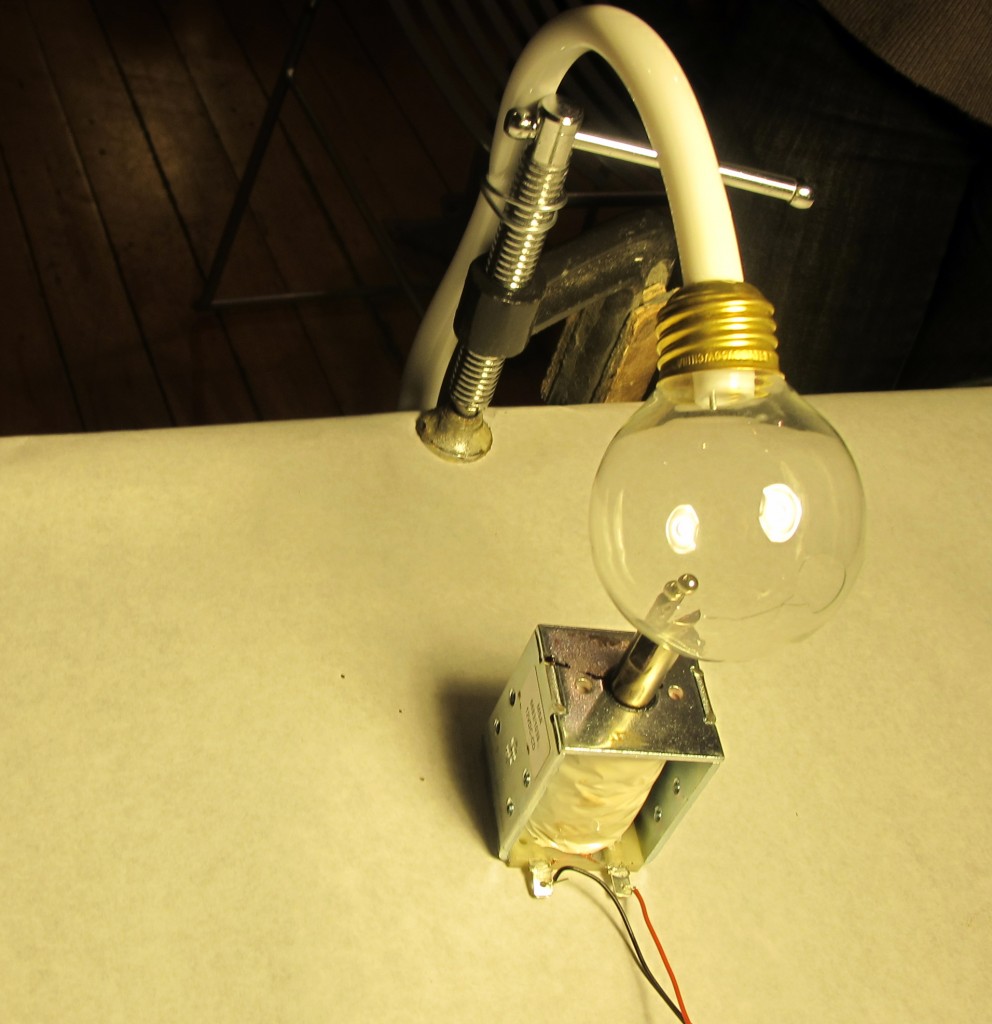
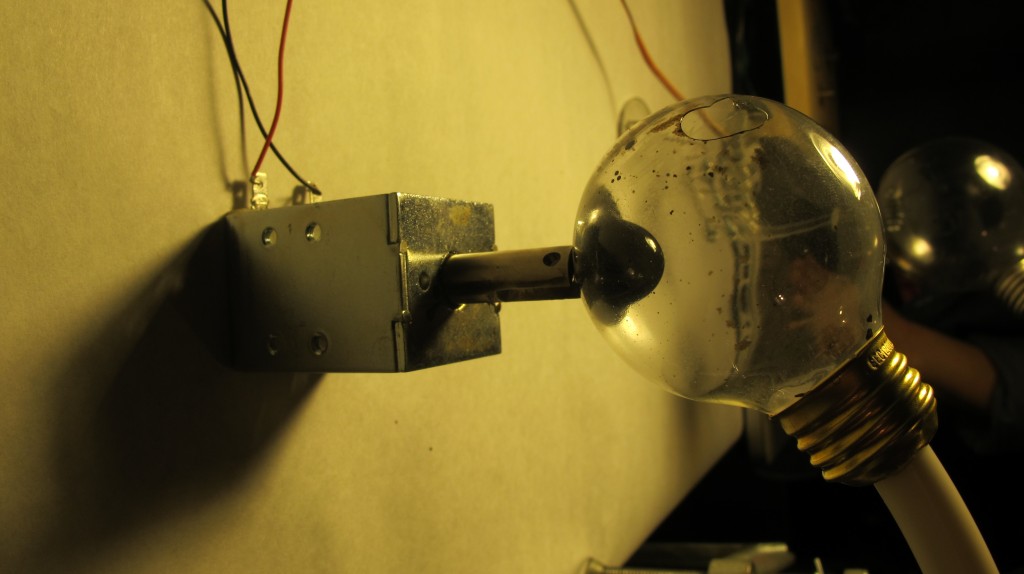
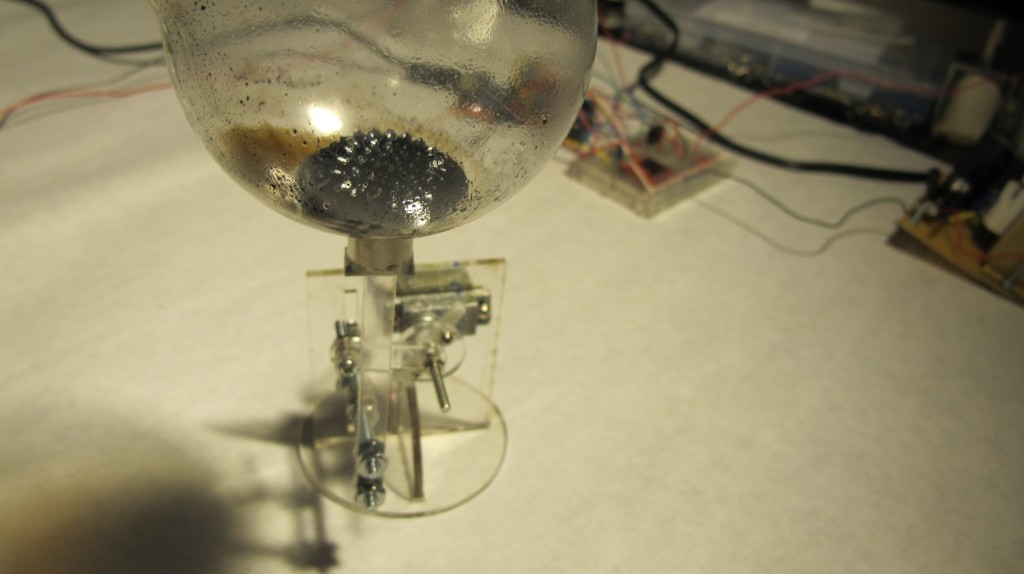
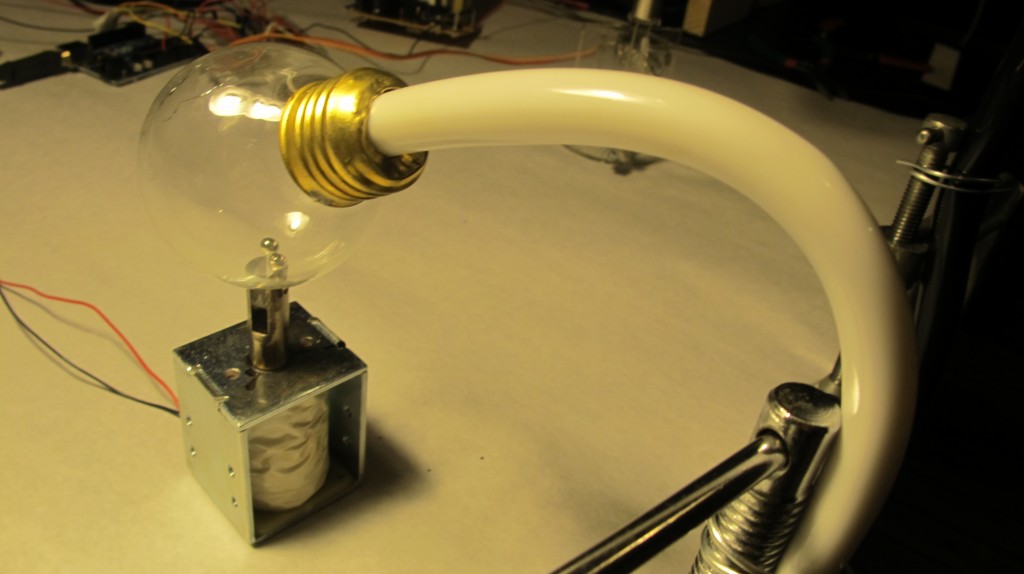
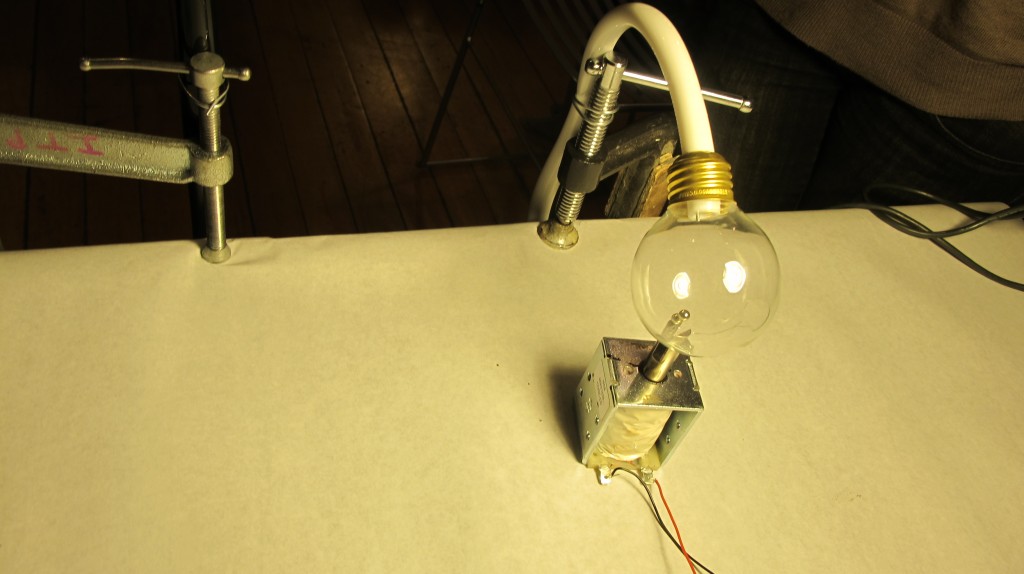
We hollowed out lightbulbs in order to cheaply make small terrariums for units that contain ferrofluid and a couple magnets, that will be perched atop solenoids and magnets.
I used a linear slide from a chain lock to keep the arm holding the magnet in place. The pieces are drying over night


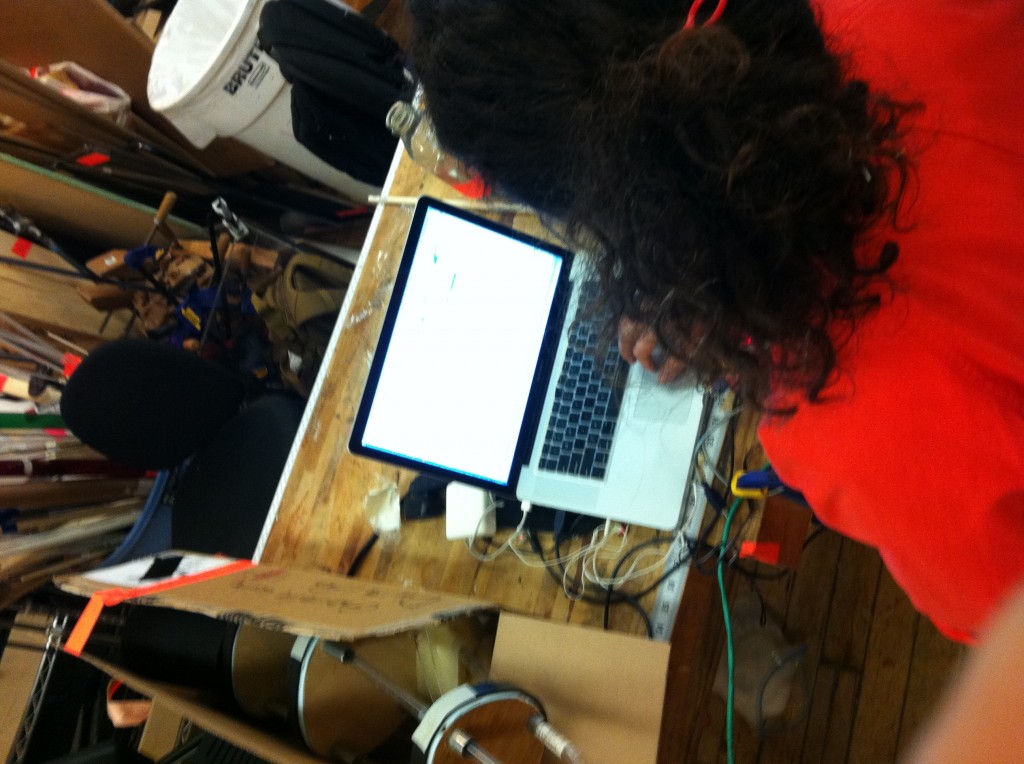
The data logging is going well – although every now and then when I check the card, it didn’t read the data (I think I have to unplug the arduino each time. Oh, and in case I forget, it took me two days to realize that with the data logger and RTC to work, I need at least 8V from a wall wort (from the 5V one we were getting 0/0/0 for the date / time. (Also, I switched the code so we it is always writing to data.txt as opposed to a new file each time, so it will be much easier to graph (instead of copying and pasting from different text files, we can just use data.txt in processing).
We also thought that because the solenoid was working with 12V from the bench power supply, we would be able to use the 12V battery powered off the solar kit / charge controller at school – However, when we plugged in the solenoid to the 12 V battery…. turned out, it hardly worked. And the voltage reading was about 0.7… RIGHT….
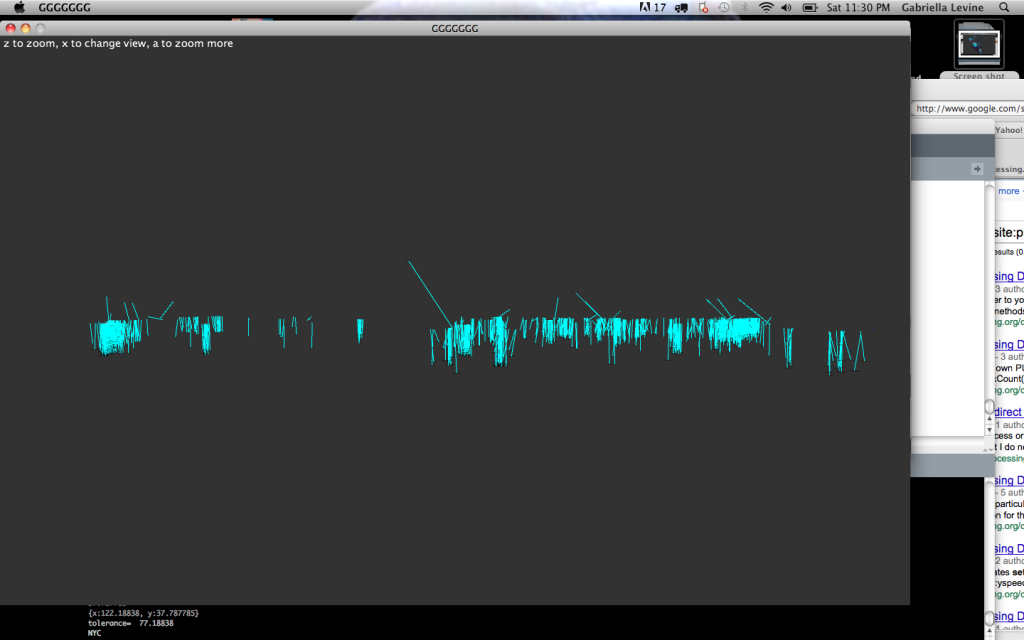
NOC
(Before I figure out speed I have to reduce the data set)
Ideas? follow a 3d path / steering method; text clarity; binning; experiment with L systems or recursion as I scale, and from day to day? sound?


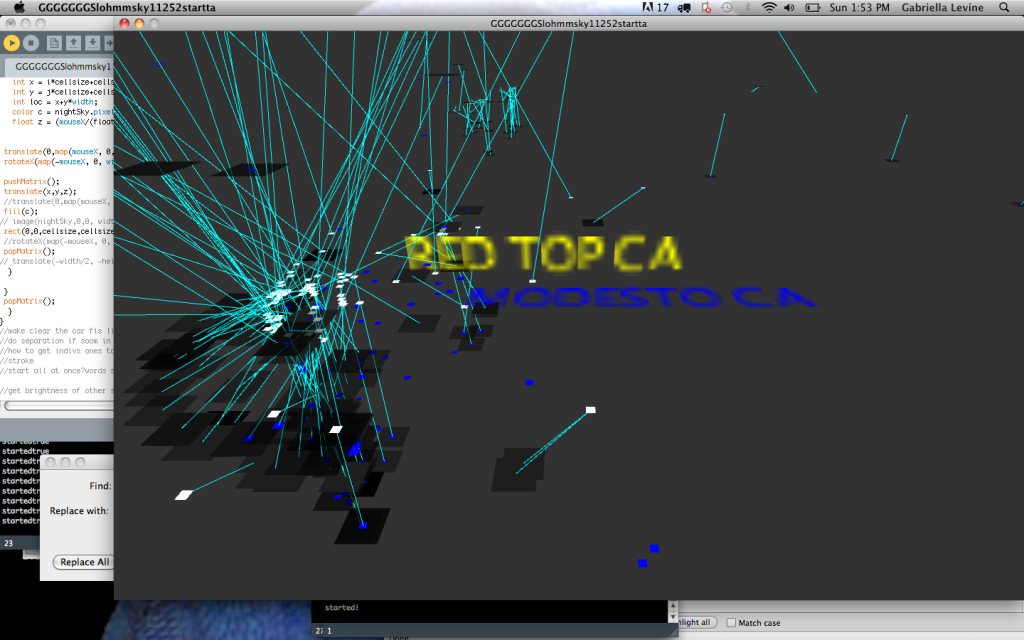
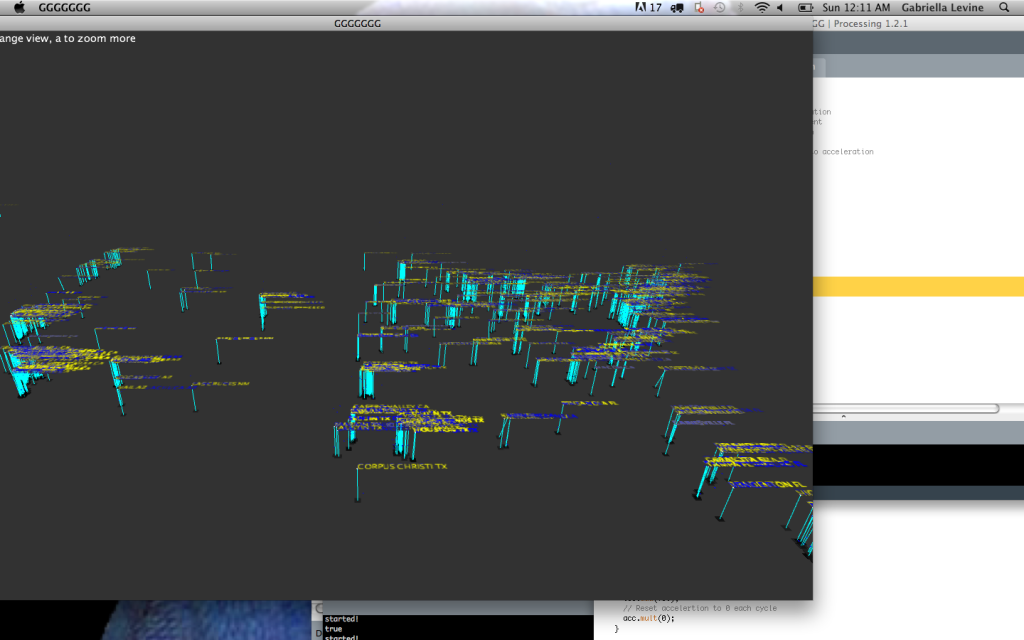
NOC with names, updating once per day
I would like to : get the cars to follow a 3d path, think more about how they will interact, fix the letters, possibly integrate a better map system to make it more informative?

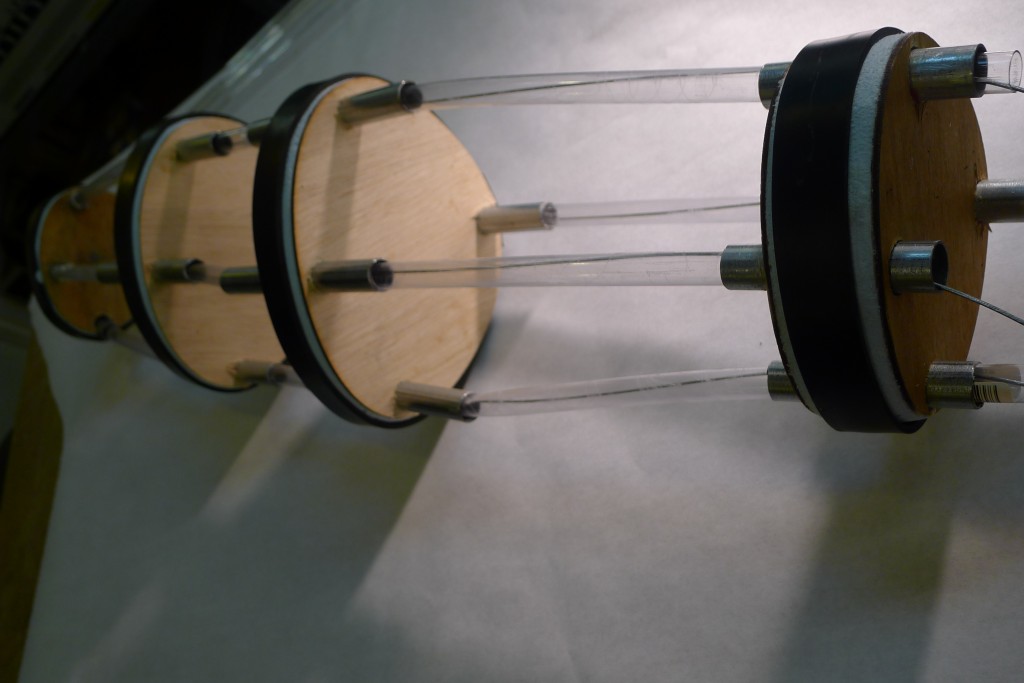
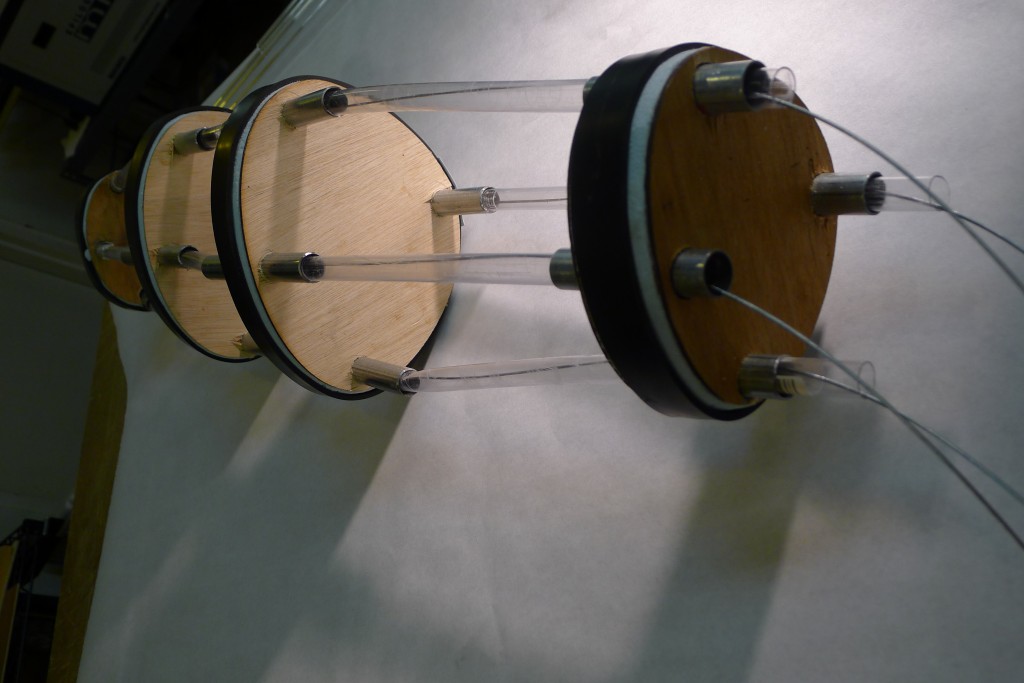
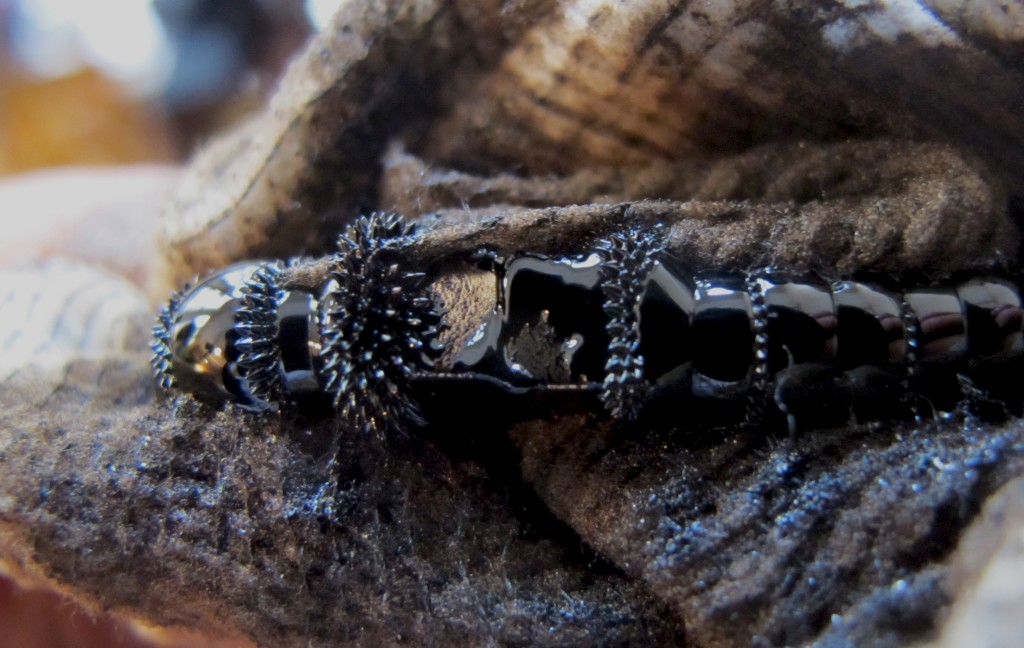
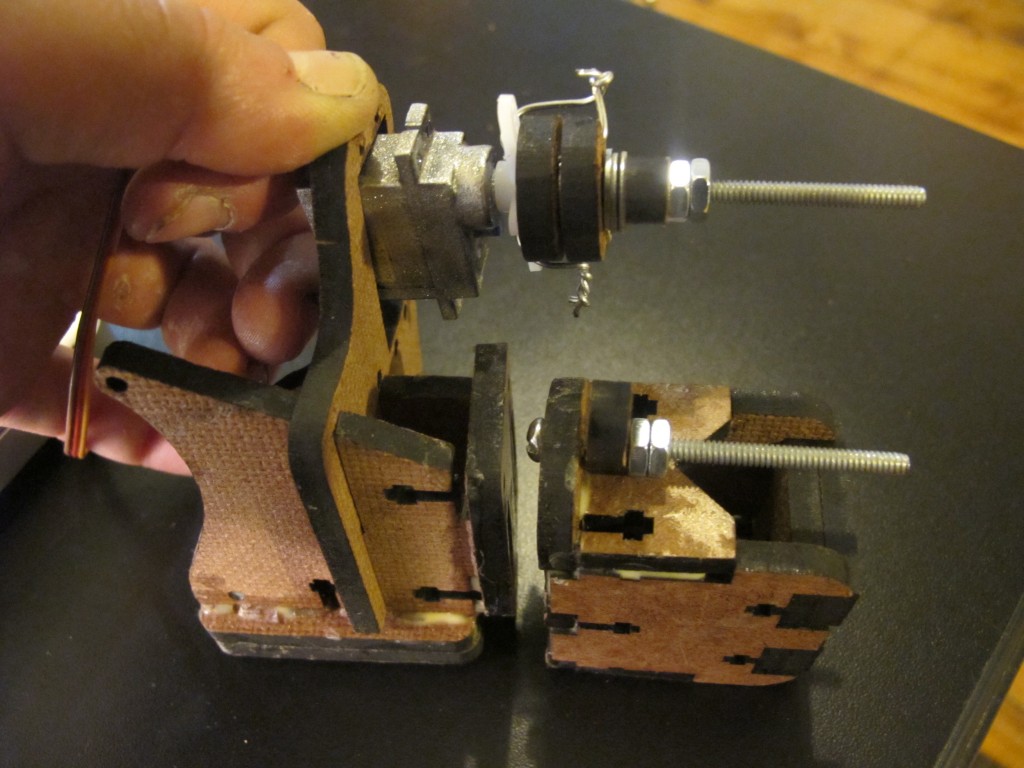
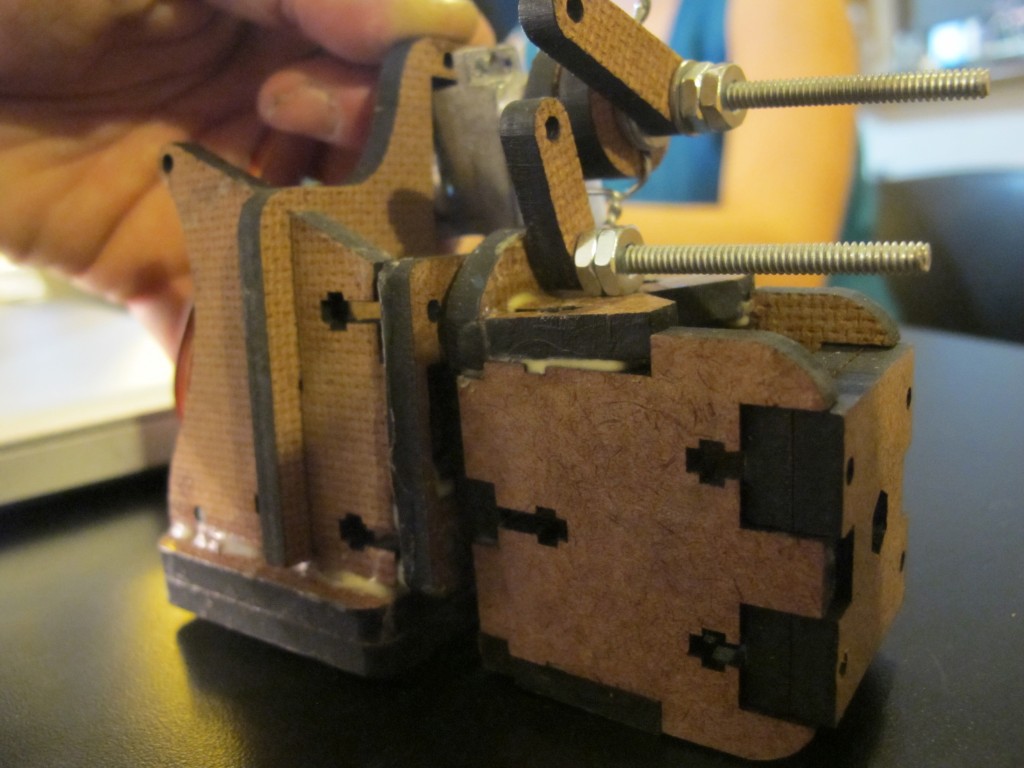
ferrofluidic motor syringe
continuing with the ferrofluid idea:
so my servos are strong enough to push syringes with liquid:
I got inspired by a radial engine:
and was going to start off by building a piston:
But I have a bunch of servos, so I decided to model some sort of an improvised two-cylinder piston that takes in fluid and spits it back out, that is modelled after MakerBot’s Unicorn Pen plotter – An elbow pushes back and forth laterally

I think that I am going to do some 3d moving model using ferrofluid, perhaps using the data that Genevieve and I are collecting about solar / temperature data
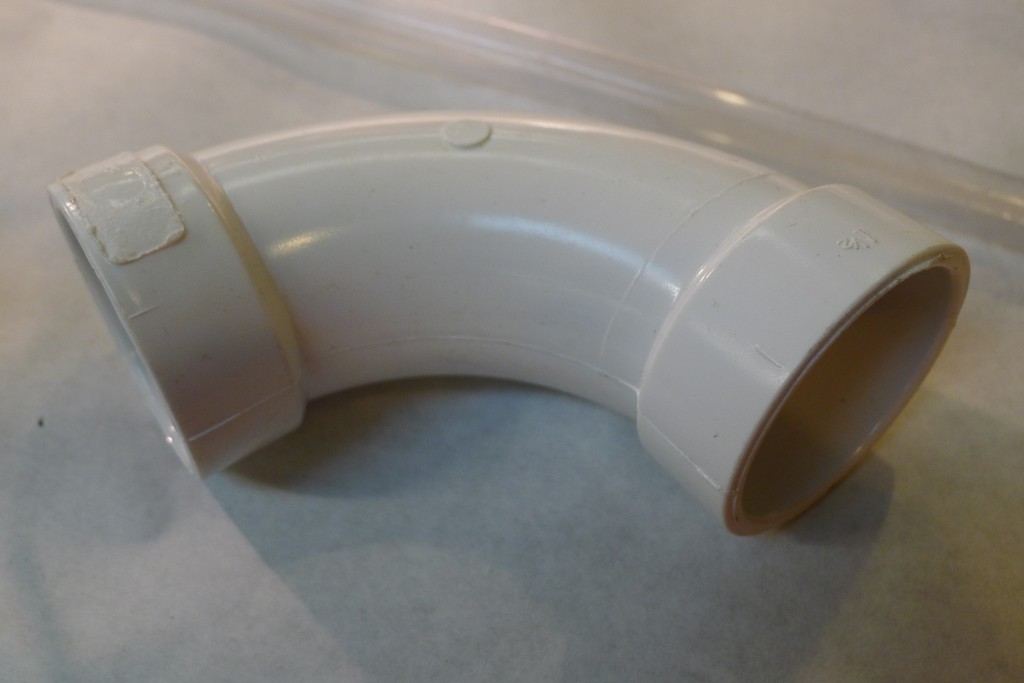
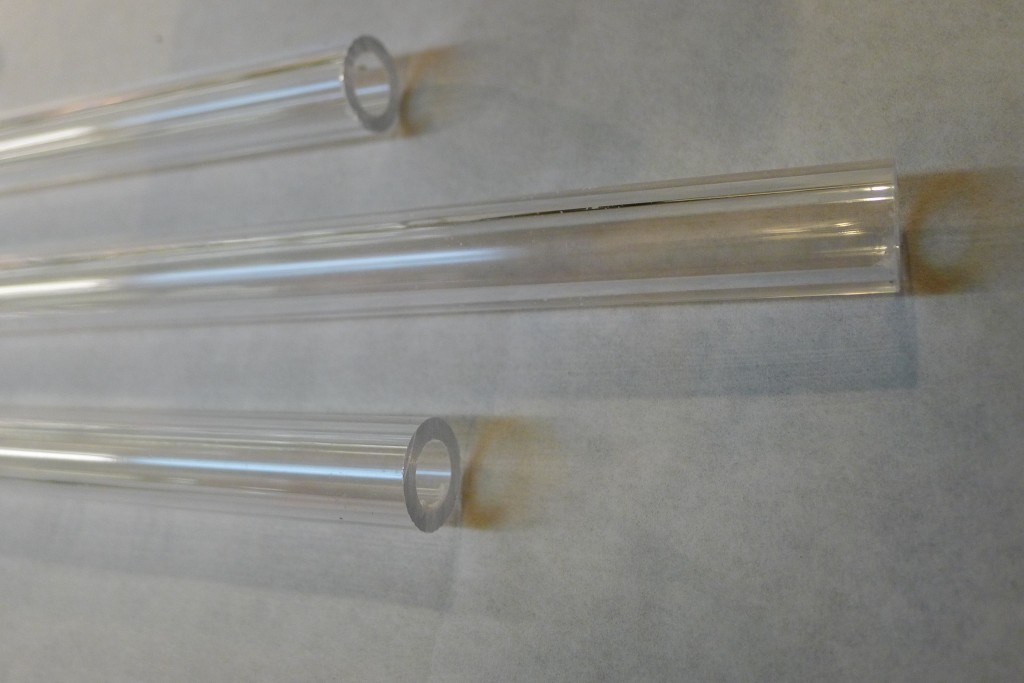
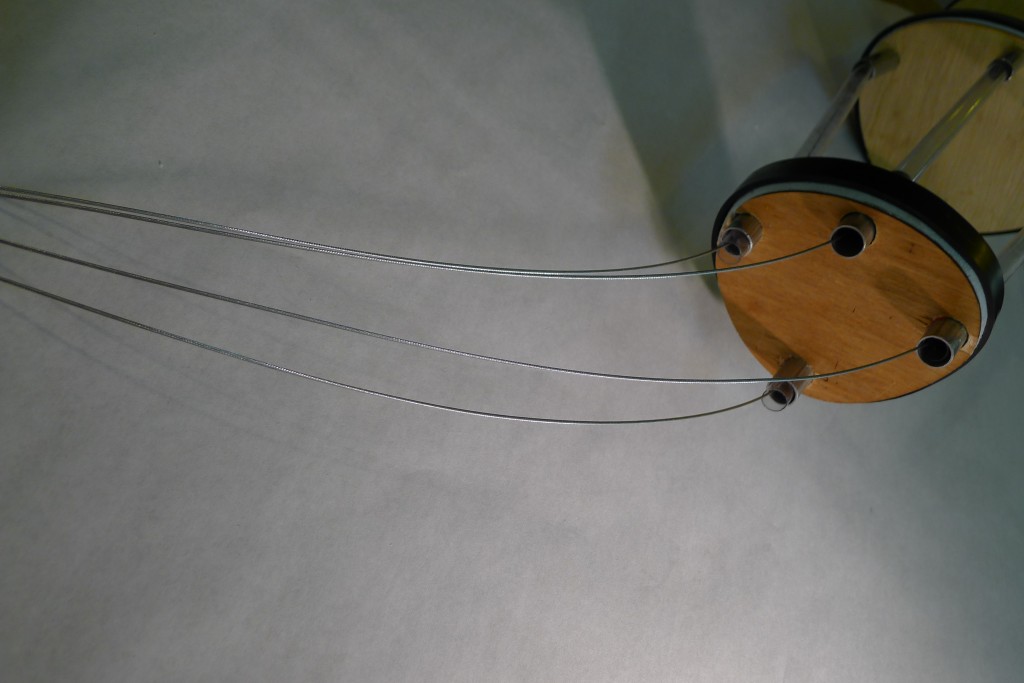
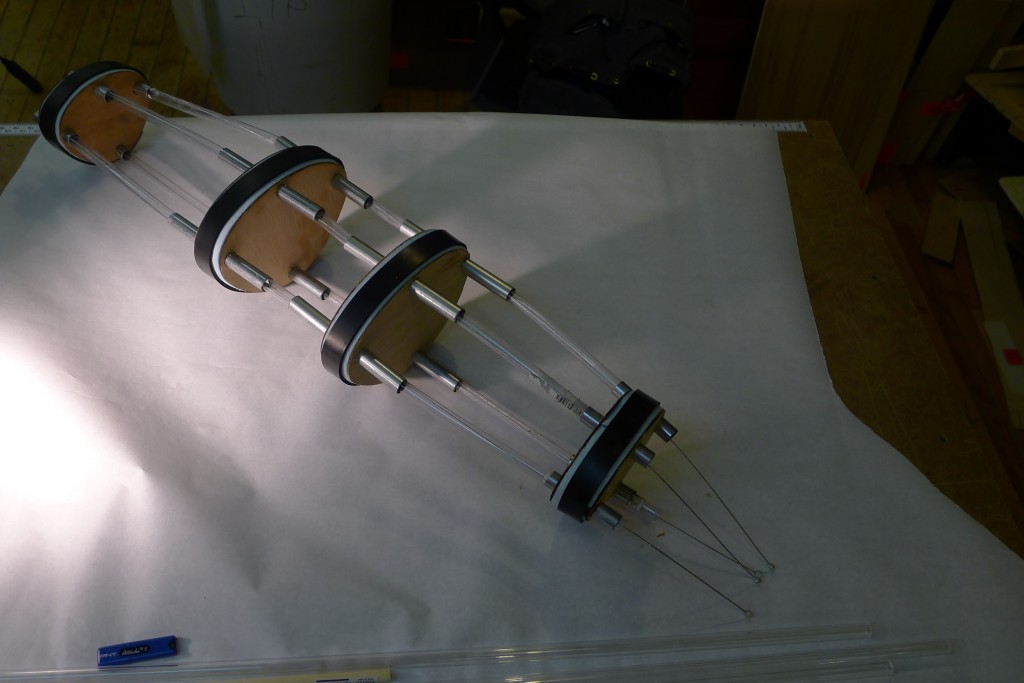
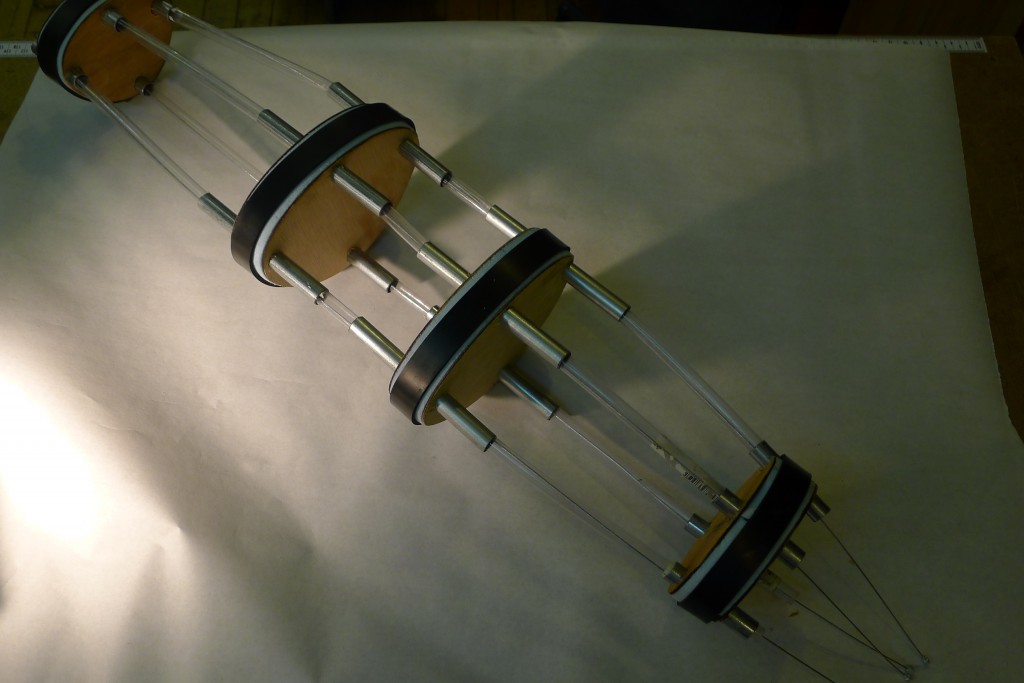
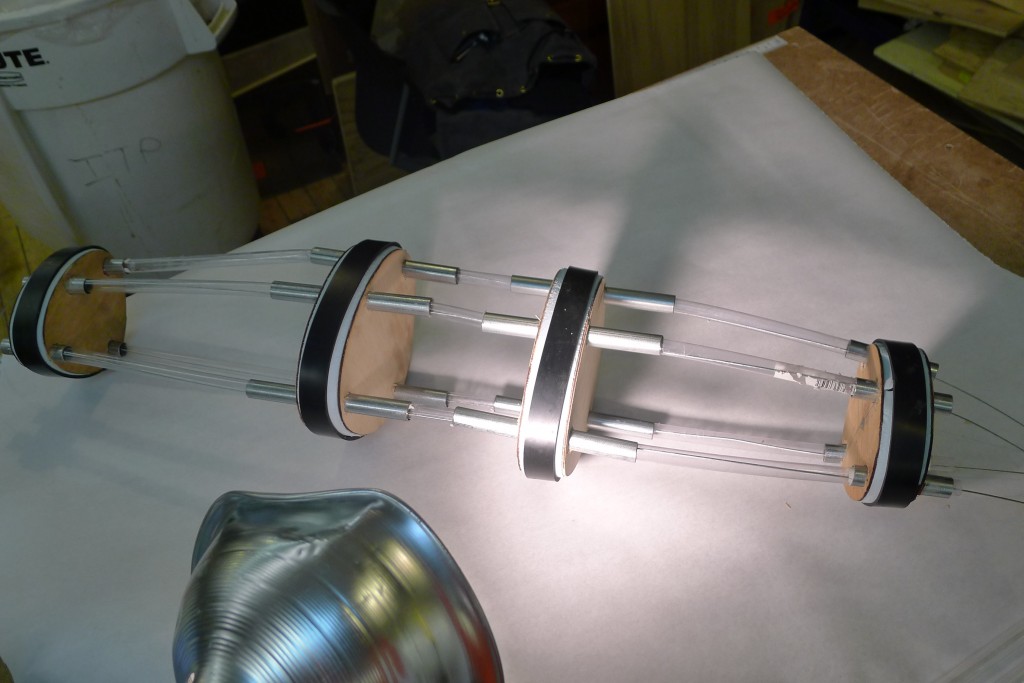
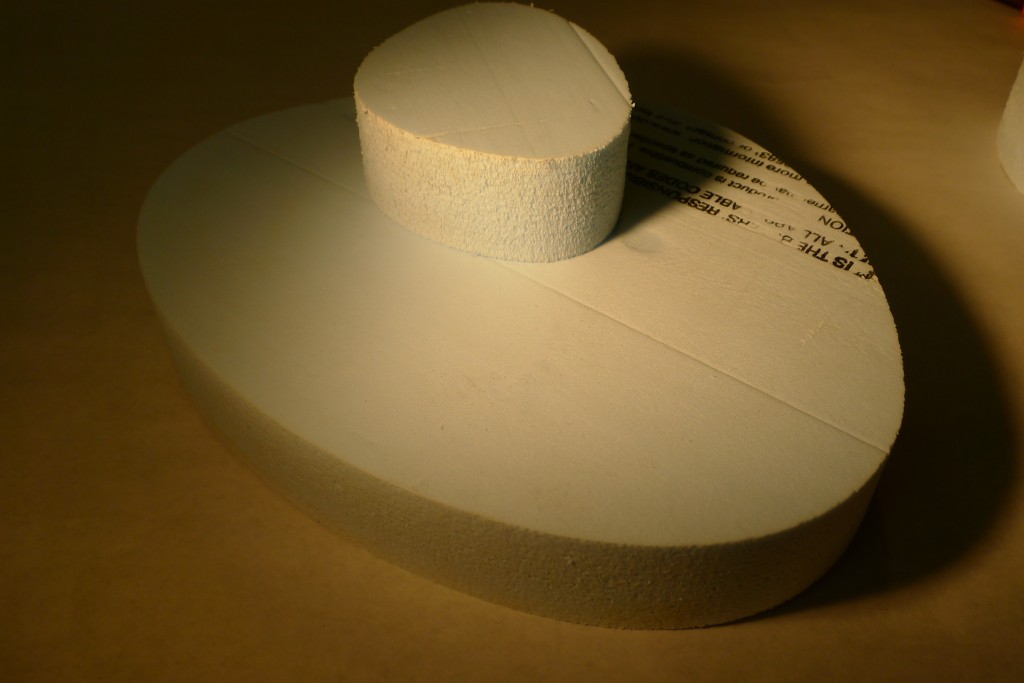
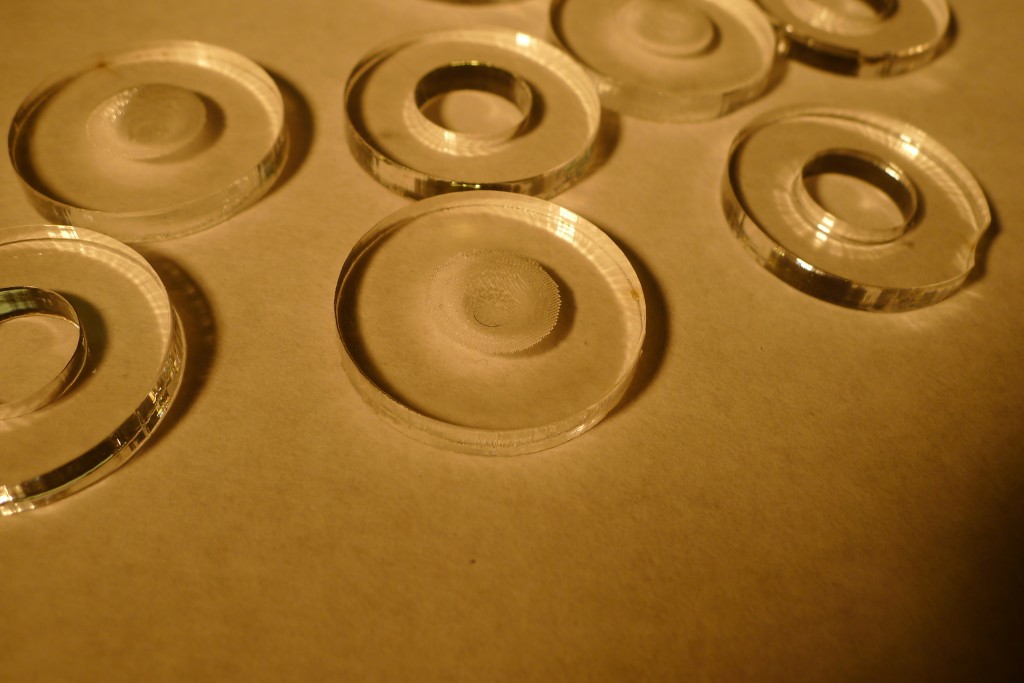
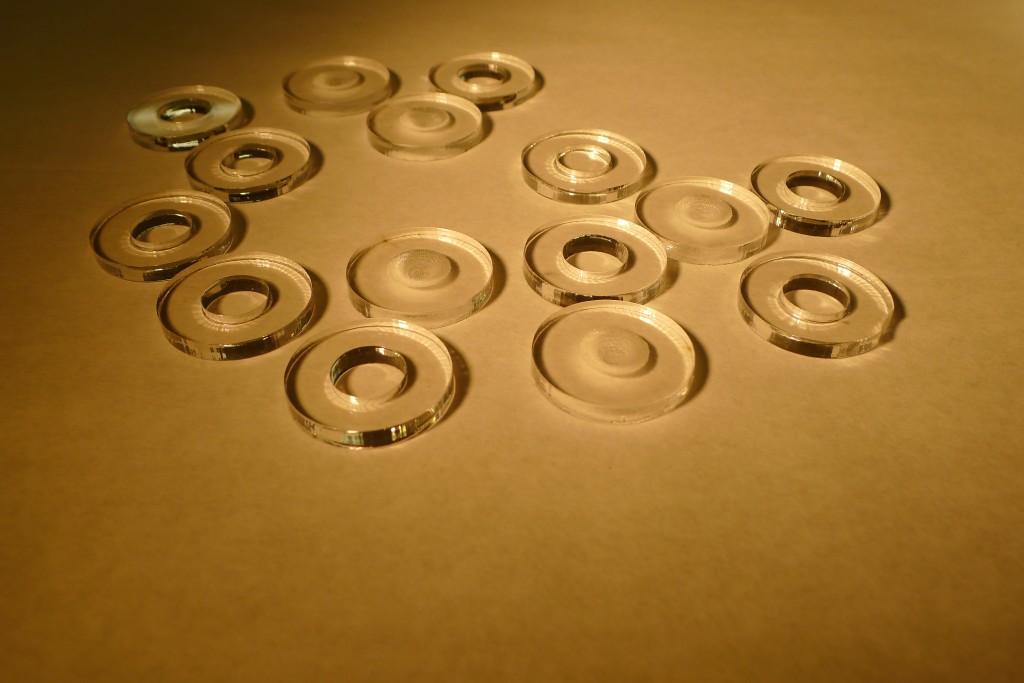
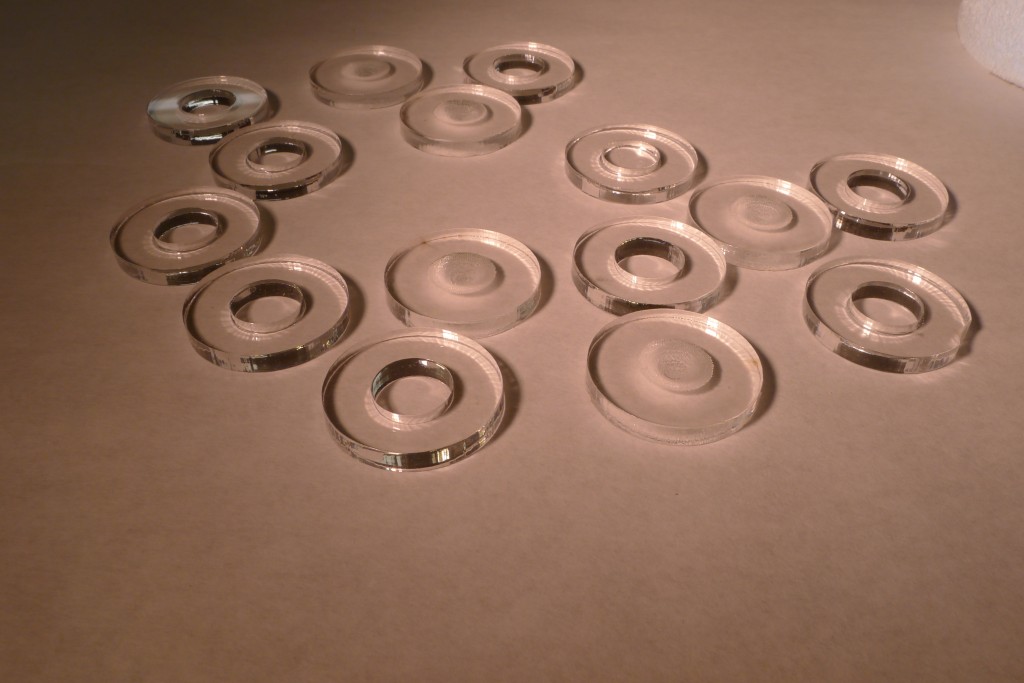
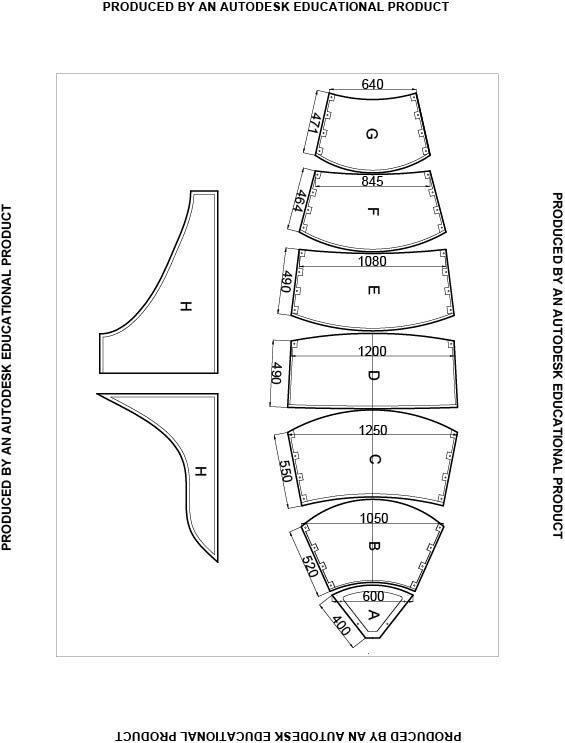
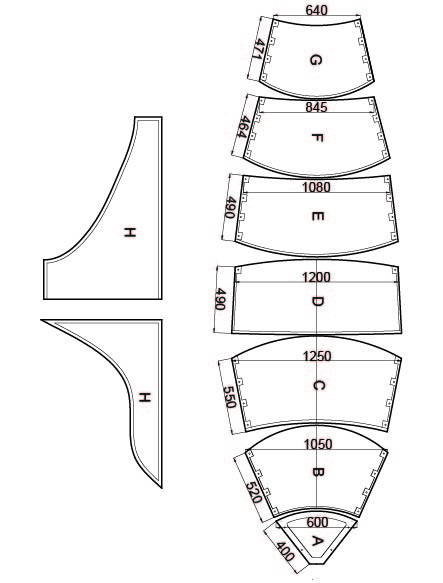
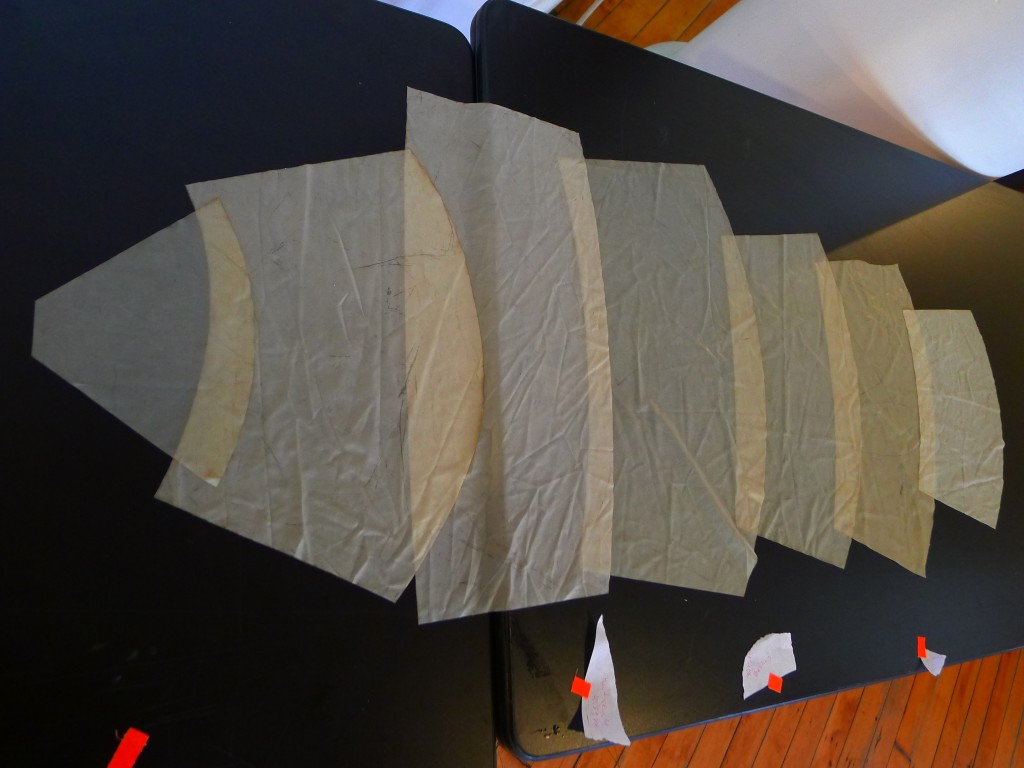
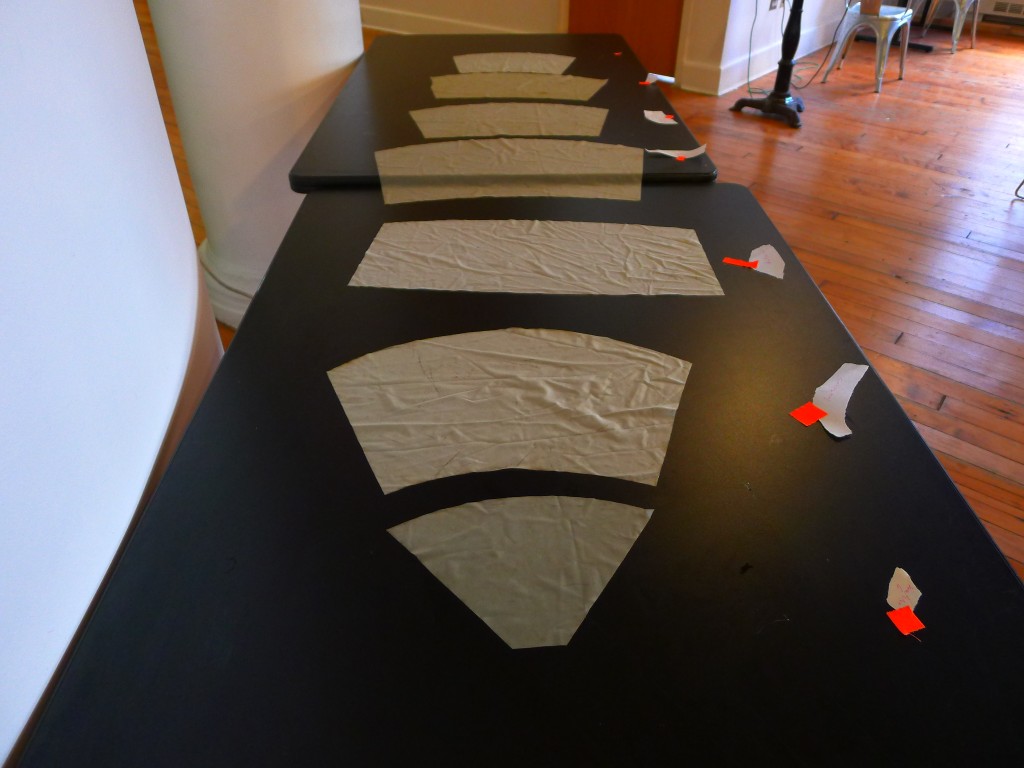
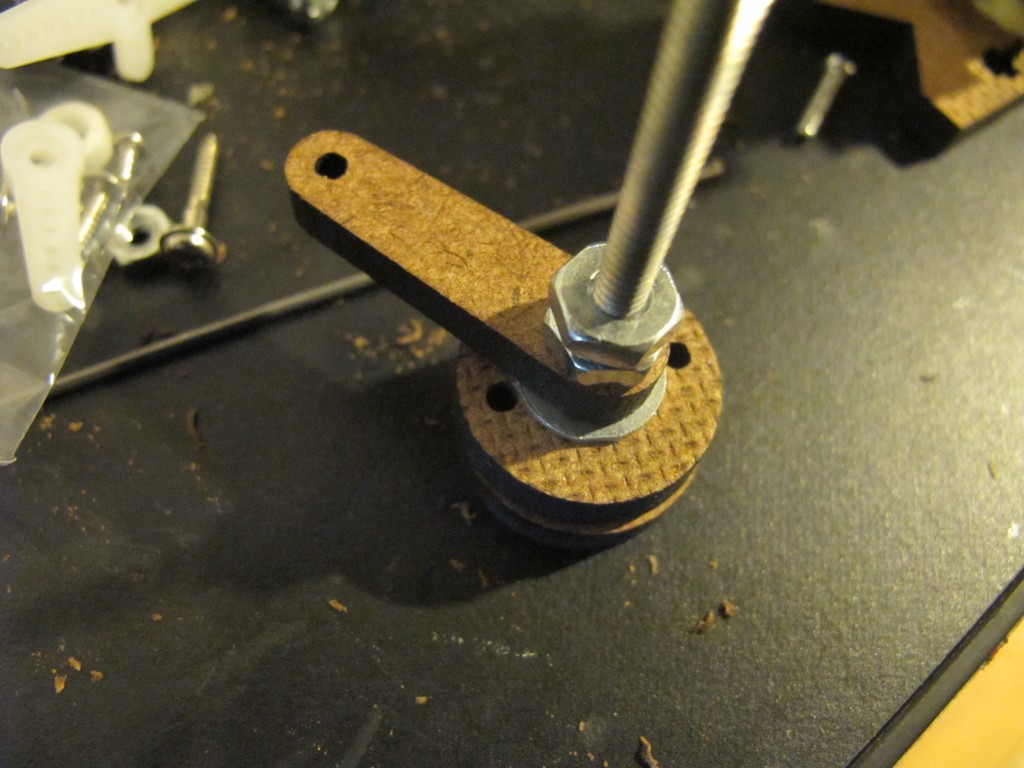
So, using the makerBot wiki, I got a pattern to cut the pieces for the mechanism: I cut it in both masonite and clear plexi (I assume the plexiglass is stronger but I preferred the transparent aesthetic, so I’ll try it!)….

now, to get some nuts and bolts…
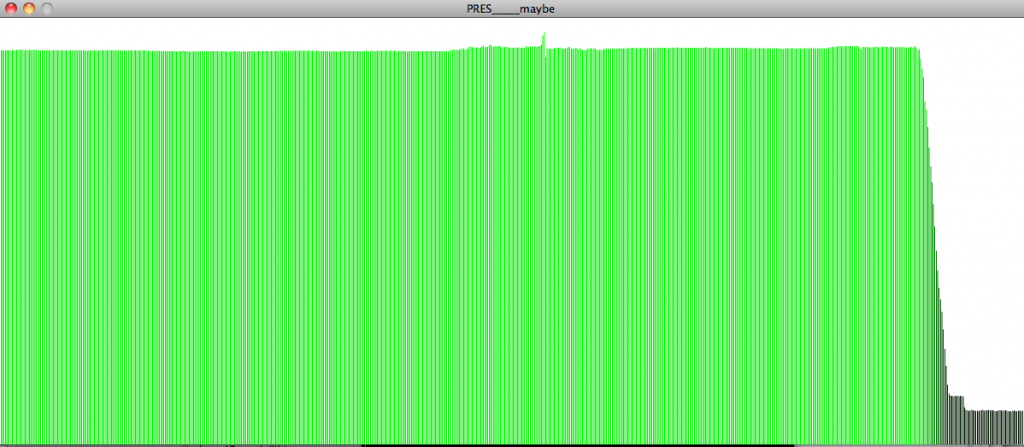
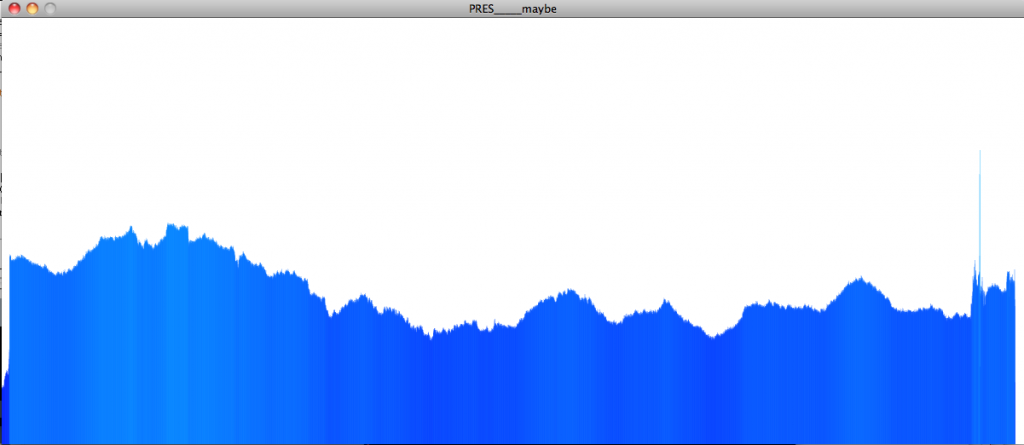
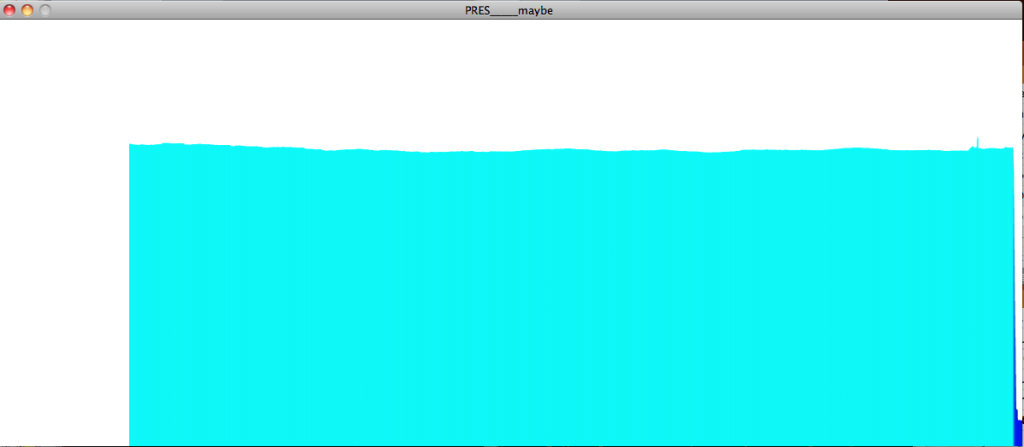
logging the data
14.38, 2.52
with the solar panels in, we’re 17, 3
click to see more info
-

- April 10
-

- April 13

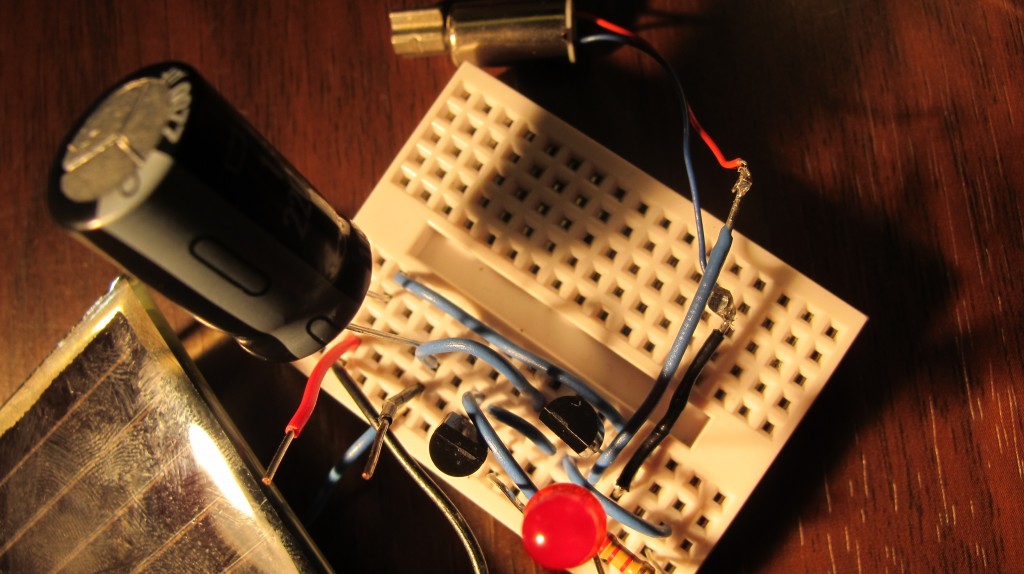
logging solar data
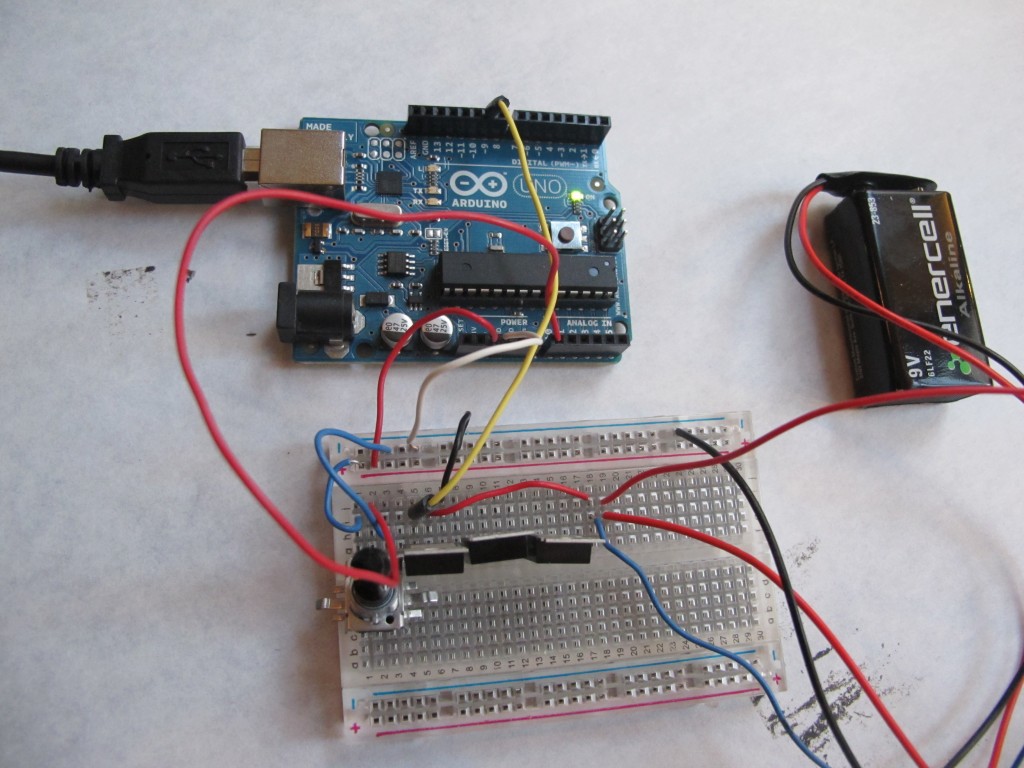
Genevieve and I now decided to log data from the sun over the course of the month – most likely, voltage, and light level. We will use both a photocell and two large solar panels (during the day one gave about 20 V). (And of course, we will power the arduino sustainably!)
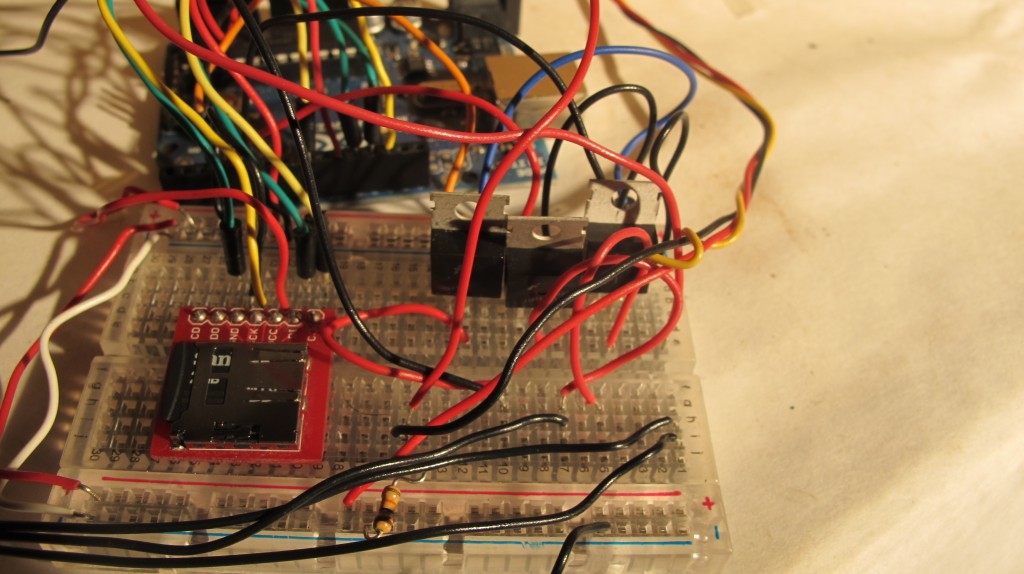
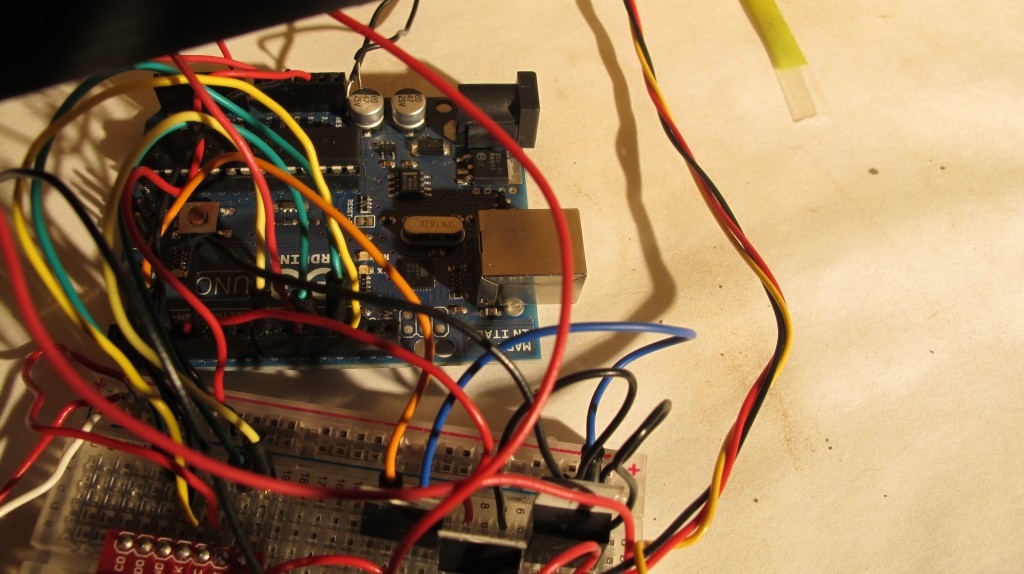
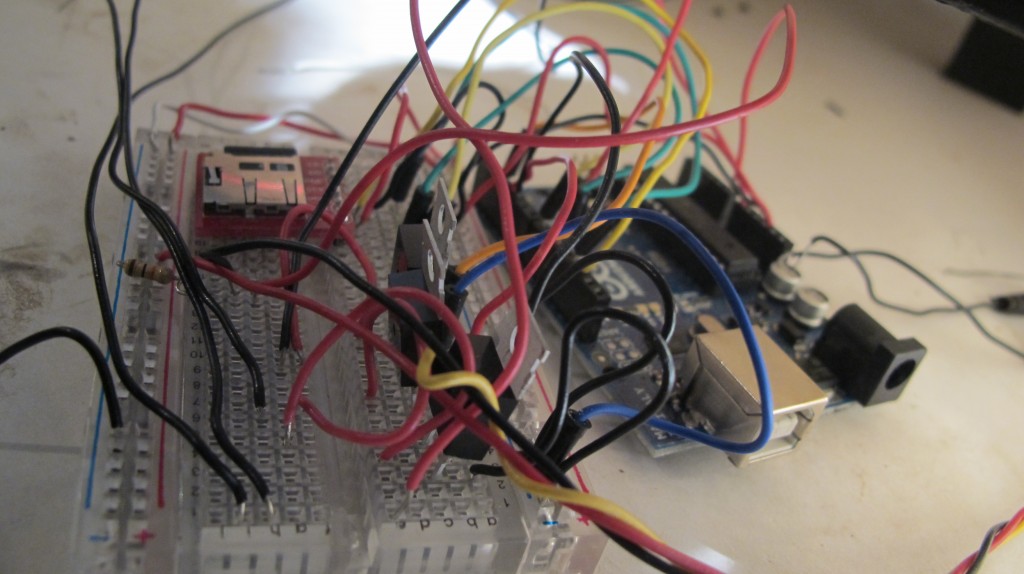
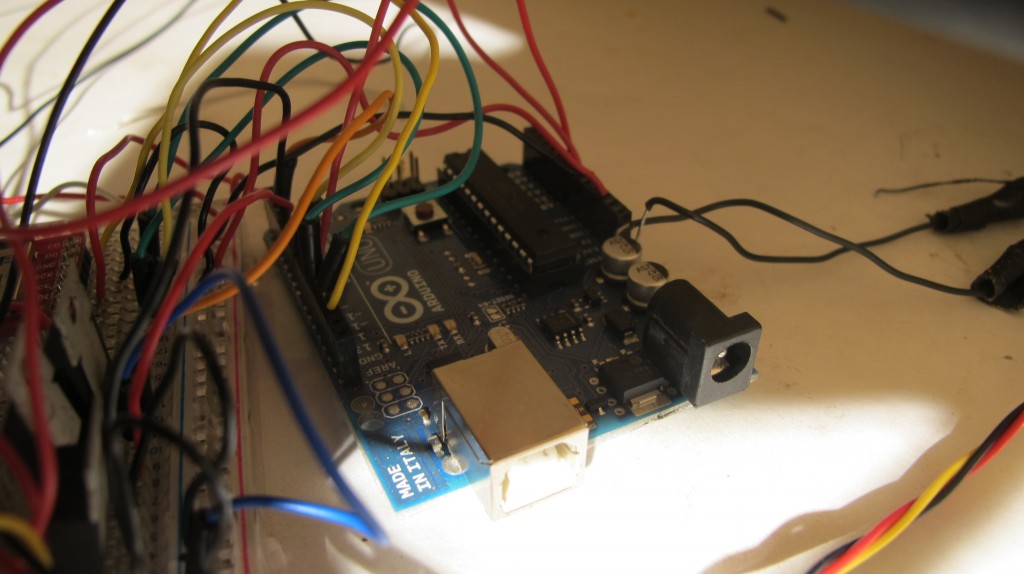
We are using a RTC (real time clock from adafruit), a micro sd card data shield, and the following code (derived from Tom Igoe’s github)
Here is the circuit:

With a 9 V battery plugged in for a few minutes, this is the result (reading voltage once per minute):

